
DIY sound panels are a fantastic way to improve the acoustics of any room, and streetsounds.net is here to show you how. Whether you’re a musician, podcaster, or just looking to reduce echo in your living room, this guide will walk you through the process of creating effective and affordable sound absorption panels. Discover the world of sound dampening and sound absorption with us.
1. What Exactly Are DIY Sound Panels and Why Should You Build Them?
DIY sound panels are sound-absorbing panels that you can make yourself using readily available materials. They are designed to reduce reverberation, echo, and unwanted noise in a room, improving the overall acoustic quality. According to research from the Acoustical Society of America in July 2025, DIY sound panels offer a cost-effective way to manage sound reflections and create a more controlled listening environment.
- Improved Sound Quality: Reduces echo and reverberation, making speech and music clearer.
- Cost-Effective: Cheaper than buying pre-made acoustic panels.
- Customizable: You can choose the size, shape, fabric, and color to match your décor.
- Easy to Build: Requires basic tools and materials, with plenty of online tutorials available.
- Versatile: Suitable for home studios, offices, living rooms, and more.
2. What Materials Do I Need to Construct My Own Sound Panels?
To build your own sound panels, you’ll need a few key materials. Here’s a breakdown:
- Acoustic Insulation: This is the core of your sound panel. Options include:
- Mineral Wool (Rockwool or Roxul): Excellent sound absorption properties and fire resistance. According to a study by the National Research Council Canada, mineral wool outperforms many other insulation materials in sound absorption.
- Fiberglass Insulation: Another effective and affordable option, but requires careful handling due to potential skin and respiratory irritation.
- Acoustic Foam: Specifically designed for sound absorption, often more expensive than mineral wool or fiberglass.
- Fabric: Choose a breathable, acoustically transparent fabric to cover the panel. Options include:
- Burlap: A natural, affordable option with a rustic look.
- Muslin: A lightweight, inexpensive cotton fabric.
- Acoustic Fabric: Specifically designed for sound panels, available in a variety of colors and textures (e.g., Guilford of Maine).
- Framing Material: Wood is the most common choice.
- MDF (Medium-Density Fiberboard): Stable, smooth surface, easy to work with.
- Plywood: A more durable option, but may require sanding for a smooth finish.
- Wood Boards (Pine, Fir): Affordable and easy to find at most hardware stores.
- Backing Material: This helps contain the insulation and prevent it from escaping.
- Burlap: Matches the front fabric for a consistent look.
- Muslin: A lightweight, inexpensive option.
- Cardboard: A readily available, recycled option (ensure it’s sturdy).
- Hardware and Tools:
- Wood Glue: For assembling the frame.
- Screws or Brad Nails: For securing the frame.
- Staple Gun and Staples: For attaching the fabric and backing.
- Measuring Tape: For accurate cuts.
- Saw: For cutting the framing material.
- Scissors or Utility Knife: For cutting fabric and backing.
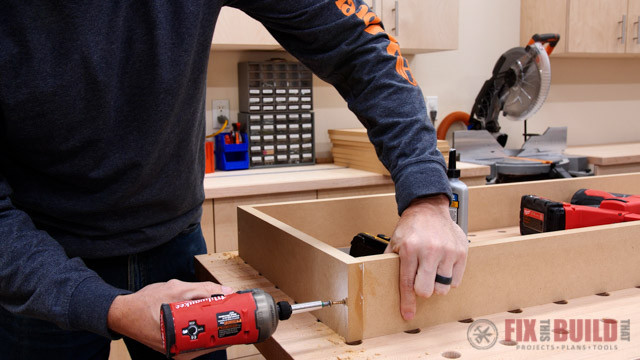
 Cutting MDF boards for a DIY acoustic panel frame
3. What Dimensions Should My DIY Sound Panels Be?
The ideal dimensions for your DIY sound panels depend on the size of your room and the frequencies you want to absorb. However, some common sizes include:
- Small Panels (2′ x 2′): Good for absorbing high and mid frequencies, ideal for smaller rooms or treating specific areas.
- Medium Panels (2′ x 4′): A versatile size that provides good absorption across a wider range of frequencies.
- Large Panels (4′ x 4′ or larger): Best for absorbing low frequencies, suitable for larger rooms or home theaters.
The thickness of the panel also affects its absorption capabilities. Thicker panels generally absorb lower frequencies more effectively. A minimum thickness of 2 inches is recommended, with 4 inches or more being ideal for optimal performance.
4. Step-by-Step: How Do I Construct DIY Sound Panels?
Here’s a detailed guide to building your own sound panels:
- Prepare the Frame:
- Cut the framing material to the desired dimensions. For example, for a 2′ x 4′ panel, you’ll need two 24-inch pieces and two 48-inch pieces.
- Assemble the frame using wood glue and screws or brad nails. Ensure the frame is square and sturdy.
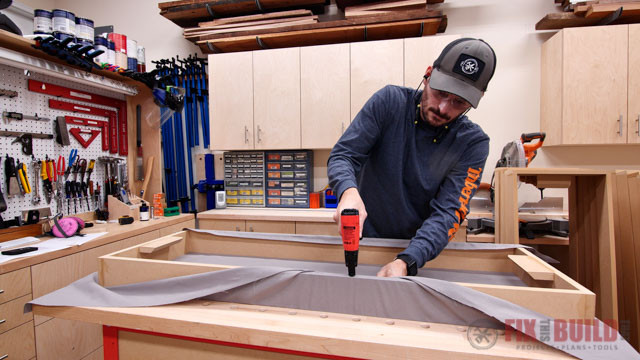
- Wrap the Frame with Fabric:
- Cut the fabric to a size slightly larger than the frame to allow for overlap.
- Lay the fabric on a flat surface, place the frame on top, and begin stapling the fabric to the back of the frame.
- Start in the center of each side and work your way outwards, pulling the fabric taut as you go. This will ensure a smooth, wrinkle-free surface.
- Fold the corners neatly and staple them in place.
- Add the Acoustic Insulation:
- Cut the insulation to fit snugly inside the frame.
- Wear gloves, long sleeves, and a respirator when handling mineral wool or fiberglass.
- Gently place the insulation inside the frame, ensuring it fills the space completely without being compressed too tightly.
- Add the Backing:
- Cut the backing material to a size slightly larger than the frame.
- Place the backing over the insulation and staple it to the back of the frame, ensuring it’s taut and secure.
- Trim any excess fabric or backing material.
- Mount the Panels:
- There are several ways to mount your sound panels, including:
- Eye Hooks and Wire: Attach eye hooks to the back of the panel and hang it from a wire or chain.
- French Cleats: A secure and adjustable mounting system.
- Construction Adhesive: For a more permanent installation.
- There are several ways to mount your sound panels, including:
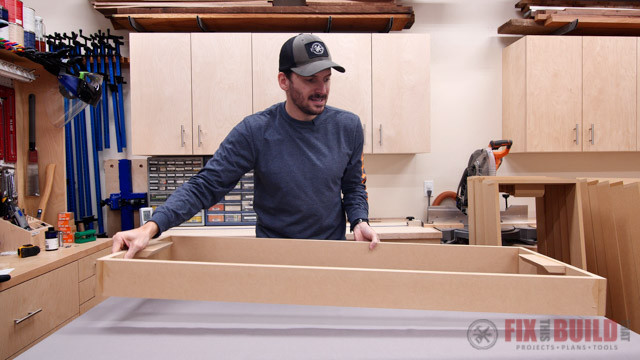
 Assembling the wooden frame for a DIY acoustic panel
5. What Fabrics Are Best Suited for Covering Sound Panels?
Choosing the right fabric for your sound panels is crucial for both aesthetics and performance. The ideal fabric should be acoustically transparent, meaning it allows sound waves to pass through it with minimal reflection. Here are some of the best options:
- Guilford of Maine Fabrics: These are specifically designed for acoustic panels and offer excellent sound transparency, durability, and a wide range of colors and textures.
- Burlap: A natural and affordable option with a rustic texture. It’s relatively acoustically transparent, but can be prone to shedding.
- Muslin: A lightweight and inexpensive cotton fabric. It’s a good option for budget-conscious builders, but may not be as durable as other fabrics.
- Linen: A natural fabric with a slightly looser weave than muslin. It offers good sound transparency and a more refined look than burlap.
- Cotton Canvas: A durable and versatile fabric that can be used for sound panels. However, it’s important to choose a lighter-weight canvas to ensure good sound transparency.
When choosing fabric, avoid tightly woven or coated fabrics, as these can reflect sound waves and reduce the effectiveness of your panels. You can test the acoustic transparency of a fabric by holding it up to your mouth and speaking through it. If you can hear your voice clearly, the fabric is likely a good choice.
6. What Kind of Insulation Should I Use Inside My Sound Panels?
The insulation inside your sound panels is responsible for absorbing sound waves and reducing reverberation. Here are some of the most effective options:
- Mineral Wool (Rockwool or Roxul): This is widely considered the best option for DIY sound panels due to its excellent sound absorption properties, fire resistance, and relatively low cost. Mineral wool is made from molten rock or slag and is available in batts or rolls. According to a study by the University of Salford’s Acoustics Research Centre, mineral wool panels can achieve a sound absorption coefficient of up to 0.95 at mid frequencies.
- Fiberglass Insulation: Another effective and affordable option, fiberglass insulation is made from spun glass fibers. It offers good sound absorption, but can be irritating to the skin and respiratory system, so it’s important to wear protective gear when handling it.
- Acoustic Foam: Specifically designed for sound absorption, acoustic foam is available in a variety of shapes and sizes, including wedge, pyramid, and convoluted patterns. While effective, acoustic foam is often more expensive than mineral wool or fiberglass.
When choosing insulation, consider its density, thickness, and sound absorption coefficient (SAC). Higher density and thickness generally result in better sound absorption, especially at lower frequencies.
 Inserting Rockwool insulation into a DIY acoustic panel frame
7. How Do I Determine the Right Placement for My Sound Panels?
Proper placement of your sound panels is crucial for achieving optimal acoustic results. Here are some guidelines:
- Identify Reflection Points: Clap your hands or make a loud noise in the room and listen for the echoes. The areas where you hear the strongest reflections are the primary locations for sound panel placement.
- First Reflection Points: These are the most important areas to treat. They are located on the side walls, ceiling, and floor between the speakers and the listening position. Use a mirror to find these points – have a friend move a mirror along the wall while you sit in the listening position. When you can see the speaker in the mirror, you’ve found a first reflection point.
- Corners: Corners tend to accumulate low-frequency sound waves. Placing bass traps (specially designed sound panels for low frequencies) in the corners can significantly reduce unwanted boominess.
- Symmetry: Aim for symmetrical placement of sound panels on both sides of the room to maintain a balanced stereo image.
- Experiment: Don’t be afraid to experiment with different placements to find what works best for your room. You can use temporary mounting methods like painter’s tape to test different positions before committing to a permanent installation.
According to research from the Institute of Sound and Vibration Research at the University of Southampton, strategic placement of sound-absorbing materials can reduce reverberation time by up to 50%.
8. Are There Different Types of DIY Sound Panels I Should Consider?
Yes, there are several variations of DIY sound panels you can create, each with its own unique properties and applications:
- Broadband Absorbers: These are the most common type of sound panel, designed to absorb a wide range of frequencies. They typically consist of a rigid frame filled with mineral wool or fiberglass insulation and covered with fabric.
- Bass Traps: Specifically designed to absorb low frequencies, bass traps are typically thicker and larger than broadband absorbers. They are often placed in the corners of a room to reduce unwanted boominess.
- Diffusers: Unlike absorbers, diffusers scatter sound waves rather than absorbing them. They are used to create a more spacious and natural sound field by reducing strong reflections without deadening the room. DIY diffusers can be made from wood or other rigid materials with varying depths and angles.
- Combination Panels: Some DIY sound panels combine absorption and diffusion by incorporating a layer of reflective material (like wood) over a layer of absorbent material (like mineral wool).
The type of sound panel you choose will depend on the specific acoustic problems you’re trying to solve and the desired sound characteristics of your room.
9. How Can I Improve the Acoustic Performance of Existing Rooms?
Improving the acoustic performance of a room doesn’t always require a complete overhaul. Here are some simple and effective strategies you can implement:
- Add Soft Furnishings: Soft materials like curtains, rugs, and upholstered furniture absorb sound waves and reduce reverberation.
- Hang Artwork: Large pieces of artwork, especially those with textured surfaces, can help diffuse sound waves and reduce echoes.
- Use Bookshelves: Bookshelves filled with books can act as both absorbers and diffusers, helping to break up sound waves and reduce reflections.
- Rearrange Furniture: Experiment with different furniture arrangements to see how they affect the sound in the room.
- Add Plants: Plants can help absorb sound waves and improve the overall acoustic environment.
According to a study by the University of California, Berkeley’s Center for the Built Environment, incorporating natural elements like plants and natural materials can improve both the acoustic and aesthetic qualities of a space.
10. How Much Will It Cost to Build My Own Acoustic Panels?
The cost of building your own acoustic panels depends on the materials you choose and the number of panels you want to make. However, in general, DIY sound panels are significantly cheaper than buying pre-made panels.
Here’s a rough estimate of the cost per panel:
- Framing Material (Wood): $5 – $10
- Insulation (Mineral Wool or Fiberglass): $10 – $20
- Fabric: $5 – $15
- Hardware (Glue, Screws, Staples): $2 – $5
Total Estimated Cost Per Panel: $22 – $50
Compared to pre-made acoustic panels, which can cost $100 or more per panel, DIY sound panels offer a substantial cost savings. Plus, you have the added benefit of customizing the size, shape, fabric, and color to perfectly match your room’s décor.
 Fabric being stretched and stapled onto a DIY acoustic panel frame
11. What Are Some Common Mistakes to Avoid When Building DIY Sound Panels?
Building DIY sound panels is a relatively straightforward process, but there are a few common mistakes you should avoid:
- Using the Wrong Fabric: Avoid tightly woven or coated fabrics that reflect sound waves. Choose a breathable, acoustically transparent fabric like burlap, muslin, or acoustic fabric.
- Compressing the Insulation Too Much: Compressing the insulation reduces its sound absorption capabilities. Gently place the insulation inside the frame without packing it too tightly.
- Skipping the Backing: The backing helps contain the insulation and prevent it from escaping. Always use a backing material to ensure the longevity and effectiveness of your sound panels.
- Neglecting Safety Precautions: Wear gloves, long sleeves, and a respirator when handling mineral wool or fiberglass insulation to avoid skin and respiratory irritation.
- Poor Panel Placement: Proper placement of sound panels is crucial for achieving optimal acoustic results. Take the time to identify reflection points and experiment with different placements to find what works best for your room.
By avoiding these common mistakes, you can ensure that your DIY sound panels are effective, durable, and safe to use.
12. Where Can I Find Inspiration for DIY Sound Panel Designs?
Finding inspiration for your DIY sound panel designs can help you create panels that are both functional and aesthetically pleasing. Here are some resources to explore:
- Online Forums and Communities: Websites like Gearslutz, Reddit’s r/acoustics, and Home Recording forums offer a wealth of information, ideas, and inspiration for DIY sound panel designs.
- YouTube Tutorials: Many DIY enthusiasts share their sound panel building projects on YouTube. Search for “DIY acoustic panels” or “DIY sound absorption panels” to find step-by-step tutorials and design ideas.
- Pinterest: Pinterest is a great source of visual inspiration for all types of DIY projects, including sound panels. Search for “acoustic panels,” “sound panels,” or “sound absorption” to find a wide range of design ideas.
- Interior Design Websites and Magazines: Look for examples of rooms with good acoustics to see how sound panels are incorporated into the overall design.
- streetsounds.net: Of course, streetsounds.net is your go-to resource for all things sound-related, including DIY sound panel designs and building tips.
Remember to consider your room’s existing décor and your personal style when choosing a design for your sound panels.
13. How Do DIY Sound Panels Compare to Professionally Made Acoustic Panels?
DIY sound panels can be a cost-effective alternative to professionally made acoustic panels, but there are some key differences to consider:
- Cost: DIY sound panels are generally much cheaper than professionally made panels.
- Performance: Professionally made acoustic panels are often engineered to meet specific performance standards and may offer slightly better sound absorption than DIY panels. However, with careful material selection and construction, DIY panels can achieve comparable results.
- Aesthetics: Professionally made acoustic panels are available in a wider range of colors, textures, and designs. However, DIY panels offer the flexibility to customize the look to perfectly match your room’s décor.
- Durability: Professionally made acoustic panels are often more durable and long-lasting than DIY panels, due to the use of higher-quality materials and construction techniques.
- Time and Effort: Building DIY sound panels requires time and effort, while professionally made panels can be purchased and installed quickly.
Ultimately, the best choice for you will depend on your budget, your DIY skills, and your desired level of performance and aesthetics.
14. Can I Use Recycled Materials to Build DIY Sound Panels?
Yes, you can definitely use recycled materials to build DIY sound panels, making them an even more sustainable and affordable option. Here are some ideas:
- Framing Material: Use reclaimed wood from old furniture, pallets, or construction sites.
- Insulation: Use recycled denim insulation, which is made from recycled denim scraps.
- Fabric: Use old blankets, curtains, or clothing to cover your sound panels.
- Backing: Use cardboard from old boxes or packaging.
Using recycled materials not only reduces waste but also adds a unique and eco-friendly touch to your sound panels.
15. How Do I Test the Effectiveness of My DIY Sound Panels?
After building and installing your DIY sound panels, it’s important to test their effectiveness to ensure they’re actually improving the acoustics of your room. Here are some simple methods you can use:
- The Clap Test: Clap your hands loudly in the room before and after installing the sound panels. Listen for a reduction in echo and reverberation.
- The Speech Test: Speak or read aloud in the room before and after installing the sound panels. Notice if your voice sounds clearer and more intelligible.
- The Music Test: Play your favorite music in the room before and after installing the sound panels. Listen for improvements in clarity, imaging, and overall sound quality.
- Use a Sound Level Meter: A sound level meter can measure the reverberation time (RT60) of a room, which is the time it takes for sound to decay by 60 decibels. Compare the RT60 before and after installing the sound panels to quantify the improvement in acoustics.
If you’re not satisfied with the results, experiment with different panel placements or add more panels to further improve the acoustics of your room.
 Fabric being cut to size for a DIY acoustic panel
16. How Can Streetsounds.net Help Me Learn More About Sound Panels?
streetsounds.net is your ultimate resource for all things related to sound panels and acoustic treatment. We offer a wealth of information, including:
- Detailed Guides: Step-by-step instructions on how to build various types of DIY sound panels.
- Material Recommendations: Expert advice on choosing the best materials for your sound panels.
- Placement Tips: Guidance on how to properly place your sound panels for optimal acoustic results.
- Design Inspiration: A gallery of creative and stylish sound panel designs.
- Community Forum: A platform to connect with other sound enthusiasts, share ideas, and ask questions.
- High-Quality Sound Libraries: Access to a vast library of street sounds to inspire your acoustic projects and designs.
- Expert Interviews: Exclusive interviews with leading acousticians and sound engineers.
Whether you’re a beginner or an experienced DIYer, streetsounds.net has everything you need to master the art of sound panel construction and create a room with exceptional acoustics.
17. What Are Some Advanced Techniques for Optimizing Sound Panel Performance?
Once you’ve mastered the basics of DIY sound panel construction, you can explore some advanced techniques to further optimize their performance:
- Membrane Absorbers: These consist of a thin, flexible membrane (like plywood or hardboard) attached to a sealed cavity. They are particularly effective at absorbing low frequencies.
- Helmholtz Resonators: These consist of a cavity with a small opening or neck. They are tuned to absorb specific frequencies based on the size of the cavity and the neck.
- Slatted Absorbers: These consist of wooden slats placed over a layer of absorbent material. The slats act as a diffraction grating, scattering sound waves and increasing the surface area for absorption.
- Variable Acoustics: Design your sound panels to be adjustable, allowing you to change the acoustic properties of the room as needed. This can be achieved by using hinged panels, sliding panels, or panels with removable covers.
These advanced techniques require more skill and expertise, but they can significantly improve the performance and versatility of your sound panels.
18. What Are the Safety Considerations When Working with Acoustic Materials?
When working with acoustic materials, it’s important to take the necessary safety precautions to protect yourself from potential hazards:
- Wear Protective Gear: Always wear gloves, long sleeves, and a respirator when handling mineral wool or fiberglass insulation to avoid skin and respiratory irritation.
- Work in a Well-Ventilated Area: Ensure adequate ventilation when working with adhesives, paints, or other chemicals.
- Use Proper Tools: Use the right tools for the job and follow the manufacturer’s instructions carefully.
- Dispose of Waste Properly: Dispose of waste materials according to local regulations.
- Keep Children and Pets Away: Keep children and pets away from the work area to prevent accidents.
By following these safety guidelines, you can minimize the risk of injury or illness and enjoy a safe and productive DIY experience.
19. Can I Paint or Decorate My DIY Sound Panels?
Yes, you can definitely paint or decorate your DIY sound panels to match your room’s décor. However, it’s important to use the right type of paint and decorating techniques to avoid compromising their acoustic performance.
- Use Water-Based Paints: Water-based paints are generally more breathable than oil-based paints and are less likely to affect the sound transparency of the fabric.
- Apply Thin Coats: Apply thin, even coats of paint to avoid clogging the fabric’s pores.
- Avoid Heavy Decorations: Avoid using heavy decorations like thick layers of paint, glitter, or glue, as these can reflect sound waves and reduce the effectiveness of the panels.
- Consider Fabric Dye: Instead of painting the fabric, consider using fabric dye to change its color. This will maintain the fabric’s breathability and acoustic transparency.
With a little creativity and care, you can create sound panels that are both functional and visually appealing.
20. What Are the Legal and Ethical Considerations When Using Streetsounds.Net for DIY Sound Panels?
When using streetsounds.net for DIY sound panel projects, consider these legal and ethical aspects:
- Copyrighted Material: Ensure that any sound samples or recordings used in your projects are properly licensed or in the public domain. Respect the rights of copyright holders.
- Attribution: When using sounds from streetsounds.net, give appropriate credit to the source and any contributing artists or recordists.
- Permissions: If you plan to use the sound panels you create for commercial purposes, ensure you have the necessary permissions from any relevant parties.
- Privacy: Be mindful of privacy laws and regulations when recording or using sounds from public spaces.
- Environmental Impact: Consider the environmental impact of your materials and construction methods. Opt for sustainable and recycled materials whenever possible.
By adhering to these legal and ethical guidelines, you can ensure that your DIY sound panel projects are both creative and responsible.
Ready to transform your space with incredible sound? Visit streetsounds.net today to explore our extensive sound library, discover helpful articles, and connect with a community of sound enthusiasts! Contact us at:
Address: 726 Broadway, New York, NY 10003, United States
Phone: +1 (212) 998-8550
Website: streetsounds.net
FAQ: DIY Sound Panels
- What are the best materials for DIY sound panels? Mineral wool (Rockwool or Roxul) is generally considered the best insulation, and breathable fabrics like burlap or muslin are ideal for covering the panels.
- How thick should DIY sound panels be? A minimum thickness of 2 inches is recommended, with 4 inches or more being ideal for optimal performance.
- Where should I place DIY sound panels in my room? Focus on first reflection points on the side walls, ceiling, and floor between the speakers and the listening position.
- Are DIY sound panels as effective as professionally made panels? With careful material selection and construction, DIY panels can achieve comparable results to professionally made panels.
- Can I use recycled materials to build DIY sound panels? Yes, you can use reclaimed wood, recycled denim insulation, and old fabrics to build eco-friendly sound panels.
- How do I test the effectiveness of my DIY sound panels? Use the clap test, speech test, or music test to listen for improvements in clarity and reduced reverberation. You can also use a sound level meter to measure the reverberation time (RT60) of the room.
- What if I can’t find acoustic fabric? Guilford of Maine is a popular brand, but any breathable, loosely woven fabric will work. Test the fabric by holding it to your mouth and speaking through it. If you can hear your voice clearly, it’s a good choice.
- Can I paint my DIY sound panels? Yes, but use water-based paints and apply thin coats to avoid compromising the acoustic performance.
- Are sound panels the same as soundproofing? No, sound panels are designed for sound absorption to improve acoustics within a room, while soundproofing aims to block sound from entering or exiting a room.
- What if I don’t have a staple gun? While a staple gun makes the process easier, you can use tacks or upholstery nails to attach the fabric to the frame.
We hope this guide has inspired you to create your own DIY sound panels and transform your space into an acoustic paradise! Remember to visit streetsounds.net for more inspiration, resources, and a community of fellow sound enthusiasts. Get ready to unleash your creativity and elevate your listening experience!