
Screen recording on a Macbook with sound is a common need, especially for content creators, educators, and professionals. Finding the right method to capture both video and audio seamlessly can significantly enhance your recordings. This guide, brought to you by streetsounds.net, will walk you through various ways to achieve this, ensuring you capture your screen and sound flawlessly. Ready to explore the world of urban audio capture? Let’s dive in.
1. Why Screen Record with Sound on a MacBook?
The ability to screen record with sound on a MacBook is essential for various reasons.
- Creating Tutorials: When demonstrating software or processes, including audio narration or system sounds provides clarity and context.
- Recording Gameplay: Gamers often record their gameplay to share on platforms like YouTube or Twitch, requiring both video and in-game audio.
- Presentations and Meetings: Capturing online meetings or presentations with audio ensures that important information is retained and can be reviewed later.
- Documenting Issues: When troubleshooting technical problems, a screen recording with sound can effectively communicate the issue to support teams.
- Capturing Streaming Content: Recording streaming audio and video allows you to save content for later viewing or analysis.
Understanding these needs highlights the importance of having a reliable method for screen recording with sound.
2. Default Method: Using QuickTime Player
QuickTime Player is a pre-installed application on macOS that can be used for basic screen recording.
- Open QuickTime Player: Find it in your Applications folder or use Spotlight search (Command + Space).
- Start a New Screen Recording: Go to “File” > “New Screen Recording” in the menu bar.
- Configure Recording Settings: A small recording panel will appear. Click the arrow next to the record button to adjust settings.
- Select Audio Source: By default, QuickTime Player may not record internal audio. You might need to select an external microphone.
- Start Recording: Click the record button, then click anywhere on the screen to start recording the entire screen, or drag to select a specific area.
- Stop Recording: Click the stop button in the menu bar or press Command + Control + Esc.
- Save the Recording: QuickTime Player will open the recording. Go to “File” > “Save” to save your screen recording.
While QuickTime Player is convenient, it has limitations regarding internal audio recording. You often need additional software to capture system sounds directly.
3. Capturing Internal Audio with BlackHole
To record internal audio with QuickTime Player, you can use a virtual audio driver like BlackHole.
- Download and Install BlackHole: Visit the BlackHole GitHub repository and follow the installation instructions. Existential Audio BlackHole is a free, open-source virtual audio driver.
- Open Audio MIDI Setup: Find this utility in /Applications/Utilities.
- Create a Multi-Output Device:
- Click the “+” button in the bottom left corner and select “Create Multi Output Device”.
- In the Multi-Output Device tab, select “Built-in Output” and “BlackHole 2ch”.
- Configure Sound Settings:
- In the menu bar, choose “Multi-Output Device” as your sound output.
- Adjust the volume before selecting multi-out mode, as volume control is disabled in this mode.
- Record with QuickTime Player: Follow the steps in Section 2, but now QuickTime Player will capture internal audio through BlackHole.
Using BlackHole allows you to record system audio, making it ideal for tutorials or capturing streaming content. Jeffreythefrog, a user on Apple Support Communities, recommends this method for its effectiveness.
 BlackHole Virtual Audio Driver setup on macOS
4. Using the Screenshot Toolbar
macOS has a built-in Screenshot toolbar that includes screen recording capabilities.
- Open the Screenshot Toolbar: Press Shift + Command + 5.
- Choose Recording Option: You can select “Record Entire Screen” or “Record Selected Portion”.
- Configure Audio Settings:
- Click “Options” in the toolbar.
- Choose your audio source. If you want to record internal audio, you might need to use BlackHole or another virtual audio driver.
- Start Recording: Click “Record” to begin.
- Stop Recording: Click the stop button in the menu bar or press Command + Control + Esc.
- Save the Recording: The recording will automatically save to your desktop.
The Screenshot toolbar provides a quick and easy way to record your screen, with options to customize the audio source.
5. Third-Party Screen Recording Software
Several third-party screen recording applications offer advanced features and better audio control.
5.1. OBS Studio
OBS Studio is a free and open-source software primarily used for live streaming, but it’s also excellent for screen recording.
- Download and Install OBS Studio: Visit the OBS Project website.
- Configure Audio Settings:
- In the “Sources” panel, add “Audio Input Capture” and select your desired audio source (e.g., BlackHole for internal audio).
- Adjust audio levels in the “Mixer” panel.
- Configure Video Settings:
- In “Sources”, add “Display Capture” or “Window Capture” to select what you want to record.
- Adjust video settings in “Settings” > “Video”.
- Start Recording: Click “Start Recording” to begin.
- Stop Recording: Click “Stop Recording” to finish.
- Find the Recording: Recordings are saved in the location specified in “Settings” > “Output”.
OBS Studio offers extensive customization options, making it suitable for advanced users. However, its interface can be overwhelming for beginners. According to robbe261 on Apple Support Communities, OBS Studio makes it easy to choose which programs you want to have sound from in the recording.
5.2. ScreenFlow
ScreenFlow is a premium screen recording and video editing software for macOS.
- Download and Install ScreenFlow: Purchase and download ScreenFlow from the Telestream website.
- Configure Recording Settings:
- Open ScreenFlow and choose “New Recording”.
- Select whether to record the screen, camera, and audio.
- Choose your audio input source.
- Start Recording: Click the record button.
- Stop Recording: Click the stop button in the menu bar.
- Edit and Export: ScreenFlow provides powerful editing tools to refine your recording. Export the video in your desired format.
ScreenFlow is known for its user-friendly interface and robust editing capabilities, making it a popular choice for professionals. charl965, in a discussion on Apple Support Communities, notes that ScreenFlow offers a user-friendly interface and numerous features, including the ability to record internal audio, edit videos, and add annotations.
5.3. Aiseesoft Screen Recorder
Aiseesoft Screen Recorder is another option that provides a straightforward way to record your screen and audio.
- Download and Install Aiseesoft Screen Recorder: Visit the Aiseesoft website.
- Configure Recording Settings:
- Open the application and select “Video Recorder”.
- Adjust the recording area and audio inputs.
- Ensure “System Sound” is enabled to record internal audio.
- Start Recording: Click the record button.
- Stop Recording: Click the stop button.
- Save the Recording: Choose where to save your recording.
Aiseesoft Screen Recorder is praised for its ease of use and clean audio capture, making it a good option for users who need a simple yet effective solution. Jonathan781 on Apple Support Communities recommends it as a game-changer for capturing both screen and internal audio cleanly.
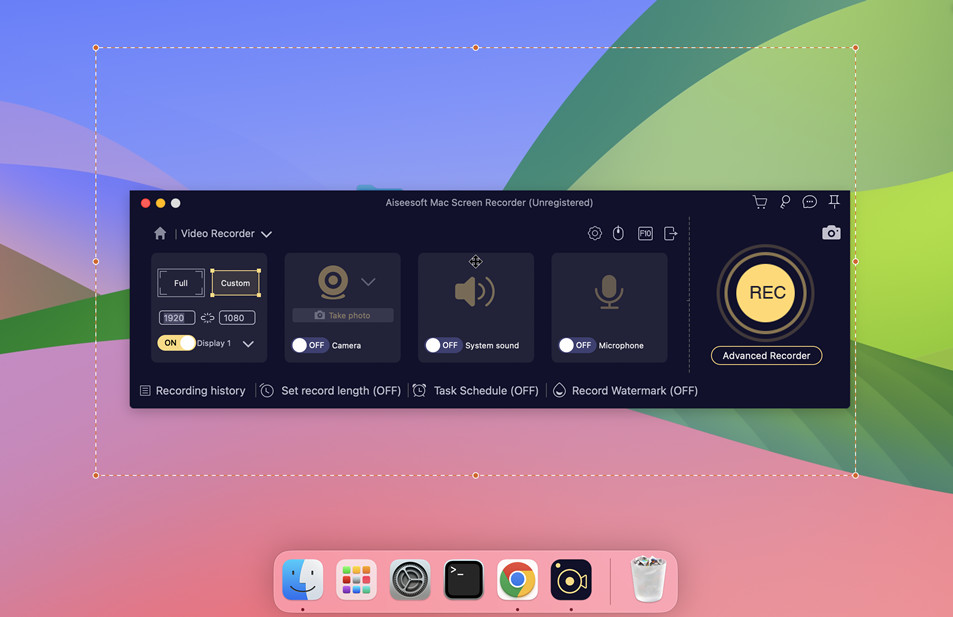 Aiseesoft Screen Recorder Interface
5.4. Camtasia
Camtasia is a professional screen recording and video editing tool developed by TechSmith.
- Download and Install Camtasia: Visit the TechSmith website.
- Configure Recording Settings:
- Open Camtasia and click “Record”.
- Select your screen area, camera, and audio inputs.
- Ensure system audio is enabled.
- Start Recording: Click the record button.
- Stop Recording: Click the stop button.
- Edit and Export: Camtasia provides extensive editing tools and export options.
Camtasia is well-regarded for its comprehensive feature set and ease of use, suitable for both beginners and experienced users.
6. Microsoft Teams Method
If you have Microsoft Teams installed on your Mac, you can use it to record system audio.
- Start a Meeting in Teams: You don’t need anyone to join, just an empty meeting. Mute your microphone.
- Share Your Screen: Select the “Include Audio” option when sharing your screen.
- Hide Teams: Move Teams to a different monitor, if available, or minimize it.
- Open Screenshot and Record: Use the Screenshot toolbar (Shift + Command + 5) and select “Microsoft Teams Audio” under the “Options” menu.
- Record Your Screen: You will get a recording with system audio.
This method is a clever workaround for capturing system audio using a tool you might already have installed. Fogelmatrix42 on Apple Support Communities suggests this method as an effective solution.
7. Troubleshooting Common Audio Issues
Even with the right tools, you might encounter audio issues during screen recording. Here are some common problems and solutions:
- No Audio:
- Ensure the correct audio input is selected in your recording software.
- Check the volume levels of your audio input.
- If using BlackHole, make sure the Multi-Output Device is correctly configured in Audio MIDI Setup.
- Low Audio Quality:
- Use a high-quality microphone or audio interface.
- Adjust the audio bitrate in your recording software settings.
- Reduce background noise by recording in a quiet environment.
- Audio Sync Issues:
- Ensure your recording software and audio drivers are up to date.
- Try reducing the recording frame rate.
- Use video editing software to manually adjust audio sync.
- Echo or Feedback:
- Avoid using speakers while recording. Use headphones instead.
- Adjust microphone gain to prevent audio feedback.
- Inconsistent Audio Levels:
- Use audio editing software to normalize audio levels after recording.
- Adjust microphone placement to maintain consistent audio input.
Addressing these common issues can significantly improve the quality of your screen recordings.
8. Best Practices for High-Quality Screen Recordings
To ensure your screen recordings are professional and effective, follow these best practices:
- Plan Your Recording: Before you start, outline what you want to cover. This helps maintain focus and clarity.
- Close Unnecessary Applications: Reduce distractions and improve system performance by closing unused apps.
- Disable Notifications: Turn off notifications to avoid interruptions during recording.
- Use a Clean Desktop: A clutter-free desktop makes your recordings look more professional.
- Speak Clearly and Slowly: Enunciate your words and speak at a moderate pace for better comprehension.
- Maintain Consistent Volume: Keep your voice at a consistent level throughout the recording.
- Edit Your Recordings: Use video editing software to remove mistakes, add annotations, and enhance the overall quality.
- Use High-Quality Equipment: Invest in a good microphone and ensure your system meets the minimum requirements for screen recording software.
- Test Your Setup: Before recording anything important, test your setup to ensure audio and video are working correctly.
9. Understanding Audio MIDI Setup
Audio MIDI Setup is a macOS utility that allows you to configure audio devices and MIDI interfaces. It is essential for managing audio inputs and outputs, especially when using virtual audio drivers like BlackHole.
- Accessing Audio MIDI Setup: Find it in /Applications/Utilities.
- Creating Aggregate Devices:
- An aggregate device combines multiple audio inputs into a single input.
- Click the “+” button in the bottom left corner and select “Create Aggregate Device”.
- Select the audio inputs you want to include in the aggregate device.
- Creating Multi-Output Devices:
- A multi-output device allows you to send audio to multiple outputs simultaneously.
- Click the “+” button and select “Create Multi Output Device”.
- Select the audio outputs you want to include.
- Adjusting Audio Device Settings:
- Select an audio device in the left panel to view and adjust its settings, such as sample rate and bit depth.
- Troubleshooting Audio Issues:
- Use Audio MIDI Setup to diagnose and resolve audio problems, such as incorrect input/output settings or device conflicts.
Properly configuring Audio MIDI Setup is crucial for achieving optimal audio performance in your screen recordings.
10. Screen Recording for Different Purposes
The approach to screen recording can vary depending on the intended use.
10.1. Tutorials
- Clear Narration: Provide clear, step-by-step instructions.
- Visual Aids: Use annotations and highlights to emphasize key points.
- Zoom and Pan: Zoom in on important details and pan across the screen to maintain focus.
- Background Music: Add subtle background music to keep viewers engaged.
- Call to Action: Include a call to action at the end, encouraging viewers to try the steps themselves.
10.2. Gaming
- High Frame Rate: Record at a high frame rate (60fps or higher) for smooth gameplay footage.
- Game Audio: Capture game audio clearly without distortion.
- Commentary: Add live commentary or record it separately and sync it later.
- Facecam: Include a facecam to show your reactions and expressions.
- Overlay Graphics: Use overlay graphics to display information such as scores, stats, and chat messages.
10.3. Presentations
- Clear Audio: Ensure your voice is clear and free of background noise.
- Visual Clarity: Use high-resolution recording settings to ensure visual elements are sharp and easy to read.
- Concise Content: Keep your presentation concise and to the point.
- Engaging Visuals: Use engaging visuals such as charts, graphs, and images to illustrate your points.
- Edit for Clarity: Edit out any pauses, mistakes, or distractions to maintain viewer focus.
10.4. Music Production
- High-Quality Audio: Capture audio at a high sample rate and bit depth.
- DAW Integration: Use screen recording software that integrates well with your Digital Audio Workstation (DAW).
- Plugin Demonstrations: Clearly demonstrate how to use plugins and effects.
- Workflow Tips: Share tips and tricks for efficient music production.
- Mixing and Mastering: Show your mixing and mastering techniques.
11. Exploring Streetsounds.net
Now that you know how to screen record with sound on your MacBook, let’s talk about how you can use those recordings to enhance your creative projects with the unique sounds of the city. At streetsounds.net, we offer a vast library of high-quality street sounds perfect for music production, film, game design, and more.
Imagine capturing the raw energy of New York City streets in your next track or adding the authentic ambiance of a bustling marketplace to your film. With streetsounds.net, you can easily find and download the perfect soundscapes to elevate your work.
11.1. What Streetsounds.net Offers
- Extensive Sound Library: A diverse collection of street sounds from around the world.
- High-Quality Recordings: Professionally recorded and curated sounds.
- Easy Search and Download: User-friendly interface for quick access to the sounds you need.
- Inspiration and Resources: Articles, interviews, and community forums for creative inspiration.
11.2. How to Use Streetsounds.net Sounds
- Browse the Library: Explore different categories and locations to find the sounds that fit your project.
- Preview Sounds: Listen to the sounds before downloading to ensure they meet your needs.
- Download Sounds: Download the sounds in high-quality formats.
- Incorporate into Your Projects: Use the sounds in your music, films, games, or other creative endeavors.
- Share Your Work: Share your projects with the streetsounds.net community and get feedback from other creators.
11.3. Success Stories
Many artists and creators have successfully used streetsounds.net to add depth and authenticity to their work.
- Music Producers: Incorporating street sounds into electronic and hip-hop tracks.
- Filmmakers: Using ambient city sounds to create immersive environments.
- Game Designers: Adding realistic urban soundscapes to games.
- Sound Artists: Creating unique sound installations and performances.
12. Advanced Audio Techniques for Screen Recording
To take your screen recording audio to the next level, consider these advanced techniques:
- Noise Reduction: Use noise reduction plugins to eliminate background noise and improve clarity.
- Equalization (EQ): Adjust the frequency balance of your audio to make it sound more natural and balanced.
- Compression: Use compression to even out the dynamic range of your audio, making it louder and more consistent.
- De-Essing: Reduce harsh “s” sounds in your voice.
- Limiting: Prevent your audio from clipping or distorting by setting a limiter on the master track.
- Audio Ducking: Automatically lower the volume of background music or ambient sounds when you speak.
- Stereo Enhancement: Widen the stereo image of your audio to create a more immersive listening experience.
13. Community Engagement
Engaging with the streetsounds.net community can provide valuable feedback, inspiration, and collaboration opportunities.
- Forums: Participate in discussions, ask questions, and share your work.
- Social Media: Follow streetsounds.net on social media platforms for updates, inspiration, and community highlights.
- Workshops and Events: Attend online or in-person workshops and events to learn new techniques and network with other creators.
- Collaborations: Connect with other artists and creators to collaborate on projects.
14. Legal Considerations
When using street sounds in your projects, be aware of potential legal considerations:
- Copyright: Ensure you have the rights to use any copyrighted material in your recordings.
- Permissions: Obtain necessary permissions if recording people or private property.
- Creative Commons Licenses: Understand the terms of Creative Commons licenses if using sounds from online sources.
- Royalty-Free Sounds: Use royalty-free sounds from reputable sources like streetsounds.net.
By being mindful of these legal aspects, you can avoid potential issues and ensure your projects are legally sound.
15. Future Trends in Sound Recording
The field of sound recording is constantly evolving. Here are some future trends to watch out for:
- Spatial Audio: Immersive audio formats that create a three-dimensional soundscape.
- AI-Powered Audio Tools: AI-driven tools for noise reduction, audio enhancement, and sound design.
- Cloud-Based Audio Production: Collaborative audio production platforms in the cloud.
- Interactive Soundscapes: Soundscapes that respond to user input or environmental conditions.
- Personalized Audio Experiences: Audio experiences tailored to individual preferences and needs.
16. FAQ: Screen Recording on MacBook with Sound
16.1. Can I use QuickTime Player to record internal audio on my MacBook?
Yes, but you need to install a virtual audio driver like BlackHole to capture internal audio, as QuickTime Player doesn’t natively support it.
16.2. Is OBS Studio free to use for screen recording?
Yes, OBS Studio is a free and open-source software that can be used for both screen recording and live streaming.
16.3. What is the best screen recording software for macOS?
The best software depends on your needs. ScreenFlow and Camtasia are excellent for professional use, while OBS Studio is a great free option. Aiseesoft Screen Recorder offers a simple, user-friendly interface.
16.4. How do I fix audio sync issues in my screen recordings?
Ensure your recording software and audio drivers are up to date. Try reducing the recording frame rate or manually adjust audio sync in video editing software.
16.5. Can I record my screen and webcam simultaneously?
Yes, many screen recording software options, such as ScreenFlow, Camtasia, and OBS Studio, allow you to record your screen and webcam at the same time.
16.6. How do I reduce background noise in my screen recordings?
Use a high-quality microphone, record in a quiet environment, and use noise reduction plugins in your audio editing software.
16.7. What is Audio MIDI Setup and why is it important?
Audio MIDI Setup is a macOS utility that allows you to configure audio devices and MIDI interfaces. It is essential for managing audio inputs and outputs, especially when using virtual audio drivers.
16.8. How do I create a multi-output device in Audio MIDI Setup?
Open Audio MIDI Setup, click the “+” button in the bottom left corner, select “Create Multi Output Device”, and choose the audio outputs you want to include.
16.9. What should I do if I can’t hear the audio while recording?
Ensure the correct audio input is selected in your recording software and that the volume levels are properly adjusted. If using BlackHole, make sure the Multi-Output Device is correctly configured in Audio MIDI Setup.
16.10. Are there any legal considerations when using street sounds in my projects?
Yes, be aware of copyright, permissions, Creative Commons licenses, and royalty-free sounds to avoid potential legal issues.
17. Conclusion
Mastering screen recording with sound on your MacBook opens up a world of possibilities for creating tutorials, capturing gameplay, documenting presentations, and more. By using the methods and tools outlined in this guide, you can ensure your recordings are of the highest quality.
And don’t forget to explore the rich soundscapes available at streetsounds.net. Whether you’re a music producer, filmmaker, game designer, or sound artist, our library of high-quality street sounds can add depth, authenticity, and inspiration to your creative projects.
Ready to start creating? Visit streetsounds.net today to discover the perfect sounds for your next masterpiece.
Address: 726 Broadway, New York, NY 10003, United States
Phone: +1 (212) 998-8550
Website: streetsounds.net
Start exploring today and bring the vibrant sounds of the streets to your next project!