Are you a fan of classic horror and looking for a unique Halloween project? If the eerie sounds of Dokken’s “Dream Warriors” resonate with you, then you’re in the right place! We’re diving into a fun and slightly spooky DIY project: creating a paper mache replica of the iconic Elm Street House from Nightmare on Elm Street 3: Dream Warriors. This deliciously creepy decoration, especially when illuminated with rotating RGB LED lights, is guaranteed to bring a touch of Freddy Krueger’s nightmare world into your home. Get ready to craft a piece of horror movie history!
Blueprints and Dimensions for Your Elm Street House
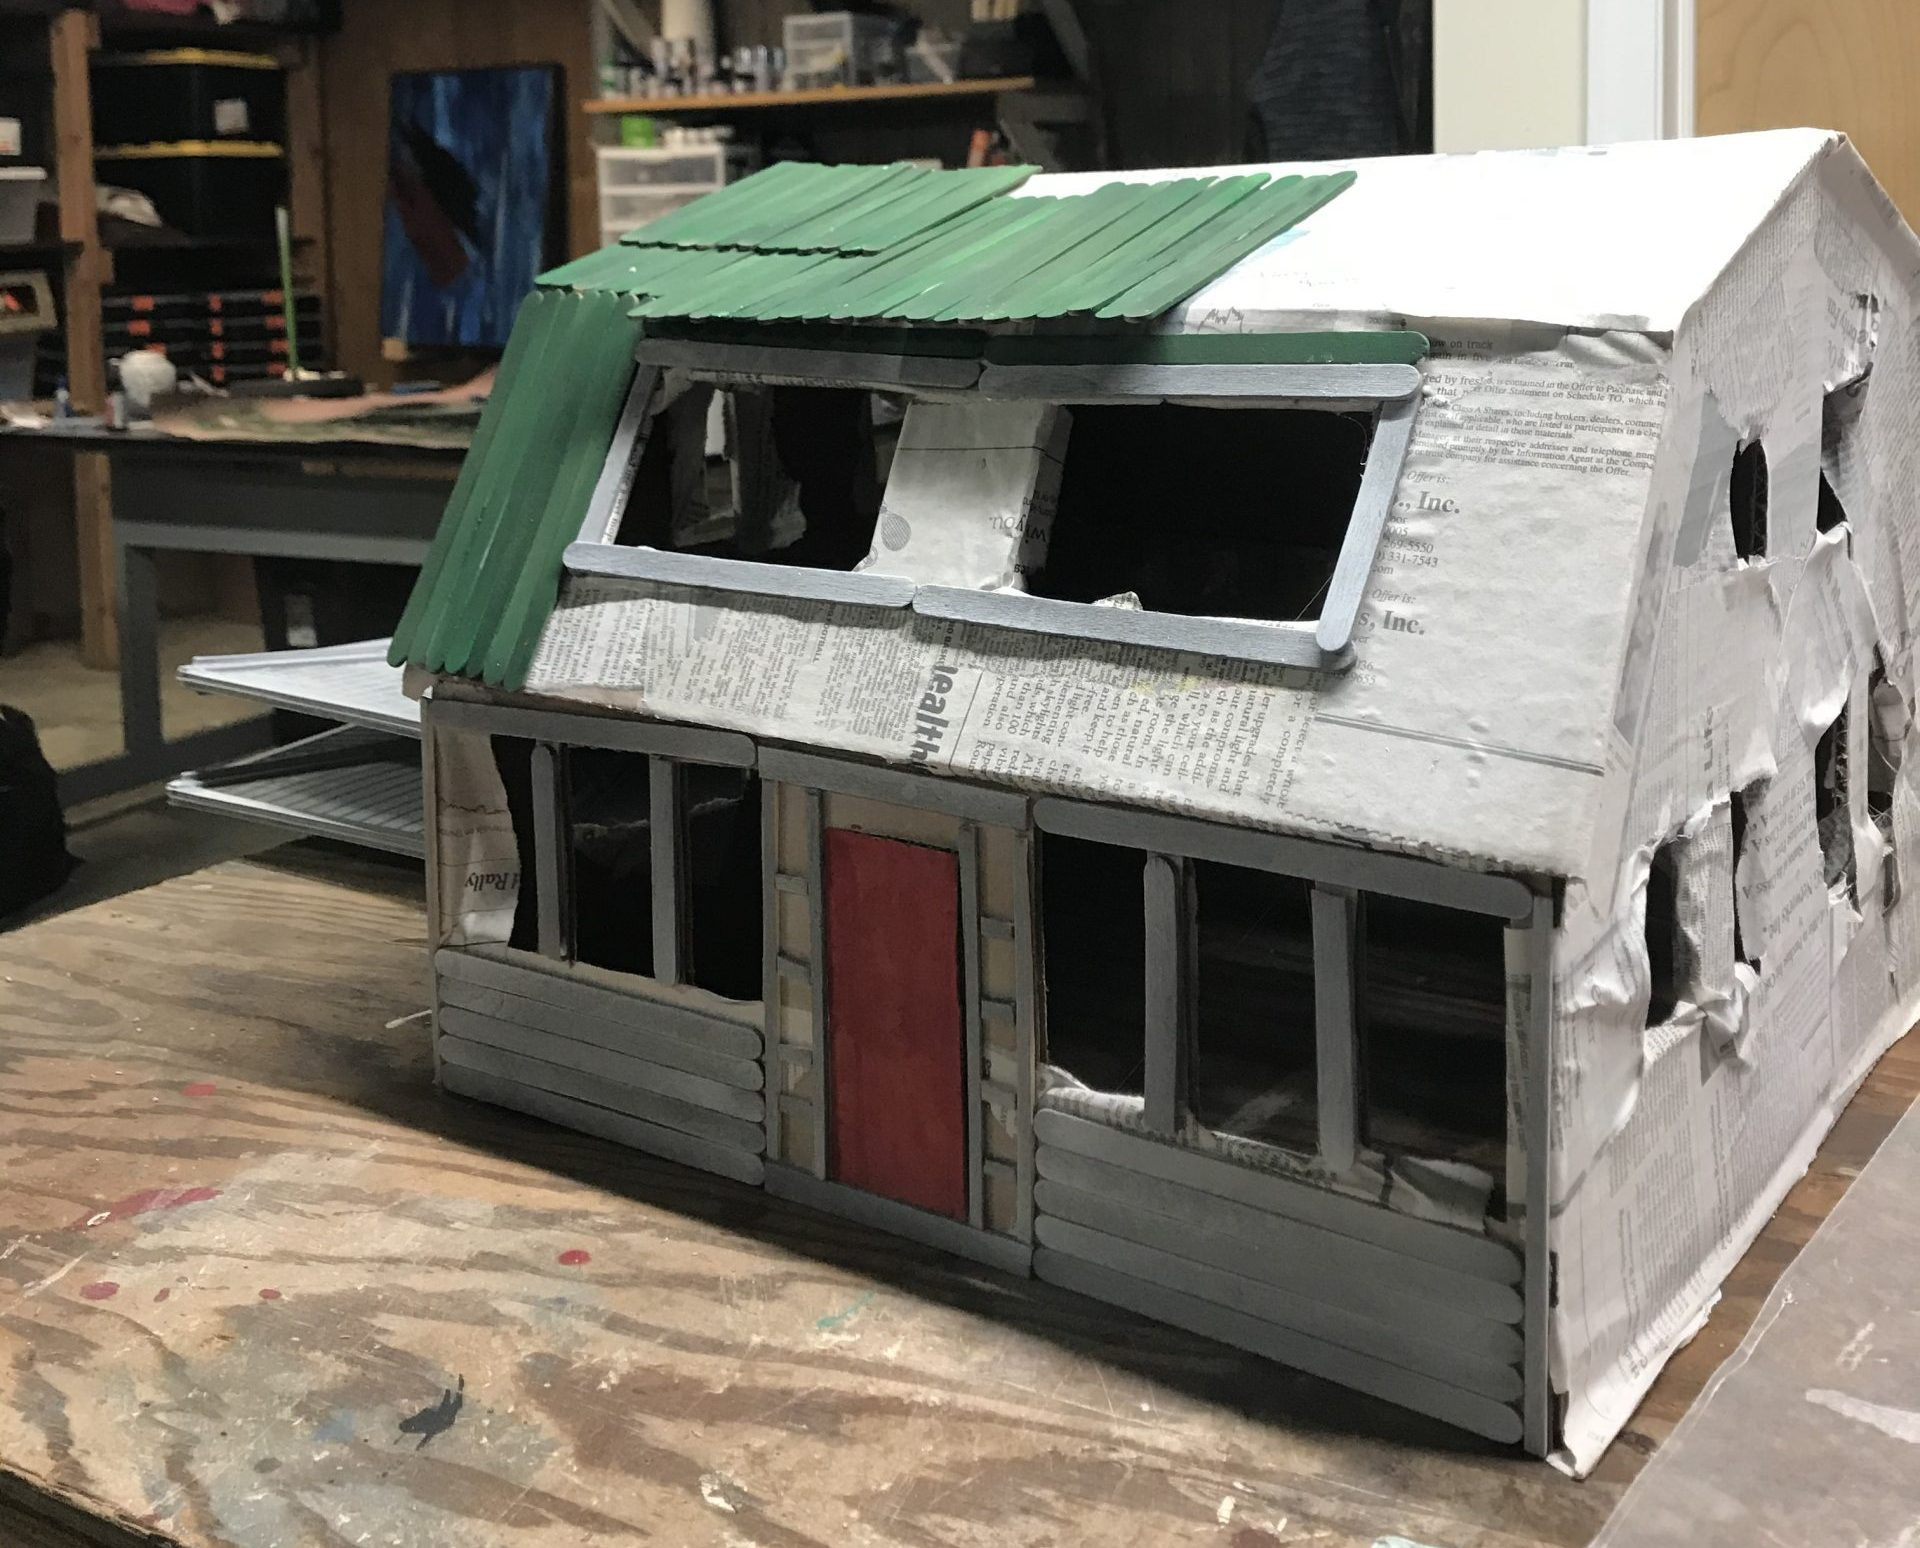
Forget complicated blueprints! We’re keeping it practical and craft-friendly. Instead of detailed drawings, here are reference images showing the house alongside a tape measure. These visuals will guide you in understanding the proportions and scale, making it easy to replicate the house’s dimensions for your paper mache project.
[Insert first measurement image here]
 Elm Street House model measurements with popsicle sticks, side view
[Insert second measurement image here]
 Close-up dimensions for crafting Elm Street house paper model, front view
Materials and Tools for Your DIY Horror House
Before we begin crafting, gather these materials and tools to ensure a smooth and enjoyable project:
Materials:
- Cardboard Box: The foundation of our Elm Street house. Choose a size that suits your desired decoration dimensions.
- Newspaper: For the paper mache – lots of it! Recycle old newspapers for an eco-friendly craft.
- Popsicle Sticks (Craft Sticks): Essential for creating the clapboard siding and roof shingles. Look for longer sticks, around 5.5 inches, for a more screen-accurate look.
- Elmer’s Glue: Our paper mache adhesive. Opt for Elmer’s Glue for a reliable and non-toxic option.
- Water: To dilute the glue and create the paper mache paste.
- Salt: A traditional ingredient in paper mache paste recipes, believed to help prevent mold.
- Wax Paper: To protect your work surface from sticky glue.
- Vallejo Black Surface Primer: For priming the popsicle sticks and ensuring good paint adhesion.
- Tamiya Flat White Paint: For the base coat of the house and clapboards, creating a weathered look.
- Tamiya Flat Red Paint: Perfect for painting the iconic Elm Street house door.
- Tamiya Park Green Paint: For the roof shingles, adding a touch of eerie color.
- ½” Pipe (or tube): For creating the columns of the house. A cardboard tube or even rolled paper will work.
- Color Changing Battery Powered LED Light: To bring your Elm Street house to life with spooky, flickering illumination.
Tools:
- Iwata Neo CN Airbrush (Optional): While an airbrush is used in the original guide for painting, it’s not essential. Brushes can be used for painting as well.
- Hot Glue Gun: For quick and strong adhesion of popsicle sticks and other elements.
- Sharp Knife (Xacto, box cutter): For cutting cardboard and popsicle sticks as needed.
Crafting Your Elm Street House: Step-by-Step Guide
Now, let’s get building! Follow these steps to create your own miniature Elm Street nightmare.
1. Measurements and Cutting the Cardboard
Referring to the provided images and measurements, cut out the cardboard pieces for the front, back, sides, and roof of your Elm Street house. The original creator used popsicle sticks as a primary measurement guide. For the first floor piece, aim for approximately 15 inches wide, and for the second floor and roofline, around 15.5 inches to create a slight overhang. The height can be roughly the length of your popsicle sticks, around 5.5 inches.
For the distinctive side pieces, which give the house its slightly menacing silhouette, you can create a paper pattern first. Eyeball the angles based on movie stills or reference images. Fold a piece of paper in half, draw half of the shape, and cut it out to create a symmetrical pattern. Transfer this pattern to cardboard and cut out the side pieces.
2. Paper Mache Application
Time to get messy! Prepare your paper mache paste using the Elmer’s glue recipe:
- 1 Cup Elmer’s Glue
- ¾ Cup Warm Water
- 1 tbsp Salt
Mix these ingredients until you achieve a consistency similar to whole milk. Tear newspaper into strips, dip them into the glue mixture, remove excess glue, and apply them to the cardboard frame of your house. Repeat this process, layering newspaper strips to cover the entire cardboard structure. Ensure you cover all surfaces, inside and out, to create a sturdy and textured base for painting. Wax paper under your project will help manage glue drips.
[Insert paper mache image here]
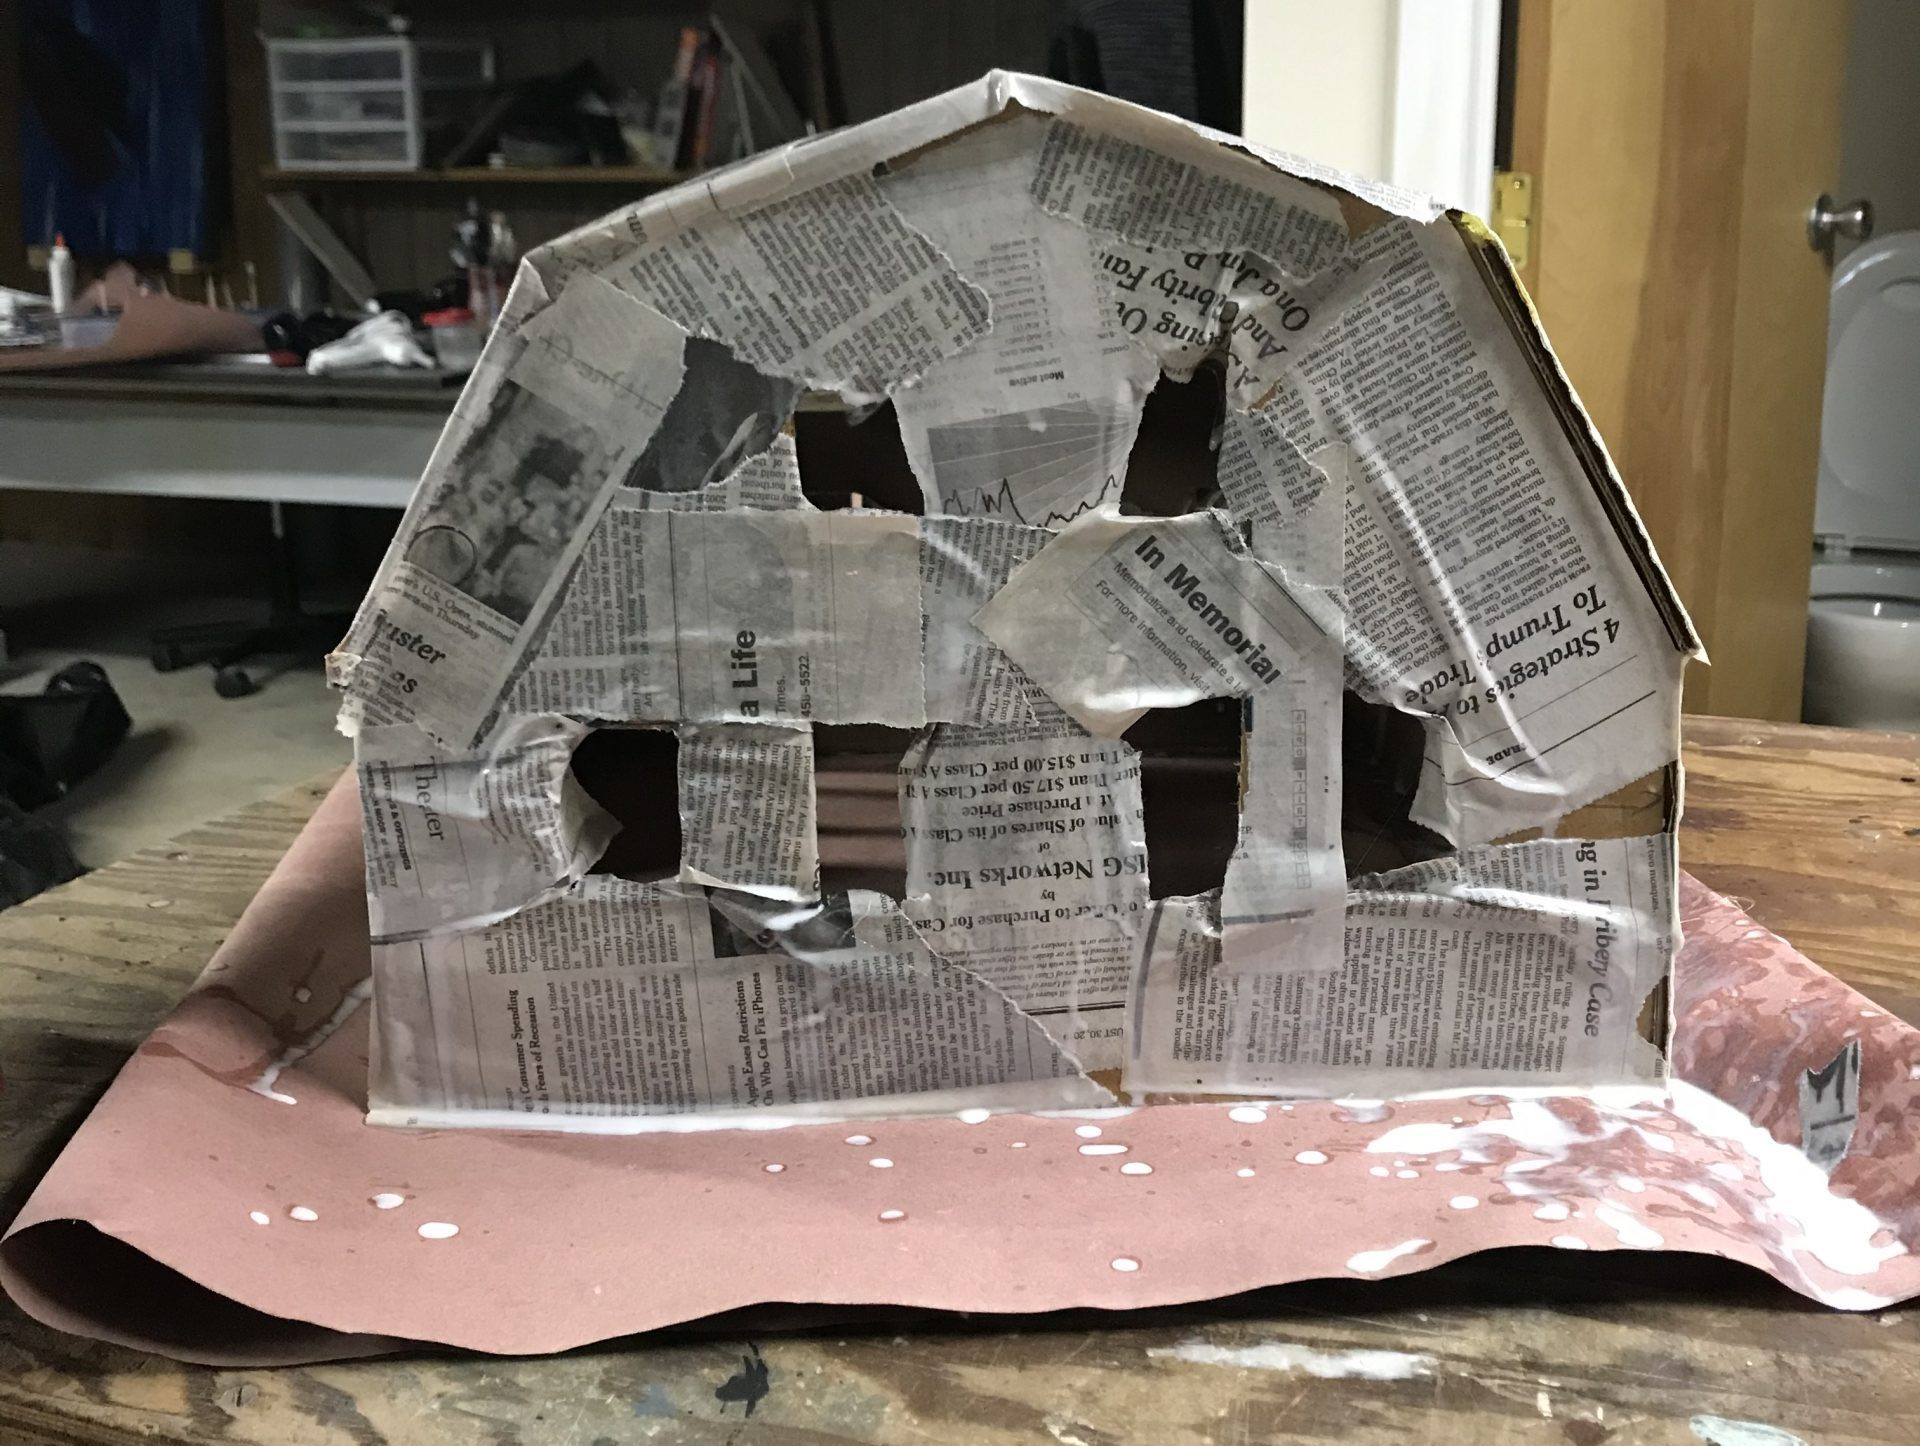 Applying paper mache newspaper strips to the cardboard Elm Street house frame
3. Painting and Gluing the Details
Once the paper mache is completely dry, it’s time to bring your Elm Street house to life with paint and details.
The House Base: To soften the newspaper print and create a muted base for the white paint, lightly spray the entire paper mache house with Tamiya Flat White paint. This also adds a subtle texture.
Clapboards and Roof Shingles: Prepare your popsicle sticks by first priming them with Vallejo Black Surface Primer. Once dry, paint the clapboards with Tamiya Flat White and the roof shingles with Tamiya Park Green. Using an airbrush (or dry brushing technique with a regular brush) allows you to control the paint density, letting some of the black primer show through for a weathered, aged look, perfect for a haunted house.
[Insert painted clapboards image here]
 Painted popsicle stick clapboards and roof shingles for the Elm Street house model
Window Boards: For extra creepiness, create weathered window boards. Prime popsicle sticks with Vallejo Black primer, then use a wire brush to scrub and distress the paint, achieving a rough, aged texture. Cut the sticks into ragged pieces to further enhance the dilapidated look.
[Insert window boards image here]
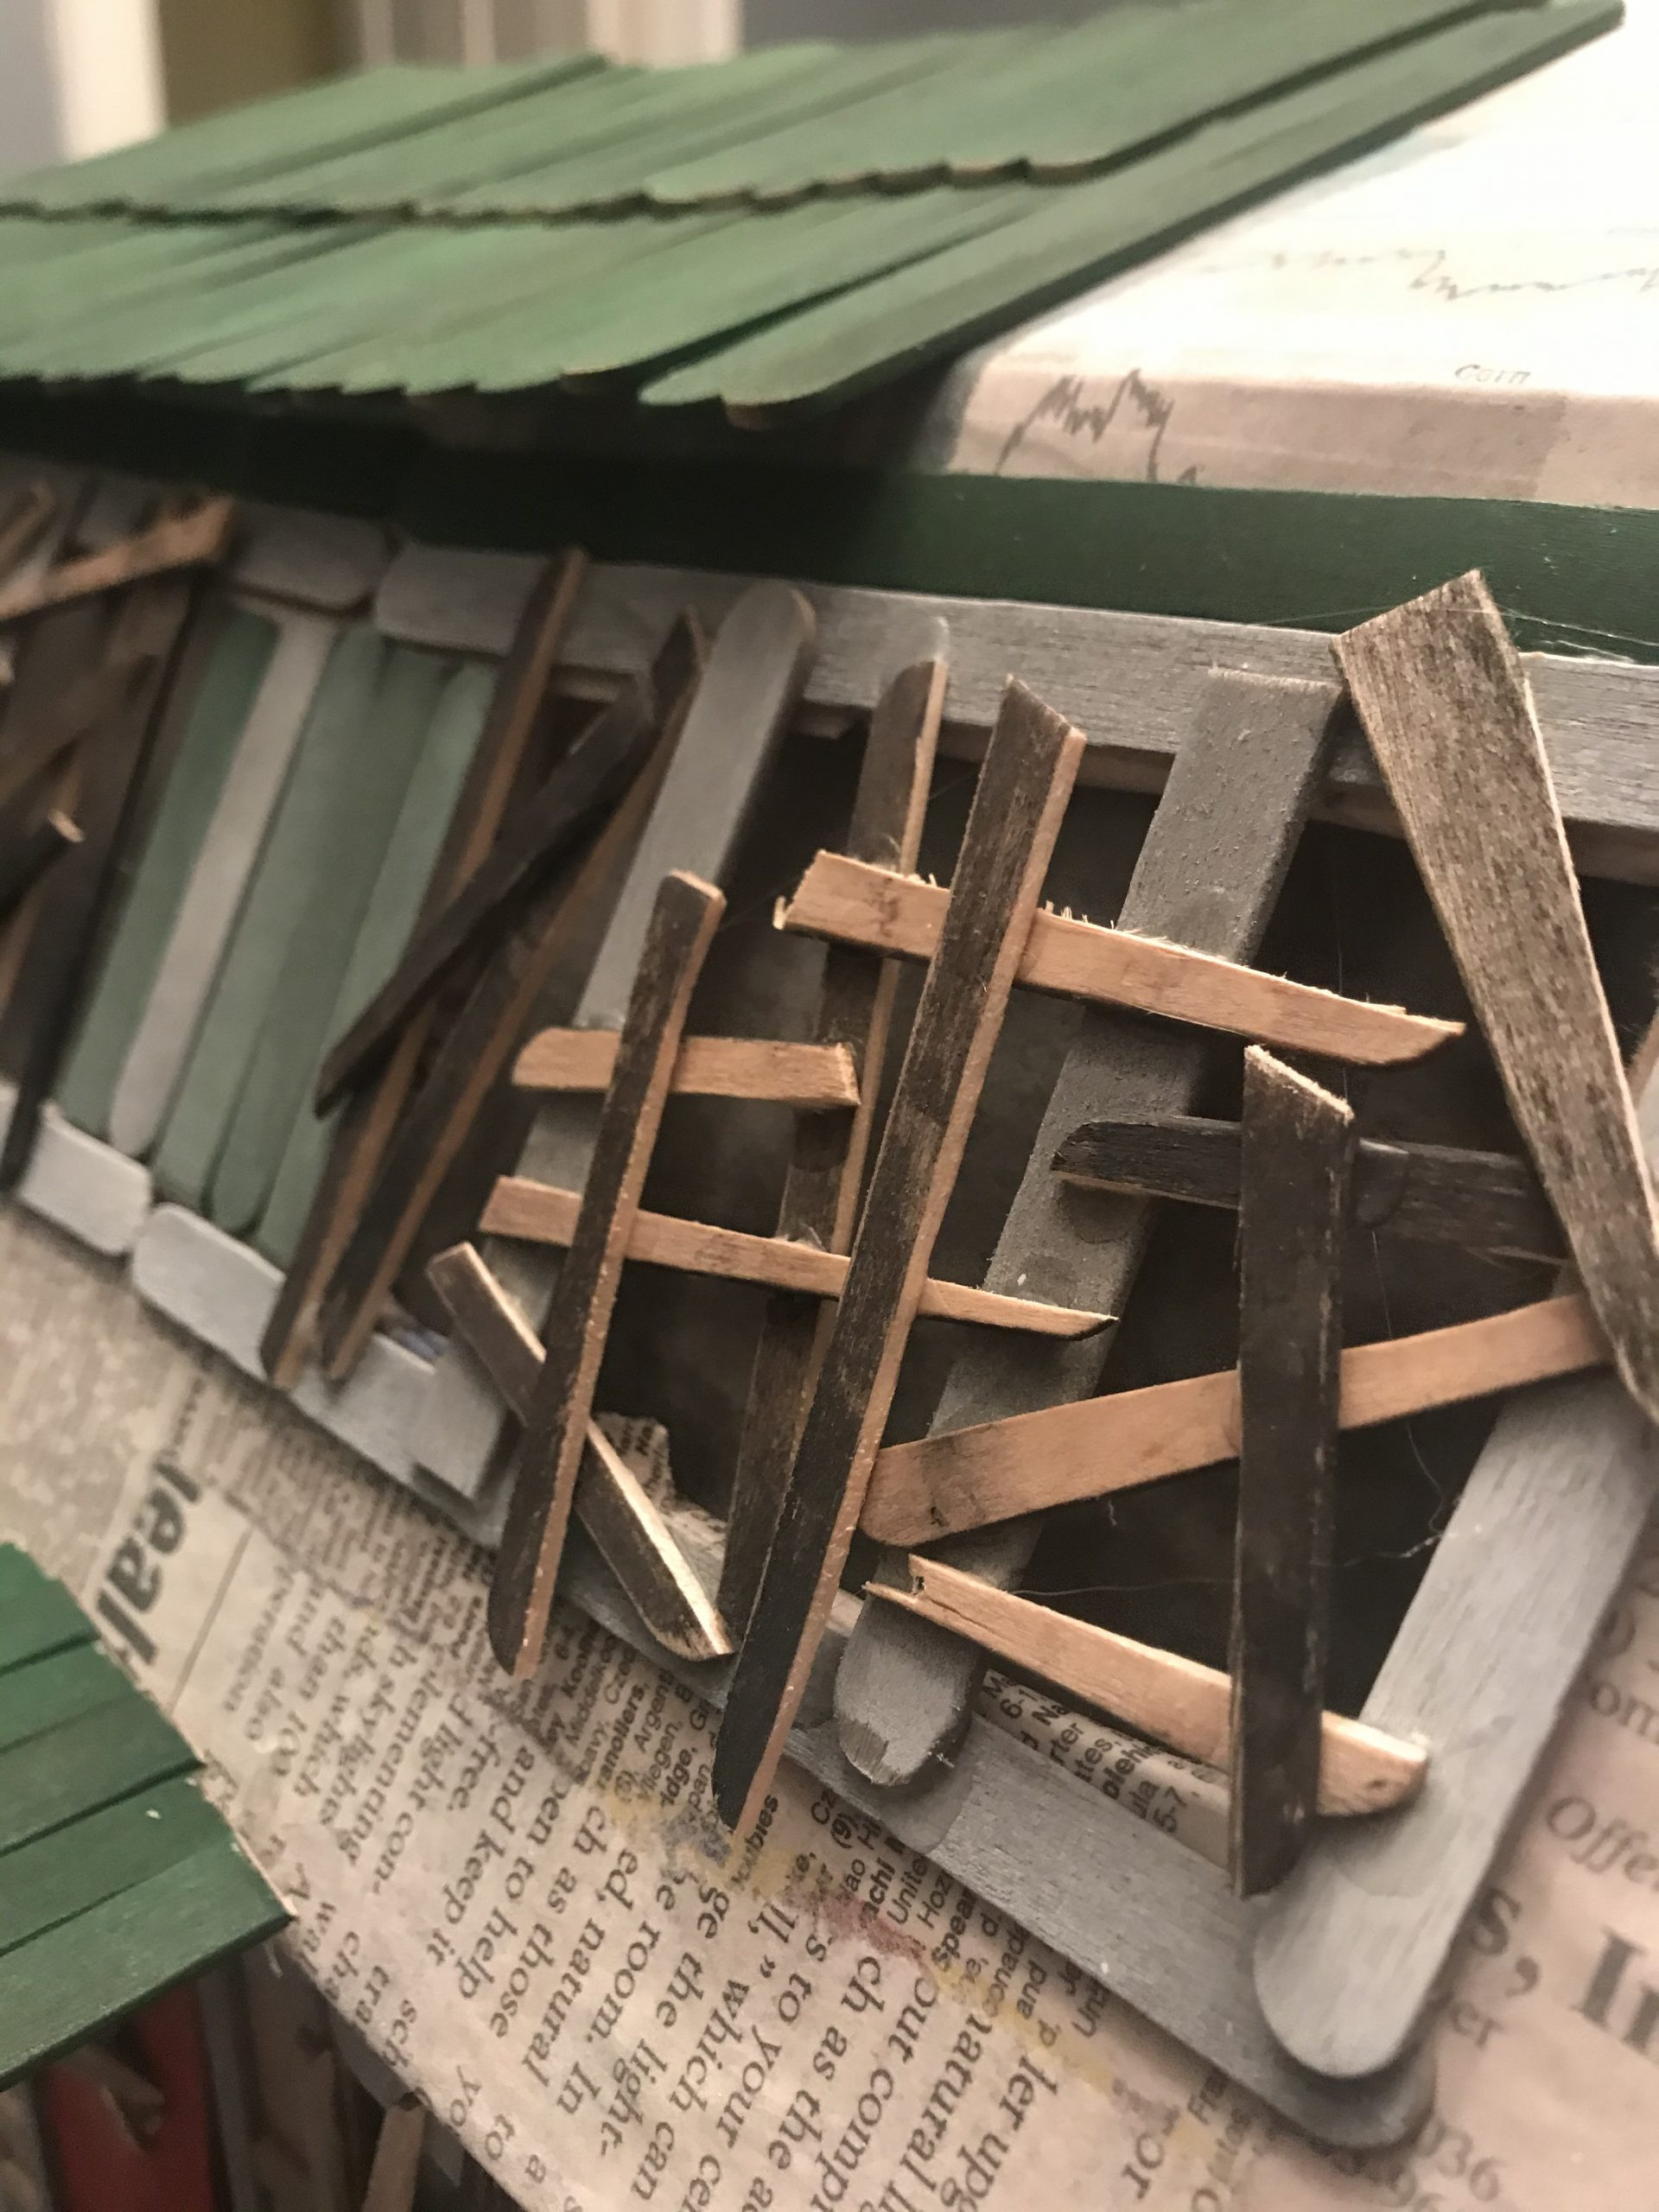 Distressed and weathered window boards for the paper Elm Street house decoration
The Door: Paint the door with Tamiya Flat Red. Once all painted elements are dry, glue the popsicle stick clapboards, roof shingles, and window boards onto the house using Elmer’s glue. Refer to screenshots from Nightmare on Elm Street 3 to accurately place these details.
Columns and Overhang: For the porch overhang, use a piece of styrene or thick cardstock, cut to size and slightly rounded. Hot glue this overhang above the door, and then hot glue green shingles onto it. For the columns, you can use ½” copper pipe or a rolled paper tube. Paper mache over the columns to blend them with the house’s texture. Attach the columns to the front of the house.
4. Spooky Lighting Effects
Lighting is key to bringing the eerie Elm Street house to life! Cut pieces of wax paper and hot glue them to the inside of the windows. This will diffuse the light and create a soft, ghostly glow. Place a color-changing LED light inside the house. The rotating colors will flicker through the windows, creating a truly unsettling and captivating Halloween decoration.
[Insert lighting effect image here]
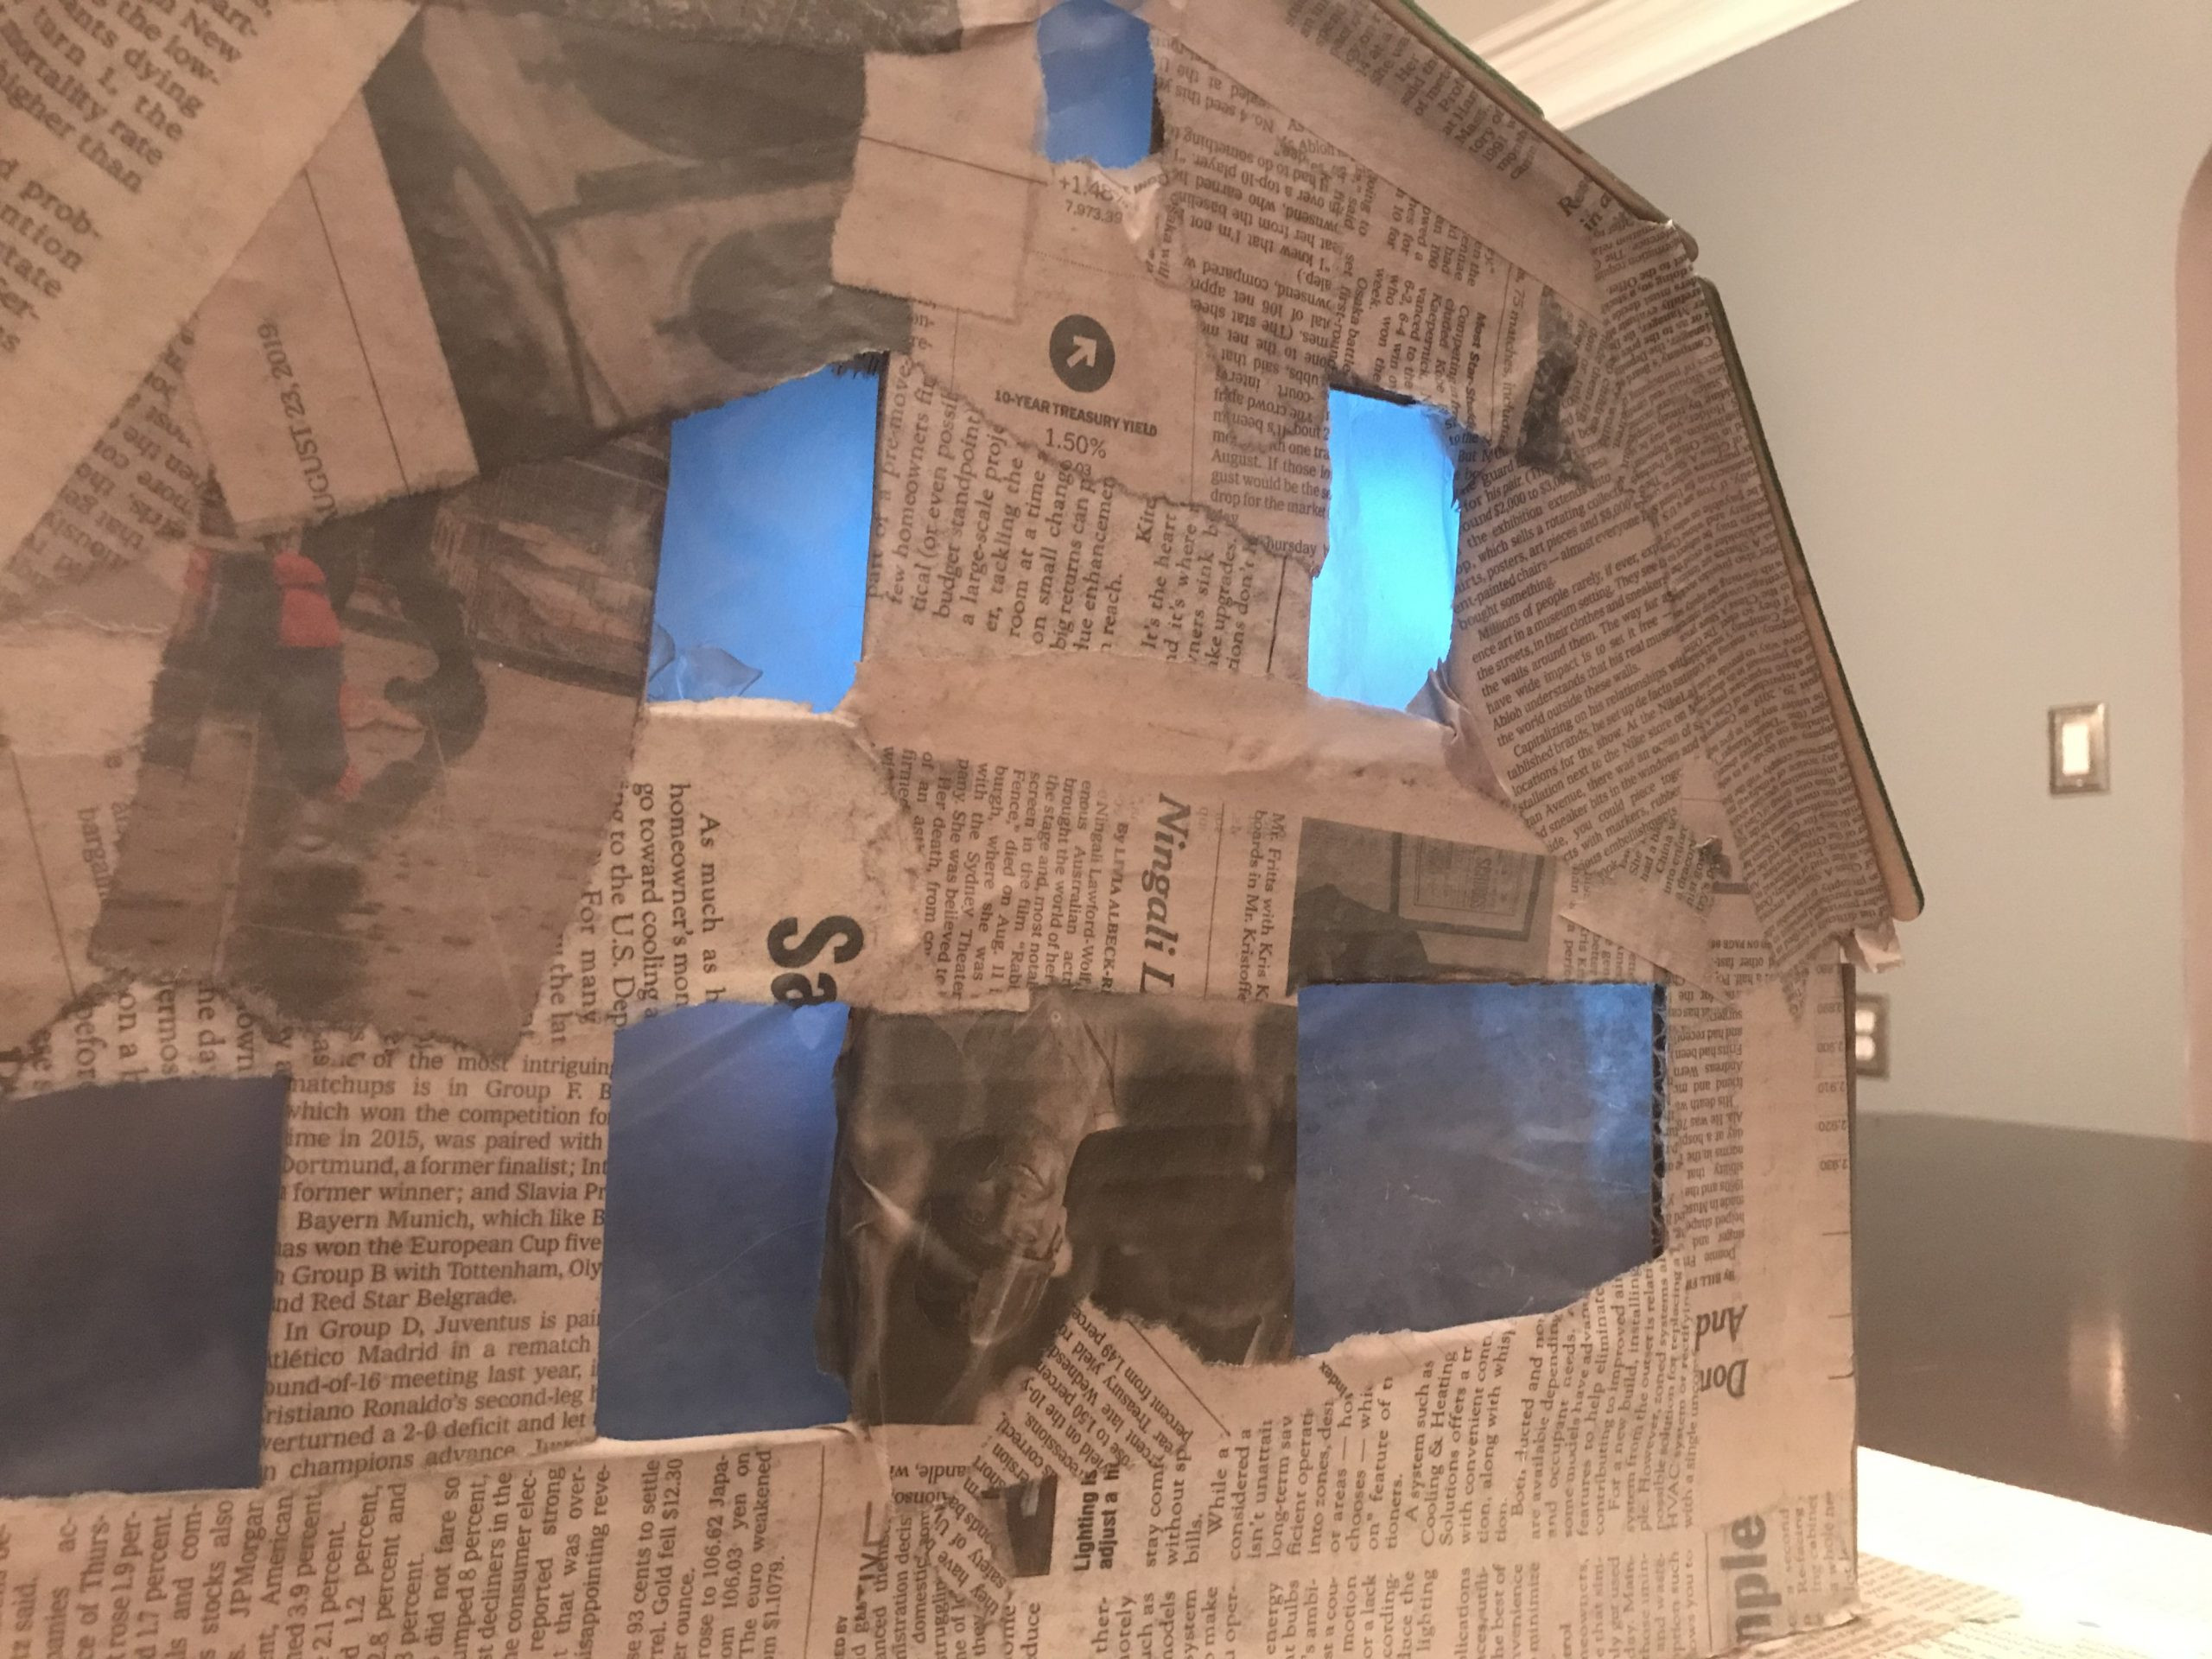 Wax paper diffuses LED light inside the paper Elm Street house model
Your Nightmare is Complete!
And that’s it! Your paper mache Elm Street house is ready to haunt your Halloween display. This project, while detailed, is achievable in just a few days, with most of the time spent waiting for things to dry. The result is a unique, handmade piece of horror movie memorabilia that’s sure to impress and maybe even frighten your guests!
[Insert finished house image here]
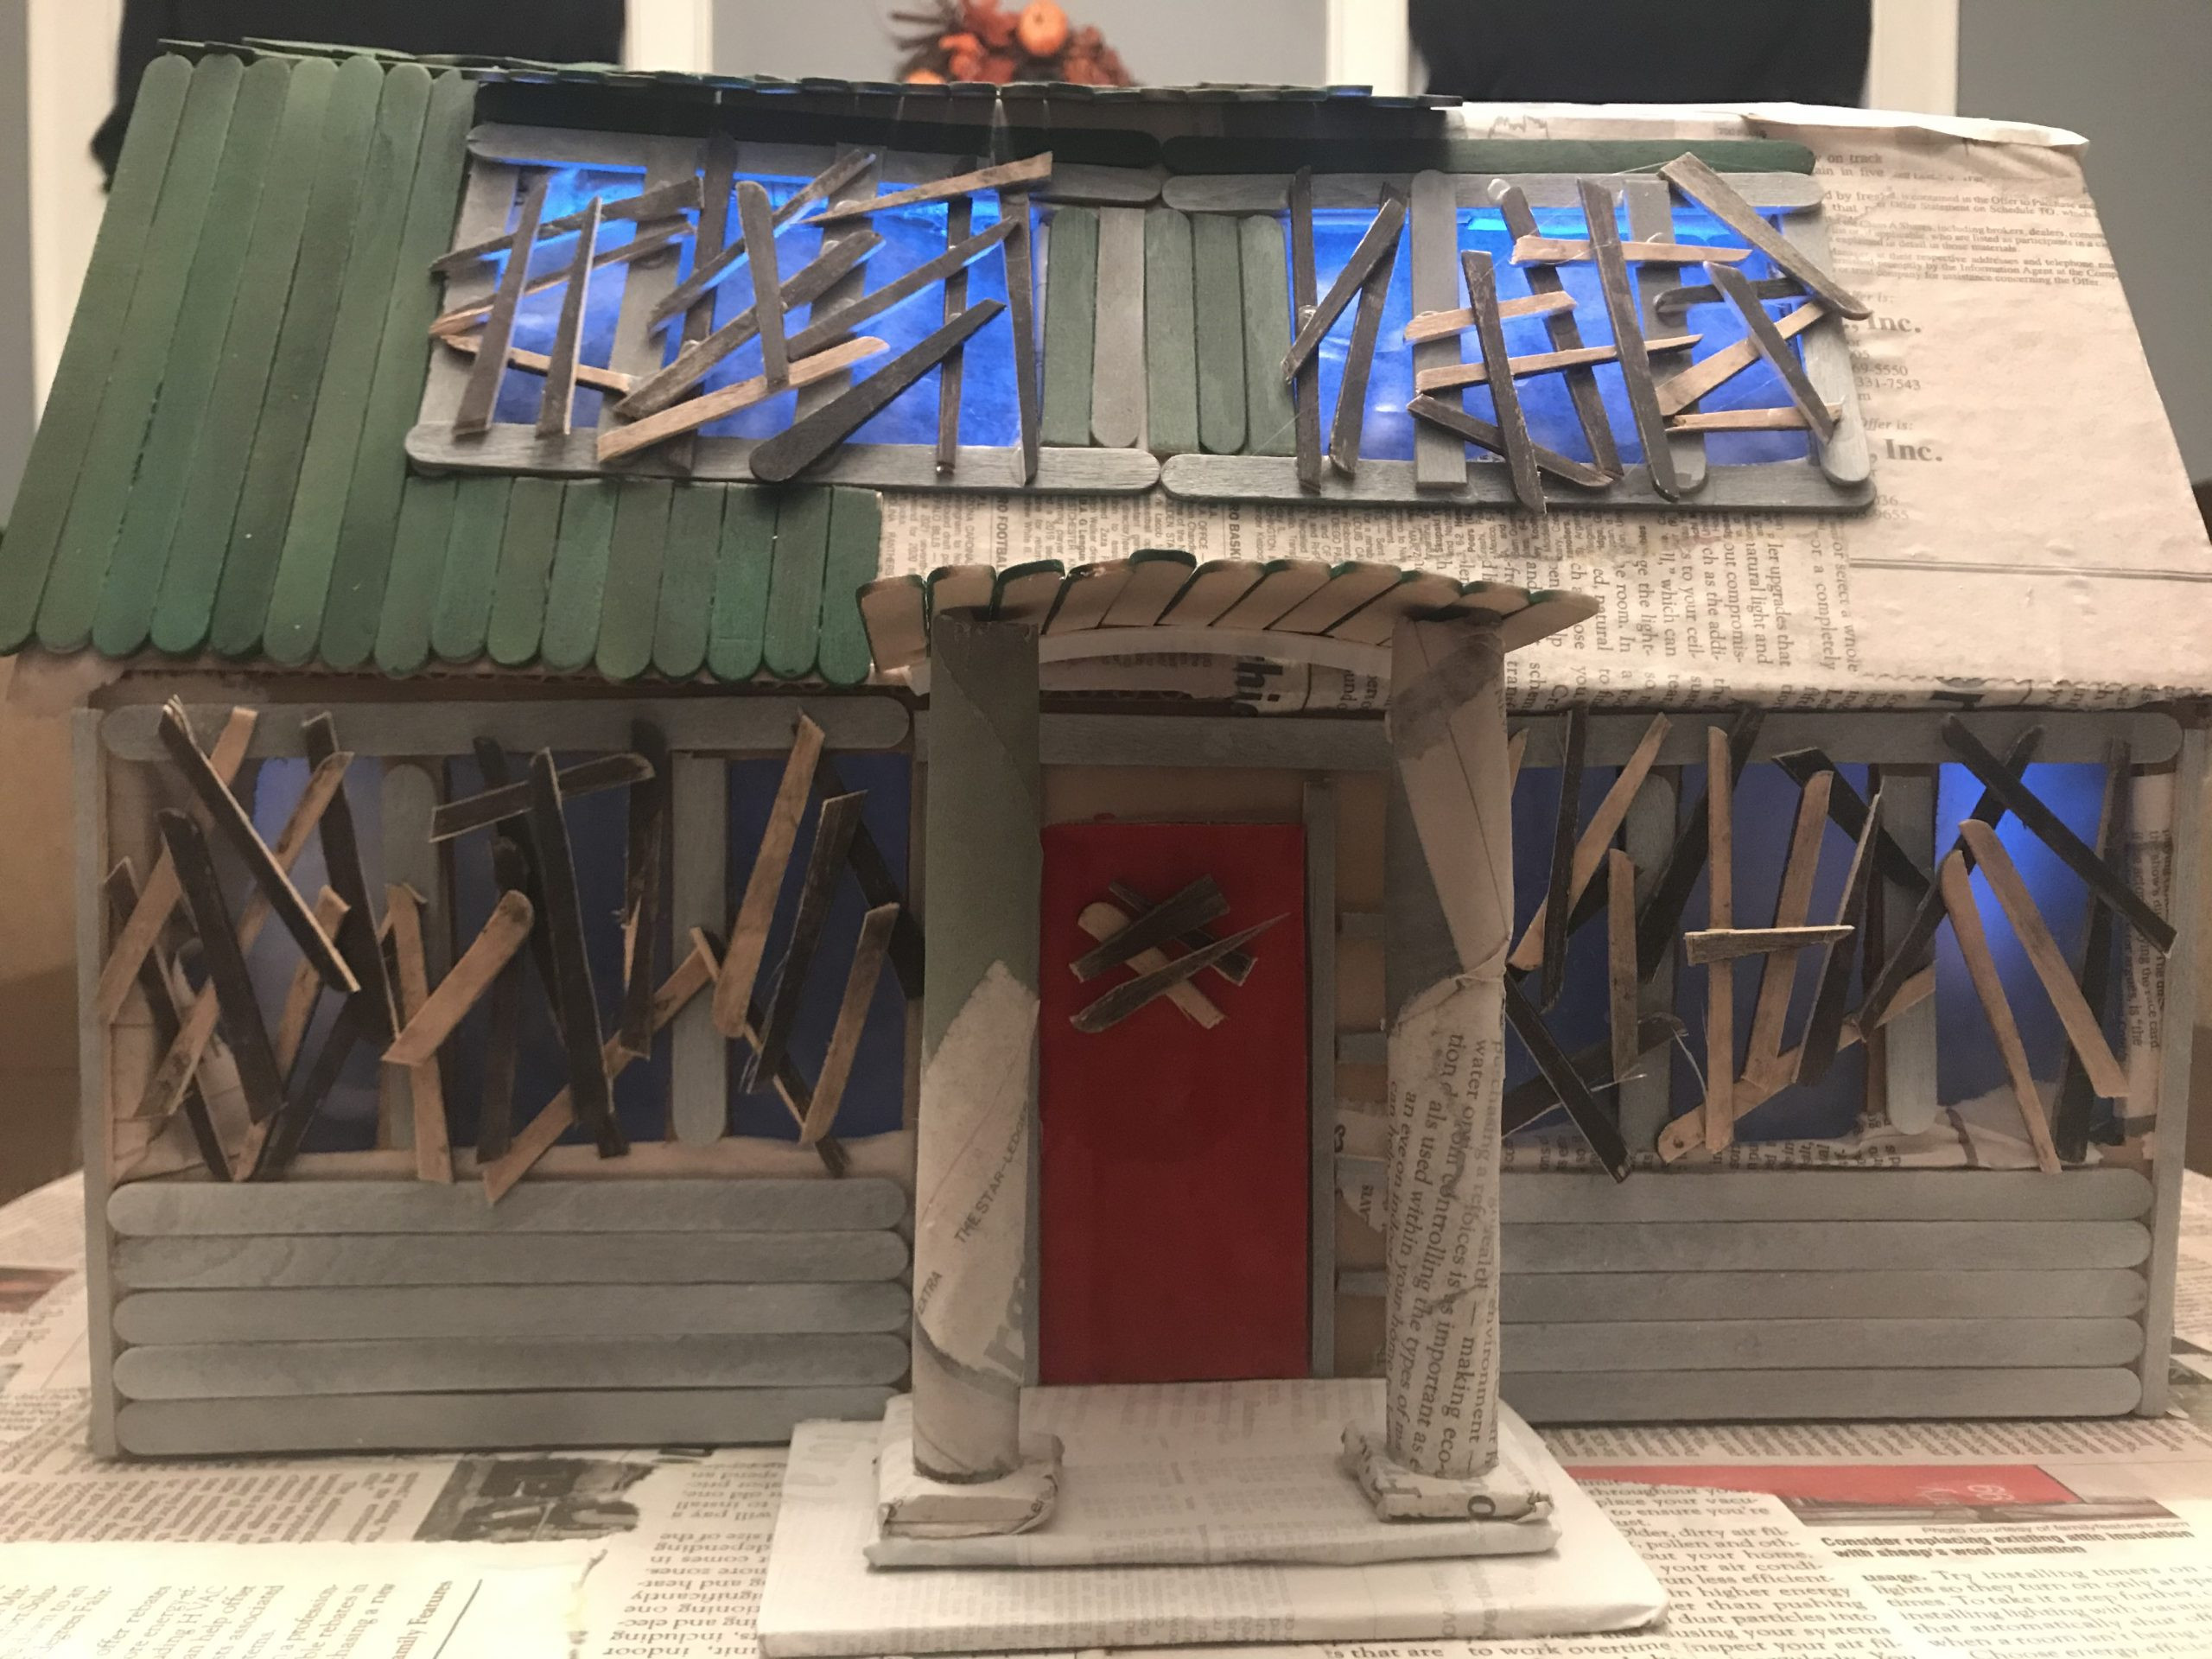 Finished paper mache Elm Street house with LED lighting for Halloween decor
If you decide to embark on this spooky crafting adventure, leave a comment below and share your creations! We’d love to see your own versions of the Elm Street house and celebrate your horror crafting skills. Sweet dreams… or nightmares!