
Recording your iPad screen with sound opens up a world of possibilities, especially for capturing the vibrant sounds of the streets for projects on streetsounds.net. Let’s explore how to create clear, professional screen recordings perfect for showcasing urban audio on streetsounds.net, helping you share your unique sonic experiences effectively.
1. Understanding the Need for iPad Screen Recording with Sound
Why would someone need to record their iPad screen with sound? The reasons are diverse and span various creative and professional fields. Understanding these needs helps us tailor the recording process for optimal results.
- Creating Tutorials: Many people use screen recordings to create tutorials. Whether it’s demonstrating how to use a music production app, showcasing sound design techniques, or guiding others through audio editing software, recording the screen with clear audio is essential.
- Providing Feedback: Professionals in audio engineering or music production often use screen recordings to provide feedback on projects. By recording their screen while reviewing a session, they can offer specific advice and demonstrate techniques in real-time.
- Capturing Gameplay: For musicians and sound designers who create interactive audio experiences, screen recording is a way to capture gameplay and share it with others.
- Documenting Bugs: In the world of app development, screen recordings are invaluable for documenting bugs. Recording the screen while demonstrating a problem helps developers understand and fix issues more efficiently.
- Creating Compelling Content for streetsounds.net: Showcasing urban audio requires high-quality recordings that capture both the visual and auditory elements of street sounds. This is critical for engaging the audience and providing a comprehensive experience.
2. Preparing Your iPad for Screen Recording with Sound
Before you start recording, a little preparation goes a long way. Ensuring your iPad is set up correctly can prevent common issues and improve the overall quality of your recording.
2.1. Checking Compatibility
First, ensure your iPad supports screen recording. This feature is available on iPads running iOS 11 or later. To check your iPad’s iOS version:
- Go to Settings.
- Tap on General.
- Select About.
- Look for the Software Version entry.
If you’re running an older version of iOS, you’ll need to update to access the screen recording feature.
2.2. Enabling Screen Recording in Control Center
The screen recording feature is accessed through the Control Center. If it’s not already there, you’ll need to add it:
- Go to Settings.
- Tap on Control Center.
- Scroll down to the “More Controls” section.
- Find Screen Recording and tap the green “+” icon next to it.
Now, when you swipe down from the top-right corner of your screen, you’ll see the screen recording button.
2.3. Configuring Audio Settings
To record sound with your screen recording, you’ll need to ensure the microphone is enabled. Here’s how:
- Open the Control Center.
- Long press on the Screen Recording button.
- A menu will appear with a microphone icon at the bottom.
- Tap the microphone icon to turn it on. When it’s red, it’s active.
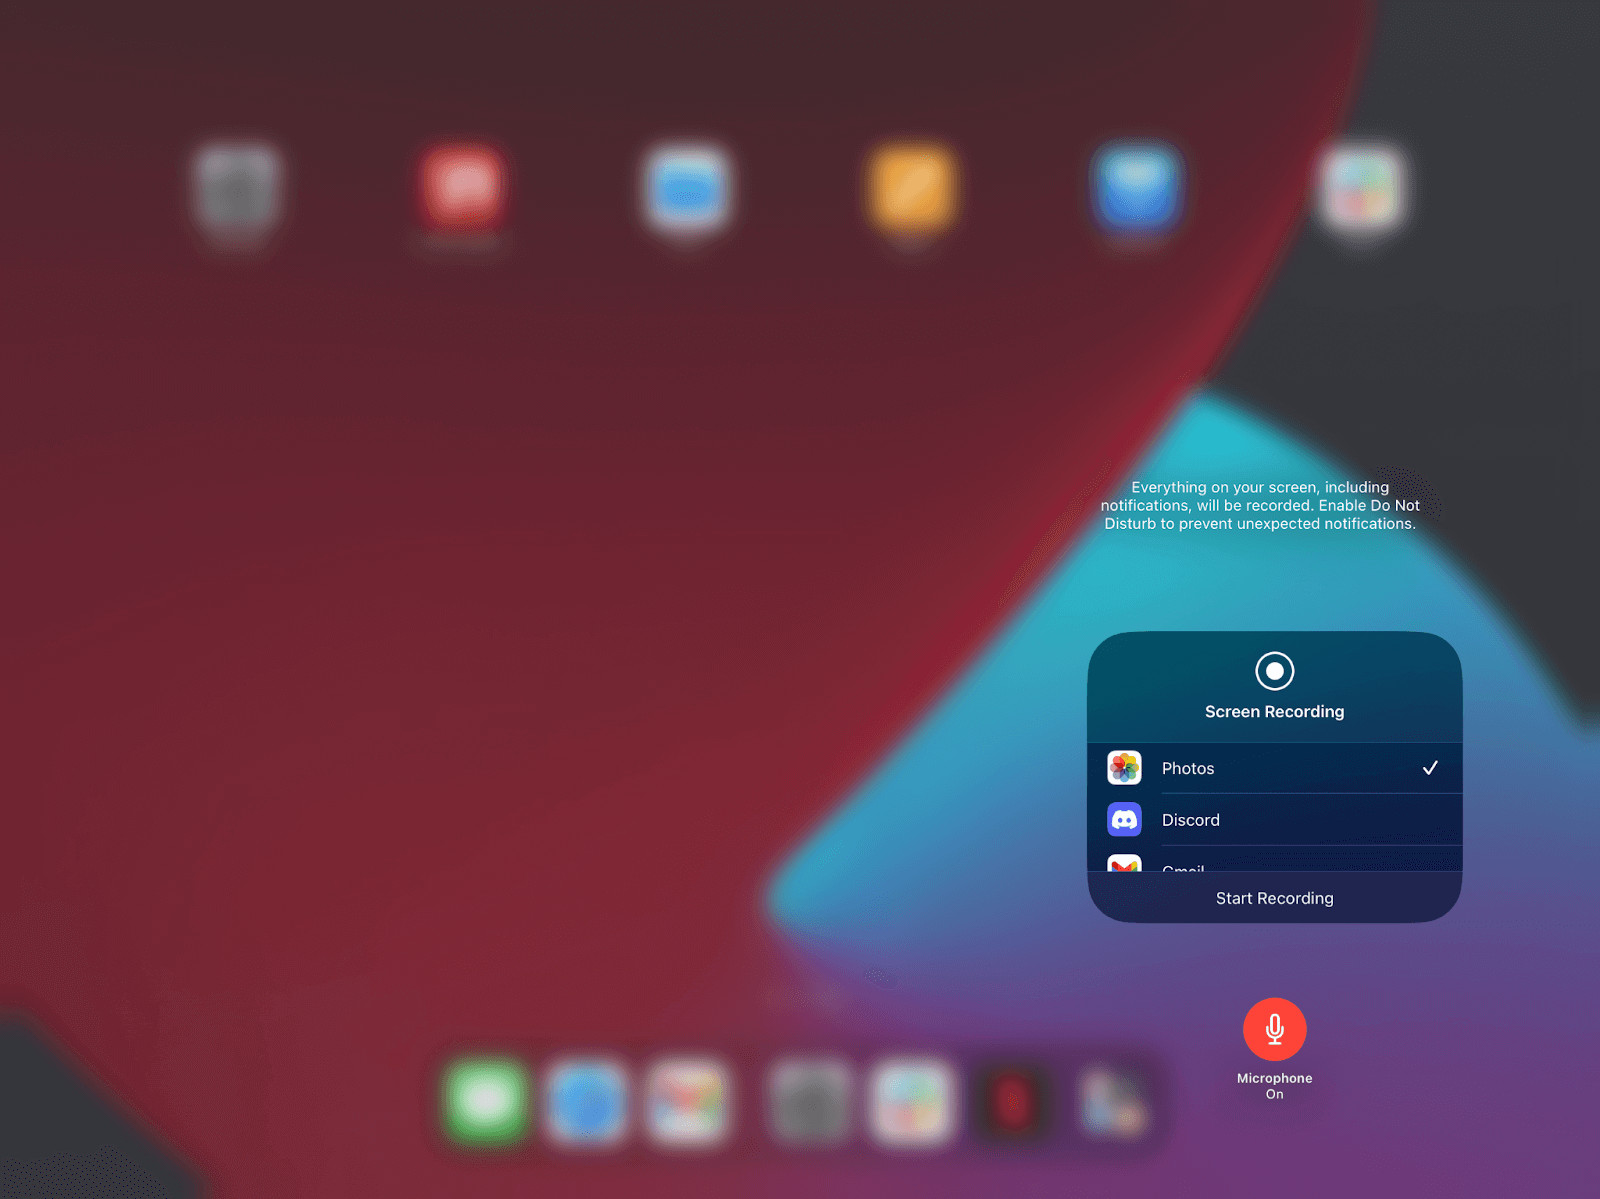 Microphone icon highlighted in the screen recording options, indicating audio recording is enabled
2.4. Optimizing Audio Quality
For capturing street sounds, audio quality is paramount. Consider these tips to optimize your audio:
- Use an External Microphone: The built-in microphone on your iPad is decent, but an external microphone will significantly improve audio quality. Options like the Rode i-XLR or Shure MV88 are designed for mobile recording and offer excellent sound.
- Minimize Background Noise: Find a quiet environment or use a windscreen for your microphone to reduce background noise.
- Monitor Audio Levels: Use headphones to monitor the audio levels while recording. This helps you ensure the audio is clear and not distorted.
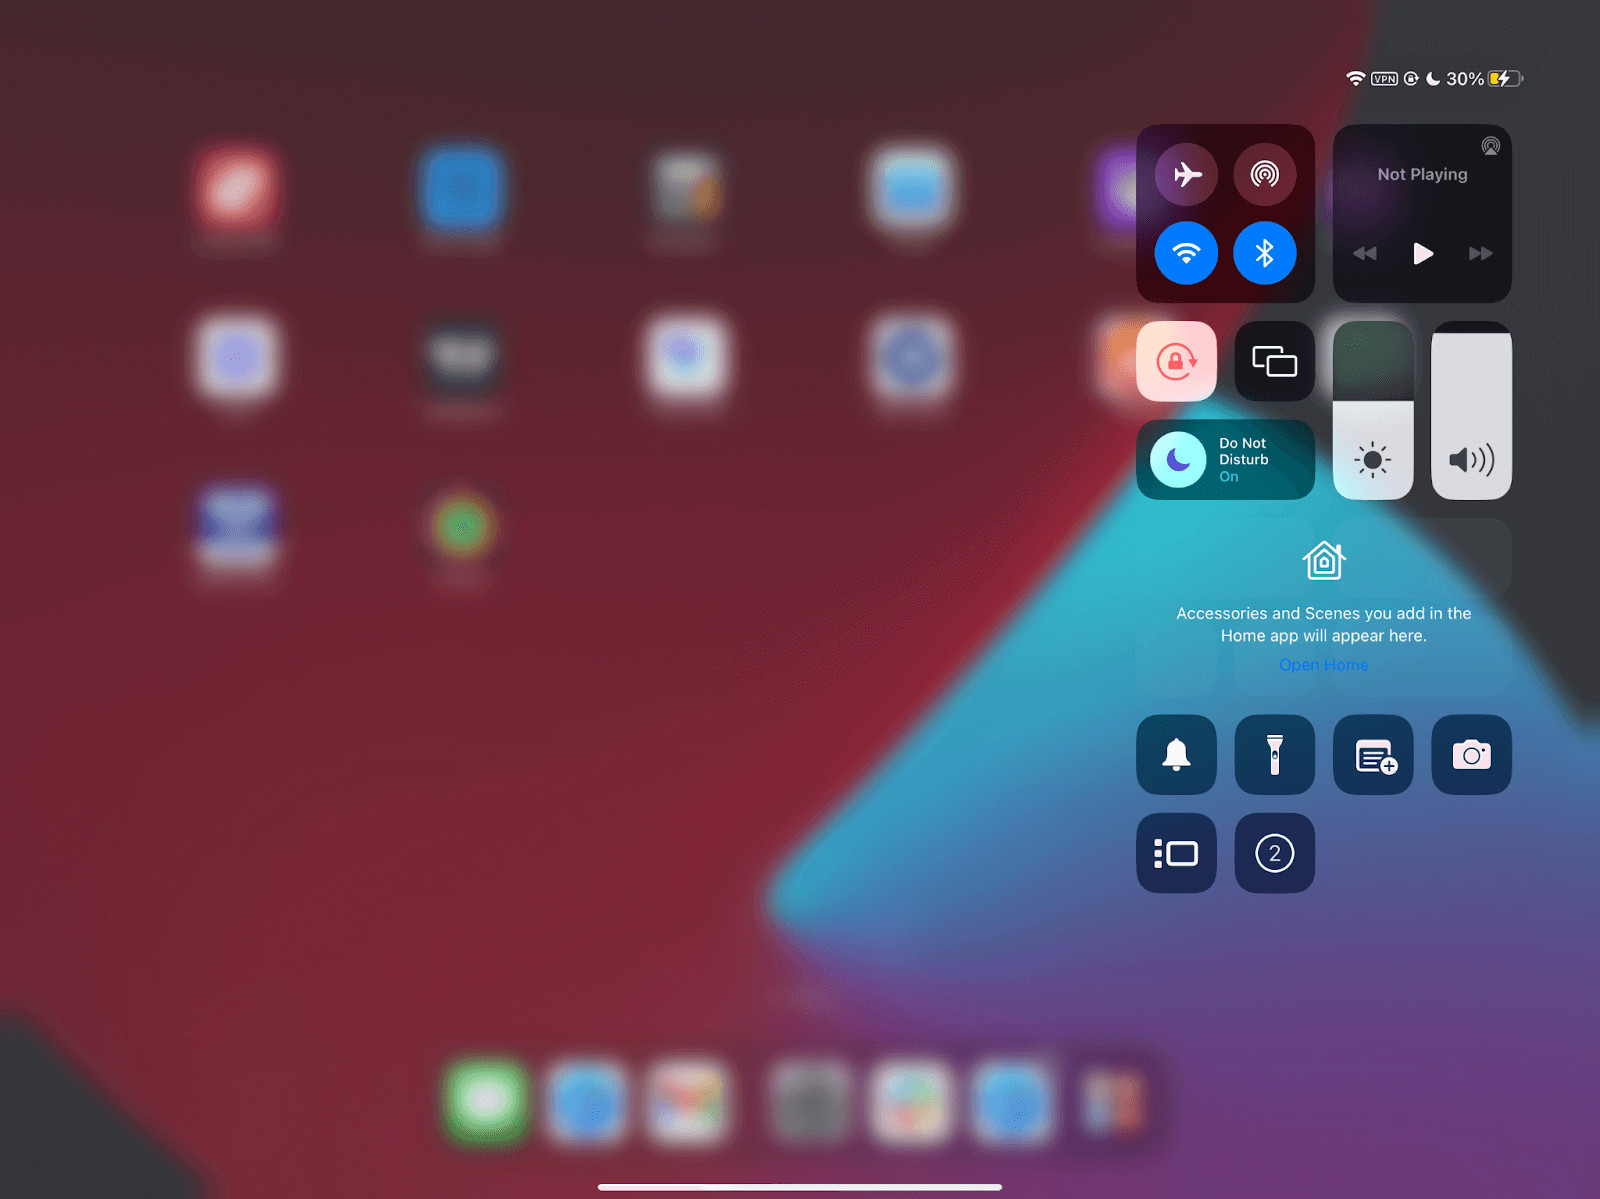
2.5. Disabling Notifications
Notifications can interrupt your recording and distract viewers. Enable “Do Not Disturb” mode to prevent this:
- Open the Control Center.
- Tap the Focus button.
- Select Do Not Disturb.
This will silence calls, alerts, and notifications, ensuring a clean recording.
3. Step-by-Step Guide to Screen Recording with Sound on iPad
Now that your iPad is prepared, let’s walk through the screen recording process.
3.1. Starting the Recording
- Open the Control Center by swiping down from the top-right corner of your screen.
- Tap the Screen Recording button.
- A three-second countdown will appear, giving you time to prepare.
- Once the countdown finishes, the recording will begin. A red bar or icon at the top of your screen indicates that recording is in progress.
 Countdown timer displayed on the record button before a screen recording starts
3.2. Recording Street Sounds
Now comes the exciting part: capturing the sounds of the streets. Here are some tips for recording compelling urban audio:
- Explore Diverse Environments: Visit different locations to capture a variety of sounds. A bustling market will sound different from a quiet park or a busy intersection.
- Capture Unique Sound Events: Keep an ear out for unique sound events like street performers, construction work, or public announcements.
- Record Ambience: Don’t forget to capture the general ambience of the environment. These background sounds add depth and realism to your recordings.
- Use a Field Recorder App: Apps like Ferrite Recording Studio or Rode Reporter offer advanced recording features like gain control, metering, and editing tools.
3.3. Narrating and Annotating
If you’re creating a tutorial or providing feedback, narrate clearly and annotate effectively.
- Speak Clearly: Speak slowly and clearly, articulating each word.
- Use Visual Cues: Use the Apple Pencil or a stylus to highlight important elements on the screen.
- Explain Your Actions: Describe what you’re doing and why. This helps viewers understand your thought process.
3.4. Stopping the Recording
When you’re finished recording:
- Tap the red bar or icon at the top of your screen.
- A prompt will appear asking if you want to stop recording.
- Tap Stop.
The recording will be saved to your Photos app.
3.5. Accessing Your Recordings
To access your recordings:
- Open the Photos app.
- Go to Albums.
- Look for the Screen Recordings album.
Here, you’ll find all your screen recordings, ready to be viewed, edited, and shared.
4. Editing and Enhancing Your Screen Recordings
Once you’ve captured your screen recording, you can edit it to enhance its quality and clarity.
4.1. Trimming and Cropping
Most screen recordings contain unnecessary footage at the beginning and end. Trim these sections to create a polished final product. You can also crop the video to focus on specific areas of the screen.
4.2. Adding Annotations and Text
Annotations and text can help viewers understand your recording. Add arrows, circles, and text boxes to highlight important elements and provide additional information.
4.3. Adjusting Audio Levels
Ensure the audio levels are balanced and clear. Adjust the volume to make sure narration and street sounds are audible without being distorted.
4.4. Adding Music and Sound Effects
Adding music and sound effects can enhance the emotional impact of your recordings. Choose sounds that complement the visuals and create a cohesive experience. Streetsounds.net is a great place to source royalty-free urban sound effects.
4.5. Using Video Editing Apps
Several video editing apps are available for iPad, each offering a unique set of features and capabilities.
- iMovie: A free, user-friendly app perfect for basic editing tasks.
- LumaFusion: A professional-grade app with advanced editing features like multi-track editing, color correction, and audio mixing.
- Descript: A versatile app that combines screen recording, audio editing, and video editing in one package.
5. Optimizing Your Screen Recordings for streetsounds.net
To make the most of your screen recordings on streetsounds.net, consider these optimization tips.
5.1. Choosing the Right Format and Resolution
streetsounds.net supports various video formats, but MP4 is generally recommended for its compatibility and quality. As for resolution, aim for 1080p (1920×1080) for a balance of clarity and file size.
5.2. Compressing Your Video
Large video files can take a long time to upload and stream. Compress your video to reduce its file size without sacrificing too much quality. Apps like HandBrake can help with this.
5.3. Creating a Compelling Title and Description
Your video’s title and description are crucial for attracting viewers. Use clear, descriptive language that accurately reflects the content of your recording. Include relevant keywords to improve search visibility.
5.4. Adding Tags
Tags are another way to improve search visibility. Add tags that describe the content, location, and theme of your recording.
5.5. Designing a Custom Thumbnail
A custom thumbnail can make your video stand out from the crowd. Create a visually appealing thumbnail that accurately represents the content of your recording.
5.6. Promoting Your Video
Once your video is uploaded, promote it on social media and other platforms to reach a wider audience. Engage with viewers in the comments section to build a community around your content.
6. Advanced Techniques for Professional Screen Recordings
For those looking to take their screen recordings to the next level, here are some advanced techniques to consider.
6.1. Using Multiple Microphones
If you’re recording a conversation or interview, using multiple microphones can improve audio quality. Use a splitter cable to connect two microphones to your iPad, or use a multi-channel audio interface.
6.2. Recording in a Soundproof Environment
To minimize background noise, record in a soundproof environment. This could be a professional recording studio or a DIY sound booth made from acoustic panels and blankets.
6.3. Using a Teleprompter
If you’re narrating a script, using a teleprompter can help you deliver a smooth, natural performance. Several teleprompter apps are available for iPad.
6.4. Using Motion Graphics
Motion graphics can add visual interest and clarity to your screen recordings. Use apps like LumaFusion or After Effects to create custom animations and effects.
6.5. Color Grading
Color grading can enhance the visual appeal of your screen recordings. Use apps like LumaFusion or DaVinci Resolve to adjust the colors and tones in your video.
7. Troubleshooting Common Issues
Even with careful preparation, you may encounter issues during the screen recording process. Here are some common problems and how to solve them.
7.1. No Sound
If your screen recording has no sound, make sure the microphone is enabled in the Control Center. Also, check that your microphone is properly connected and that the audio levels are set correctly.
7.2. Poor Audio Quality
If your audio quality is poor, try using an external microphone, minimizing background noise, and monitoring audio levels while recording.
7.3. Laggy Performance
If your iPad is performing sluggishly during recording, close unnecessary apps and disable background processes. You may also need to upgrade to a more powerful iPad.
7.4. Recording Stops Unexpectedly
If your recording stops unexpectedly, check that you have enough storage space on your iPad. Also, make sure your iPad is not overheating.
7.5. Video is Grainy or Blurry
If your video is grainy or blurry, make sure you’re recording at a high resolution. Also, check that your iPad’s screen is clean and free of smudges.
8. Showcasing Street Sounds: Examples and Inspiration
To inspire your own screen recordings, here are some examples of how street sounds can be showcased effectively.
8.1. Music Production Tutorials
Demonstrate how to use urban sound samples in music production. For instance, show how to create a hip-hop beat using samples of New York City subway sounds, car horns, and street percussion.
8.2. Sound Design Demonstrations
Create tutorials on designing soundscapes for films or video games. Show how to layer different street sounds to create a realistic and immersive urban environment.
8.3. Field Recording Vlogs
Share your experiences capturing street sounds in different locations. Document your process, highlight interesting sounds, and discuss the challenges and rewards of field recording.
8.4. Interactive Sound Maps
Create interactive sound maps that allow users to explore different urban environments through sound. Use screen recordings to demonstrate how the map works and highlight specific sound events.
8.5. Sound Art Installations
Showcase sound art installations that incorporate street sounds. Use screen recordings to capture the installation in action and explain the artist’s vision.
9. The Future of Street Sounds and Recording Technology
As technology continues to evolve, the possibilities for capturing and showcasing street sounds are endless.
9.1. Immersive Audio
Immersive audio technologies like Dolby Atmos and spatial audio are becoming increasingly popular. These technologies allow you to create soundscapes that surround the listener, providing a more realistic and engaging experience.
9.2. AI-Powered Audio Tools
AI-powered audio tools are making it easier than ever to clean up, enhance, and manipulate street sounds. These tools can automatically remove noise, adjust audio levels, and even generate new sounds based on existing recordings.
9.3. Mobile Recording Technology
Mobile recording technology is becoming more powerful and accessible. Smartphones and tablets now offer professional-grade recording capabilities, allowing you to capture high-quality street sounds on the go.
9.4. Virtual Reality (VR) and Augmented Reality (AR)
VR and AR technologies are creating new opportunities for experiencing street sounds. Imagine exploring a virtual city where the sounds of the streets are recreated in stunning detail, or using AR to overlay street sounds onto your real-world environment.
9.5. Community-Driven Sound Archives
Platforms like streetsounds.net are fostering community-driven sound archives, where users can share and discover street sounds from around the world. These archives provide a valuable resource for artists, researchers, and anyone interested in urban audio.
10. Frequently Asked Questions (FAQ) About Recording Your iPad Screen with Sound
10.1. Can I record internal audio on my iPad?
Yes, you can record internal audio on your iPad using the built-in screen recording feature. Just ensure the microphone is enabled in the Control Center.
10.2. What’s the best app for screen recording on iPad?
The best app depends on your needs. iMovie is great for basic editing, LumaFusion for professional editing, and Descript for a combination of screen recording, audio editing, and video editing.
10.3. How do I improve audio quality on my iPad recordings?
Use an external microphone, minimize background noise, monitor audio levels, and record in a quiet environment.
10.4. Can I record my face while screen recording on iPad?
Yes, some apps like Record it! and RecPro allow you to record your face using the front-facing camera while screen recording.
10.5. How do I stop the screen recording on my iPad?
Tap the red bar or icon at the top of your screen, then tap Stop.
10.6. Where are my screen recordings saved on iPad?
Screen recordings are saved to the Photos app in the Screen Recordings album.
10.7. How do I share my screen recordings from iPad?
You can share your screen recordings directly from the Photos app via email, social media, or cloud storage services.
10.8. What is streetsounds.net?
Streetsounds.net is a website dedicated to capturing and sharing the diverse sounds of urban environments, providing a platform for artists, researchers, and enthusiasts to explore the sonic landscape of cities. Located at 726 Broadway, New York, NY 10003, United States, and reachable by phone at +1 (212) 998-8550, streetsounds.net offers a rich library of sound effects, articles, and community features for those passionate about urban audio.
10.9. How can I use street sounds in my creative projects?
You can use street sounds to add realism, depth, and emotional impact to your music, films, video games, and sound art installations. Websites like streetsounds.net offer a wide variety of royalty-free street sound effects for your creative projects.
10.10. What are some ethical considerations when recording street sounds?
Respect people’s privacy, avoid recording sensitive conversations, and be mindful of noise pollution. Always obtain permission before recording in private spaces.
By following these steps and tips, you can create professional-quality screen recordings with sound on your iPad, perfect for capturing the vibrant sounds of the streets for projects on streetsounds.net. Embrace the sonic landscape of your city and share your unique audio experiences with the world.
Ready to bring your street sound recordings to life? Visit streetsounds.net today to explore a vast library of urban sound effects, discover insightful articles, and connect with a community of passionate sound enthusiasts. Start your sonic journey now and let the sounds of the streets inspire your creativity.