Are you trying to personalize your Outlook experience on Windows 11? Changing the notification sound is a great way to customize your alerts and make them more distinctive. At streetsounds.net, we understand the importance of tailoring your digital environment to suit your preferences, and we’re here to guide you through every step. Explore soundscapes and audio customization with sound effects, audio cues, and personalized alerts.
1. Why Change the Outlook Notification Sound in Windows 11?
Changing the Outlook notification sound in Windows 11 offers several benefits, enhancing both user experience and productivity. Let’s explore why customizing this setting is important:
-
Personalization: Customizing the notification sound allows you to personalize your computing environment, making it feel more like your own.
-
Distinctiveness: A unique notification sound can help you distinguish Outlook alerts from other application notifications, ensuring you don’t miss important emails.
-
Improved Alert Recognition: Choosing a sound that resonates with you can make alerts more noticeable, helping you stay on top of your inbox.
-
Reduced Stress: A pleasant notification sound can reduce stress associated with email overload, making the experience more enjoyable.
-
Accessibility: Custom sounds can be chosen to be more accessible to individuals with hearing impairments, ensuring they don’t miss critical notifications.
-
Focus and Productivity: By selecting a sound that is both attention-grabbing and non-disruptive, you can maintain focus and improve overall productivity.
-
Brand Consistency: For business users, custom notification sounds can align with company branding, reinforcing a professional image.
-
Contextual Awareness: Different sounds can be assigned to different types of notifications, providing contextual awareness without needing to check the screen.
-
Enhanced User Satisfaction: Customization options like notification sounds contribute to overall user satisfaction with the software.
-
Easy Identification: When multiple users share a device, custom sounds make it easy to identify who is receiving the notification.
2. Understanding Sound Settings in Windows 11
Before diving into changing the Outlook notification sound, it’s essential to understand how sound settings work in Windows 11. Windows 11 manages sound through a centralized system, allowing you to control volume levels, output devices, and app-specific sounds. Here’s a breakdown:
- Sound Control Panel: This is the main hub for managing sound devices and settings. You can access it by searching for “Sound Settings” in the Windows search bar.
- Output Devices: Windows 11 allows you to select different output devices, such as speakers, headphones, or external sound systems.
- Input Devices: Similarly, you can choose your preferred input device, like a microphone or headset.
- App Volume and Device Preferences: This feature lets you customize the volume levels and output devices for individual apps.
- Sound Schemes: Windows 11 includes various sound schemes, which are collections of sounds for different system events.
- System Sounds: These are sounds associated with specific actions or notifications, such as error messages, system alerts, and email notifications.
- Spatial Sound: This feature enhances the audio experience by creating a more immersive soundscape.
- Sound Mixer: The sound mixer allows you to adjust the volume levels for each application individually, providing granular control over your audio.
- Troubleshooting Tools: Windows 11 includes built-in troubleshooting tools to help resolve common sound issues.
- Accessibility Features: Windows 11 offers accessibility features like mono audio and visual alerts to support users with hearing impairments.
3. Step-by-Step Guide: Changing Outlook Notification Sound in Windows 11
Now, let’s get into the nitty-gritty of changing your Outlook notification sound in Windows 11. Follow these steps carefully to personalize your audio alerts:
- Open Outlook: Launch the Outlook application on your Windows 11 system.
- Access File Menu: Click on the “File” tab located in the top-left corner of the Outlook window.
- Navigate to Options: In the File menu, find and click on “Options” at the bottom of the list.
Alt text: Accessing Outlook options to customize settings on Windows 11.
- Go to Mail Settings: In the Outlook Options window, select “Mail” from the left sidebar.
- Message Arrival: Scroll down to the “Message arrival” section.
Alt text: Configuring message arrival options for custom notifications in Outlook on Windows 11.
-
Play a Sound: Check the box next to “Play a sound” if it’s not already checked. This enables sound notifications for new messages.
-
Change Windows Sound Settings: To change the actual sound, you’ll need to go to the Windows Sound Settings. Close Outlook and follow these steps:
- Right-click on the volume icon in the system tray (usually located in the bottom-right corner of your screen).
- Select “Sound settings”.
Alt text: Navigating Windows 11 sound settings to customize notification sounds.
- Sound Control Panel: In the Sound Settings window, click on “More Sound Settings” under the Related Content section. This will open the classic Sound Control Panel.
Alt text: Accessing the sound control panel for advanced sound customizations in Windows 11.
- Program Events: In the Sound Control Panel, go to the “Sounds” tab.
- Locate New Mail Notification: Scroll through the “Program Events” list to find “New Mail Notification”.
- Select a New Sound: Click on “New Mail Notification” and then choose a new sound from the “Sounds” dropdown menu. You can preview the sound by clicking the “Test” button.
Alt text: Selecting a new sound for new mail notifications in Windows 11.
- Apply Changes: Once you’ve selected your desired sound, click “Apply” and then “OK” to save your changes.
- Test the New Sound: Re-open Outlook and send yourself a test email to ensure the new notification sound is working correctly.
- Adjust Volume: If the sound is too loud or too quiet, adjust the volume using the volume slider in the Sound Control Panel or the system tray.
By following these steps, you can easily customize your Outlook notification sound in Windows 11, making your email experience more personalized and efficient.
4. Troubleshooting Common Sound Issues
Sometimes, you might encounter issues when trying to change or play notification sounds. Here are some common problems and their solutions:
- No Sound:
- Problem: No sound plays for any notifications.
- Solution:
- Check the volume mixer to ensure Outlook is not muted.
- Verify that the correct audio output device is selected.
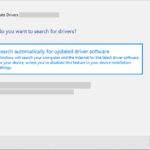
- Update your audio drivers.
- Ensure the “Play a sound” option is checked in Outlook settings.
- Incorrect Sound:
- Problem: The notification sound is not the one you selected.
- Solution:
- Double-check that you selected the correct sound in the Sound Control Panel.
- Restart your computer to ensure changes are applied.
- Verify that no other application is overriding the sound settings.
- Sound is Too Quiet:
- Problem: The notification sound is barely audible.
- Solution:
- Adjust the volume slider in the Sound Control Panel.
- Check the app-specific volume settings in Windows 11.
- Ensure your speakers or headphones are properly connected and functioning.
- Sound is Distorted:
- Problem: The notification sound is unclear or distorted.
- Solution:
- Try a different sound file to see if the issue persists.
- Update your audio drivers.
- Check your speaker or headphone connections for any issues.
- Outlook Muted in Volume Mixer:
- Problem: Outlook is muted in the volume mixer.
- Solution:
- Open the Volume Mixer by right-clicking the volume icon in the system tray.
- Find Outlook in the list of applications and ensure it is not muted.
- Adjust the volume slider for Outlook as needed.
- Conflicting Sound Schemes:
- Problem: Another sound scheme is overriding your custom notification sound.
- Solution:
- Go to the Sound Control Panel and select the “Sounds” tab.
- Choose “Windows Default” as the sound scheme and apply the changes.
- Then, re-select your custom notification sound for Outlook.
- Corrupted Sound File:
- Problem: The sound file you selected is corrupted.
- Solution:
- Try a different sound file.
- Download a new copy of the sound file from a reliable source.
- Ensure the sound file is in a supported format (.wav).
- Hardware Issues:
- Problem: There may be a problem with your speakers or sound card.
- Solution:
- Test your speakers or headphones with another device.
- Check your sound card drivers and update them if necessary.
- Consider replacing faulty hardware.
- Windows Update Issues:
- Problem: A recent Windows update may have caused sound issues.
- Solution:
- Check for and install any available updates.
- Roll back to a previous version of Windows if the issue persists.
- Third-Party Software Conflicts:
- Problem: Another application may be conflicting with Outlook’s sound settings.
- Solution:
- Close any unnecessary applications running in the background.
- Temporarily disable recently installed software to see if the issue resolves.
By systematically addressing these common issues, you can troubleshoot and resolve most sound-related problems in Windows 11 and ensure your Outlook notifications work perfectly.
5. Advanced Customization Options
For those who want to take their customization to the next level, here are some advanced options for managing notification sounds in Windows 11:
- Custom Sound Files: Use your own sound files (.wav format) for a truly unique notification.
- Third-Party Apps: Explore apps like “Ear Trumpet” for advanced volume control and sound routing.
- Registry Editor: Modify sound settings directly through the Registry Editor (use caution).
- PowerShell Scripts: Automate sound changes using PowerShell scripts.
- Focus Assist: Configure Focus Assist to manage notifications during specific times or activities.
- Sound Themes: Create and share custom sound themes with friends and colleagues.
- Equalizers: Use equalizers to fine-tune sound frequencies for optimal audio quality.
- Virtual Audio Cables: Route audio between applications using virtual audio cables.
- Command-Line Tools: Use command-line tools to control sound settings from the command prompt.
- Hardware Sound Cards: Invest in a high-quality sound card for superior audio performance.
6. Creating Custom Sound Files
One of the most exciting ways to personalize your Outlook notifications is by creating your own custom sound files. Here’s how you can do it:
- Choose a Sound Recorder: Use a sound recorder like Audacity (free), Adobe Audition, or even the built-in Voice Recorder in Windows 11.
- Record Your Sound: Record a short, distinct sound. It could be a snippet of your favorite song, a funny quote, or a custom jingle.
- Edit the Sound: Use the sound recorder to edit your sound. Trim it to the right length (2-3 seconds is ideal) and adjust the volume.
- Save as .wav: Save your sound file in the .wav format. This is the format that Windows uses for system sounds.
- Name Your Sound: Give your sound file a descriptive name so you can easily find it later.
- Move to Sounds Folder: Place your custom sound file in the Windows Sounds folder, usually located at
C:WindowsMedia. - Apply in Sound Settings: Follow the steps in Section 3 to select your custom sound file as the Outlook notification sound.
- Test the Sound: Send yourself a test email to ensure the custom sound is working correctly.
- Adjust Volume: Adjust the volume as needed to ensure the sound is audible but not too loud.
- Backup Your Sounds: Keep a backup of your custom sound files in case you need to reinstall Windows or move them to another computer.
By creating your own custom sound files, you can make your Outlook notifications truly unique and personal.
7. Integrating Street Sounds into Your Notifications
At streetsounds.net, we believe that sound is an integral part of our environment, and integrating street sounds into your notifications can add a unique and engaging dimension to your digital experience. Here’s how you can incorporate street sounds into your Outlook notifications:
- Explore the Streetsounds.net Library: Dive into our extensive library of high-quality street sounds, ranging from bustling cityscapes to tranquil nature sounds.
Alt text: A collection of urban city sound effects.
-
Select a Suitable Sound: Choose a sound that is both attention-grabbing and non-intrusive. Consider sounds like gentle rain, distant traffic, or subtle urban ambiance.
-
Download the Sound: Download the sound file in .wav format.
-
Edit the Sound: Use a sound editor to trim the sound to the appropriate length (2-3 seconds).
-
Save as .wav: Save the edited sound file in the Windows Sounds folder.
-
Apply in Sound Settings: Follow the steps in Section 3 to select the street sound as your Outlook notification sound.
-
Test the Sound: Send yourself a test email to ensure the street sound is working correctly.
-
Adjust Volume: Adjust the volume as needed to balance the sound with other system sounds.
-
Experiment with Different Sounds: Try different street sounds to find the perfect one that suits your personal taste and enhances your digital environment.
By integrating street sounds into your Outlook notifications, you can create a more immersive and engaging computing experience that connects you to the world around you.
8. The Psychology of Notification Sounds
The sounds we hear every day have a profound impact on our mood, focus, and overall well-being. Notification sounds are no exception. Understanding the psychology of notification sounds can help you choose the right sounds to optimize your productivity and reduce stress. Here are some key considerations:
-
Attention-Grabbing: Notification sounds should be attention-grabbing enough to alert you to new messages or events.
-
Non-Intrusive: However, they should not be so loud or jarring that they disrupt your focus or cause anxiety.
-
Pleasantness: Choose sounds that you find pleasant and enjoyable. This can help reduce stress and improve your overall mood.
-
Distinctiveness: Use unique sounds that distinguish Outlook notifications from other alerts.
-
Contextual Relevance: Consider using different sounds for different types of notifications to provide contextual awareness.
-
Volume Level: Adjust the volume to a comfortable level that is audible but not overwhelming.
-
Frequency: Be mindful of how often you receive notifications. Too many notifications can lead to alert fatigue and reduced productivity.
-
Personal Preference: Ultimately, the best notification sounds are those that align with your personal preferences and work style.
-
Cultural Associations: Be aware of any cultural associations or meanings that certain sounds may have.
-
Experimentation: Don’t be afraid to experiment with different sounds to find the perfect balance between attention-grabbing and non-intrusive.
By understanding the psychology of notification sounds, you can make informed choices that enhance your digital experience and improve your overall well-being.
9. Best Practices for Managing Outlook Notifications
Managing Outlook notifications effectively is essential for staying productive and avoiding distractions. Here are some best practices to help you optimize your notification settings:
-
Prioritize Notifications: Determine which notifications are most important to you and customize your settings accordingly.
-
Disable Non-Essential Notifications: Turn off notifications for less important emails or events to reduce distractions.
-
Use Rules and Filters: Create rules and filters to automatically sort incoming emails and prioritize notifications based on sender, subject, or content.
-
Schedule Notification Breaks: Set aside specific times during the day to check your email and respond to notifications.
-
Use Focus Assist: Take advantage of Focus Assist in Windows 11 to manage notifications during specific activities or times.
-
Customize Sound Alerts: Choose unique and distinct sound alerts for different types of notifications.
-
Adjust Volume Levels: Adjust the volume of notifications to a comfortable level that is audible but not overwhelming.
-
Use Visual Alerts: Consider using visual alerts, such as desktop notifications or taskbar badges, in addition to sound alerts.
-
Monitor Notification Frequency: Keep track of how often you receive notifications and adjust your settings as needed.
-
Stay Organized: Keep your inbox organized by deleting or archiving emails once you have responded to them.
By following these best practices, you can manage your Outlook notifications effectively and stay productive without being overwhelmed by distractions.
10. Resources for Finding Unique Sound Effects
Finding the perfect sound effect for your Outlook notifications can be a fun and creative process. Here are some resources where you can find unique and high-quality sound effects:
- Streetsounds.net: Explore our extensive library of street sounds and urban ambiance.
- Freesound.org: A collaborative database of Creative Commons Licensed sounds.
- Zapsplat.com: Offers a wide variety of free and premium sound effects.
- SoundBible.com: Features royalty-free sound clips and effects.
- 99Sounds.org: Provides free sound effects and sample packs.
- BBC Sound Effects: A vast archive of sound effects from the BBC.
- Adobe Audition Sound Effects: A collection of sound effects included with Adobe Audition.
- Epidemic Sound: Offers a subscription-based library of high-quality sound effects and music.
- AudioJungle: A marketplace for royalty-free audio tracks and sound effects.
- YouTube Audio Library: Provides free music and sound effects for YouTube creators.
When choosing sound effects, be sure to consider factors such as quality, relevance, and licensing terms. Look for sounds that are well-recorded, professionally edited, and free from copyright restrictions.
11. How to Reset to Default Notification Sounds
If you ever want to revert to the default notification sounds in Windows 11, follow these steps:
- Open Sound Settings: Right-click on the volume icon in the system tray and select “Sound settings”.
- More Sound Settings: Click on “More Sound Settings” under the Related Content section.
- Sounds Tab: In the Sound Control Panel, go to the “Sounds” tab.
- Sound Scheme: Select “Windows Default” from the “Sound Scheme” dropdown menu.
- Apply Changes: Click “Apply” and then “OK” to save your changes.
This will reset all of your system sounds, including the Outlook notification sound, to the default Windows settings.
12. Using Focus Assist to Manage Notifications
Focus Assist is a feature in Windows 11 that helps you minimize distractions and stay focused on your work. Here’s how you can use it to manage Outlook notifications:
- Open Settings: Press the Windows key and click on the Settings icon.
- System: Select “System” from the Settings menu.
- Focus Assist: Click on “Focus Assist” in the left sidebar.
- Choose a Mode: Select one of the following modes:
- Off: Receive all notifications as normal.
- Priority Only: See only selected notifications. You can customize your priority list by clicking “Customize your priority list”.
- Alarms Only: Hide all notifications except alarms.
- Automatic Rules: Configure automatic rules to enable Focus Assist during specific times or activities. For example, you can set it to turn on automatically when you are duplicating your display or playing a game.
By using Focus Assist, you can manage Outlook notifications effectively and stay productive without being interrupted by distractions.
13. Creating Different Notification Sounds for Different Senders
Outlook allows you to create different notification sounds for different senders, helping you prioritize important emails. Here’s how you can do it:
- Open Outlook: Launch the Outlook application on your Windows 11 system.
- Rules and Alerts: Click on the “File” tab, then “Manage Rules & Alerts”.
Alt text: Managing rules and alerts in Outlook for personalized notification settings.
- New Rule: In the Rules and Alerts window, click on “New Rule”.
- Start from a Blank Rule: Under “Start from a blank rule”, select “Apply rule on messages I receive” and click “Next”.
- Specify Conditions: Specify the conditions for the rule. For example, you can choose “from people or public group” and select the sender from your contacts. Click “Next”.
- Specify Actions: Under “What do you want to do with the message?”, select “play a sound”.
- Select a Sound: Click on “a sound” and choose a sound file from the list. You can also click “Browse” to select a custom sound file.
- Exceptions: Add any exceptions to the rule if necessary and click “Next”.
- Name the Rule: Give your rule a descriptive name and click “Finish”.
Now, whenever you receive an email from the specified sender, Outlook will play the selected sound.
14. Using Third-Party Apps for Enhanced Sound Control
For advanced sound control and customization options, consider using third-party apps. Here are some popular choices:
- Ear Trumpet: A modern volume control app for Windows.
- Sound Volume View: A utility for managing volume levels for different applications.
- Equalizer APO: A system-wide equalizer for fine-tuning sound frequencies.
- Voicemeeter: A virtual audio mixer for advanced sound routing.
- Boom 3D: An audio enhancer with customizable equalizer settings.
These apps offer features such as per-app volume control, sound routing, equalizers, and audio enhancements, allowing you to customize your sound experience to your exact preferences.
15. The Future of Sound Customization in Windows
As technology evolves, the future of sound customization in Windows looks promising. Here are some potential developments:
-
AI-Powered Sound Management: AI algorithms could automatically adjust sound levels and notification sounds based on your activity and environment.
-
Adaptive Soundscapes: Windows could create adaptive soundscapes that change based on the time of day, your location, or your mood.
-
Spatial Audio Enhancements: Spatial audio technology could become more immersive and customizable, providing a more realistic sound experience.
-
Integration with Smart Home Devices: Windows could integrate with smart home devices to control sound settings throughout your home.
-
Voice Control: Voice control could be used to manage sound settings and create custom sound profiles.
-
Advanced Equalization: More advanced equalization tools could allow you to fine-tune sound frequencies with greater precision.
-
Personalized Sound Profiles: Windows could create personalized sound profiles based on your hearing abilities and preferences.
-
Haptic Feedback: Haptic feedback could be integrated with sound notifications to provide a more tactile experience.
-
Accessibility Enhancements: More advanced accessibility features could be developed to support users with hearing impairments.
-
Cloud-Based Sound Libraries: Cloud-based sound libraries could provide access to a vast collection of sound effects and music.
These advancements could transform the way we experience sound in Windows, making it more personalized, immersive, and adaptive to our needs.
FAQ: Changing Outlook Notification Sound in Windows 11
-
Q1: How do I change the default notification sound in Windows 11?
You can change the default notification sound in Windows 11 through the Sound Control Panel. Go to Sound Settings, click on “More Sound Settings,” navigate to the “Sounds” tab, select “Notification,” and choose a new sound from the dropdown menu.
-
Q2: Can I use a custom sound for Outlook notifications?
Yes, you can use a custom sound for Outlook notifications. Save your sound file in .wav format, place it in the Windows Sounds folder (C:WindowsMedia), and then select it in the Sound Control Panel.
-
Q3: Why is my Outlook notification sound not working?
If your Outlook notification sound is not working, check the volume mixer to ensure Outlook is not muted, verify that the correct audio output device is selected, update your audio drivers, and ensure the “Play a sound” option is checked in Outlook settings.
-
Q4: How do I change the notification sound for different senders in Outlook?
You can create different notification sounds for different senders in Outlook by creating rules and alerts. Go to File > Manage Rules & Alerts, create a new rule, specify the sender as a condition, and select “play a sound” as the action.
-
Q5: Can I disable Outlook notifications altogether?
Yes, you can disable Outlook notifications altogether by unchecking the “Play a sound” option in Outlook settings under Mail > Message Arrival.
-
Q6: How do I adjust the volume of Outlook notifications?
You can adjust the volume of Outlook notifications through the volume slider in the Sound Control Panel or the app-specific volume settings in Windows 11.
-
Q7: What is Focus Assist and how can it help manage Outlook notifications?
Focus Assist is a feature in Windows 11 that helps you minimize distractions and stay focused on your work. You can configure it to hide all notifications except alarms or prioritize certain notifications.
-
Q8: How do I reset to the default notification sounds in Windows 11?
To reset to the default notification sounds, go to the Sound Control Panel, select the “Sounds” tab, choose “Windows Default” from the “Sound Scheme” dropdown menu, and apply the changes.
-
Q9: Can I use third-party apps for enhanced sound control in Windows 11?
Yes, you can use third-party apps like Ear Trumpet, Sound Volume View, or Equalizer APO for enhanced sound control and customization options.
-
Q10: How do I troubleshoot sound distortion issues with Outlook notifications?
To troubleshoot sound distortion issues, try a different sound file, update your audio drivers, and check your speaker or headphone connections for any issues.
Ready to take your audio customization to the next level? Visit streetsounds.net today to explore our vast library of street sounds and urban ambiance, and start creating a truly unique and personalized notification experience.