
Recording sound on your computer doesn’t have to be a headache. With the right tools and techniques, capturing high-quality audio is within everyone’s reach. streetsounds.net provides the resources and guidance to master computer audio recording. Ready to elevate your audio projects? Discover the world of soundscapes, audio engineering, and acoustic samples, and find the best audio capture methods.
1. What is the Simplest Way to Record Sound on a PC Using Windows Sound Recorder?
The simplest way to record sound on a PC is by using the built-in Sound Recorder (or Voice Recorder in newer versions) app. This tool is ideal for basic audio capture tasks, such as quick voice notes or simple recordings.
Here’s how to use it:
1.1. Accessing the Sound Recorder App
To access the Sound Recorder app:
- Click on the “Start Menu.”
- Type “Sound Recorder” or “Voice Recorder” in the search box.
- Select the app from the search results.
This will open the app, ready for recording.
1.2. Setting Up Your Recording Device
Before you hit record, ensure that your preferred recording device is selected:
- Right-click on the speaker icon in the system tray (usually in the bottom right corner of your screen).
- Select “Open Sound settings”.
- In the Sound settings, click on “Input” and choose the appropriate microphone or input device from the dropdown menu.
Selecting the right device ensures that you capture audio from the intended source, whether it’s an external microphone or your computer’s internal microphone.
1.3. Initiating a Recording
Once your device is set:
- Click the “Record” button (usually a microphone icon) in the Sound Recorder app.
- The app will immediately start capturing sound. A timer will indicate the duration of your recording.
1.4. Concluding a Recording
To stop recording:
- Click the “Stop” button (usually a square icon) in the Sound Recorder app.
- The recording will be automatically saved.
1.5. Saving Your Audio File
After stopping the recording:
- A dialog box will appear, prompting you to name and save your audio file.
- Choose a location on your computer to save the file and give it a descriptive name.
- Click “Save” to store the recording.
Once saved, you can easily locate and play back your audio file. If needed, use audio editing software for enhancements.
2. How Can Camtasia Be Used to Record System Audio for Professional Projects?
Camtasia is an excellent choice for recording system audio for professional projects due to its advanced features and capabilities. It allows you to capture high-quality audio directly from your computer, along with video, making it ideal for tutorials, presentations, and demonstrations.
2.1. Camtasia Overview
Camtasia is a comprehensive video editing and screen recording software suite that includes robust audio recording capabilities. It’s designed for users who need to create professional-quality videos with synchronized audio.
2.2. Setting Up Audio Recording in Camtasia
- Launch Camtasia: Open the Camtasia application on your computer.
- Select Recording Options:
- Click on the “Record” button to open the Camtasia Recorder.
- In the recorder window, you’ll see options for both video and audio recording.
- Configure Audio Input:
- Under the audio section, ensure that “Record System Audio” is selected. This option captures the sound played through your computer’s speakers.
- You can also select a specific microphone if you want to record narration or other external audio simultaneously.
- Adjust Audio Levels:
- Use the audio level meter to monitor the input volume. Adjust the levels to ensure that the audio is neither too quiet nor distorted.
2.3. Initiating a Recording
- Start Recording: Click the “Record” button (usually a red circle) in the Camtasia Recorder.
- Screen and Audio Capture: Camtasia will begin capturing both audio and video from your screen, if selected. A countdown timer will indicate when the recording starts.
2.4. Concluding a Recording
- Stop Recording: When you’ve captured the necessary audio and video, click the “Stop” button in the Camtasia Recorder. Alternatively, you can use the keyboard shortcut (usually F9 or Esc).
- Automatic Import: Camtasia automatically imports the recorded media into the Camtasia Editor.
2.5. Saving and Editing the File
- Edit the Recording: In the Camtasia Editor, you can review and edit the recorded audio and video. Trim unwanted sections, adjust audio levels, add effects, and synchronize the audio with the video.
- Export the File:
- Once you’re satisfied with the edits, click on the “Export” button.
- Choose the desired file format (e.g., MP4, MOV, AVI) and settings (e.g., resolution, frame rate, audio quality).
- Specify a location on your computer to save the exported file.
- Click “Export” to save the final version of your recording.
Using Camtasia provides a professional and efficient way to record system audio, especially when combined with screen recording for tutorials and presentations. Its editing capabilities allow for further refinement, ensuring a high-quality final product.
 A image showing the user interface for the recorder in camtasia
3. What Steps Are Involved in Recording System Audio on Windows Using WASAPI?
Recording system audio on Windows using WASAPI (Windows Audio Session API) offers a method to capture high-quality sound directly from your system without external noise. This is particularly useful when you want to record audio from applications or system processes.
3.1. Understanding WASAPI
WASAPI is a Windows API that allows applications to communicate directly with audio devices, bypassing some of the layers that can introduce noise or latency. By using WASAPI, you can achieve a cleaner and more accurate recording of system audio.
3.2. Required Tools
To record system audio using WASAPI, you will need:
- Audio Recording Software: Audacity is a popular, free, open-source audio editing and recording software that supports WASAPI.
- Windows Operating System: WASAPI is a Windows-specific API, so you’ll need a Windows-based computer.
3.3. Configuring Audacity for WASAPI
- Install Audacity: Download and install Audacity from the official website.
- Open Audacity: Launch the Audacity application.
- Select WASAPI Host:
- In Audacity, go to the “Audio Host” dropdown menu (usually located near the top-left of the window).
- Select “Windows WASAPI” as the audio host.
- Choose Recording Device:
- In the “Recording Device” dropdown menu, select the appropriate loopback device. This is often labeled as “default” or “speakers.” The loopback device captures the audio that is being outputted by your system.
- Configure Channels:
- Set the number of recording channels (e.g., stereo or mono) according to your needs. Stereo is typically used for music and general audio, while mono may be suitable for voice recording.
3.4. Recording System Audio
- Start Recording: Click the “Record” button in Audacity to begin recording.
- Play System Audio: Play the audio you want to record from your system (e.g., a YouTube video, a music file, or an application’s audio output).
- Monitor Levels: Watch the audio level meters in Audacity to ensure that the recording level is appropriate. Adjust the system volume or Audacity’s input level as needed to avoid clipping (distortion).
3.5. Stopping and Saving the Recording
- Stop Recording: Click the “Stop” button in Audacity to stop the recording.
- Edit the Audio: You can now edit the recorded audio in Audacity. This includes trimming, noise reduction, equalization, and other audio processing tasks.
- Export the Audio:
- Go to “File” > “Export” and choose the desired audio format (e.g., MP3, WAV, FLAC).
- Specify the file name, location, and quality settings.
- Click “Save” to export the audio file.
By using WASAPI with Audacity, you can capture high-quality system audio with minimal noise and distortion. This method is particularly useful for recording audio from applications, streaming services, and other system outputs.
4. What Are Some Essential Tips to Improve Sound Quality When Recording Computer Audio?
Improving sound quality when recording computer audio involves several key steps, from selecting the right equipment to optimizing your recording environment. Here are essential tips to ensure your audio recordings are crisp, clear, and professional.
4.1. Choosing the Right Equipment
- Microphone:
- USB Microphones: Opt for a high-quality USB microphone designed for recording. These microphones offer better sound quality compared to built-in computer microphones. Brands like Blue Yeti, Rode, and Audio-Technica are popular choices.
- XLR Microphones: For professional-grade recording, consider an XLR microphone paired with an audio interface. XLR microphones provide superior sound quality and flexibility.
- Headphones:
- Closed-Back Headphones: Use closed-back headphones to monitor your audio while recording. These headphones prevent sound from bleeding into the microphone, ensuring a cleaner recording.
- Audio Interface (for XLR Microphones):
- An audio interface connects your XLR microphone to your computer. It provides phantom power (if needed), preamps, and high-quality analog-to-digital conversion. Popular interfaces include Focusrite Scarlett, PreSonus AudioBox, and Universal Audio Apollo.
4.2. Optimizing Your Recording Environment
- Acoustic Treatment:
- Minimize Echo and Reverberation: Record in a quiet room with minimal echo. Use acoustic panels, foam, or heavy blankets to absorb sound reflections.
- DIY Solutions: If you don’t have access to professional acoustic treatment, use everyday items like bookshelves, curtains, and rugs to dampen sound.
- Reduce Background Noise:
- Quiet Space: Choose a room away from external noise sources like traffic, appliances, and other people.
- Turn Off Noisy Equipment: Turn off or move any noisy equipment, such as fans, air conditioners, and computers, if possible.
- Microphone Placement:
- Proximity: Position the microphone close to the sound source (e.g., your mouth) but not too close to avoid popping sounds.
- Angle: Experiment with the microphone angle to find the optimal position that captures your voice clearly without unwanted noise.
4.3. Configuring Software Settings
- Sample Rate and Bit Depth:
- Sample Rate: Set the sample rate to 44.1 kHz or 48 kHz for most applications. Higher sample rates (e.g., 96 kHz) are suitable for professional audio production but require more processing power.
- Bit Depth: Use a bit depth of 16-bit or 24-bit. 24-bit provides better dynamic range and is recommended for high-quality recordings.
- Input Levels:
- Adjust Gain: Set the input gain on your microphone or audio interface to a level where the loudest parts of your audio reach around -6dB to -3dB on the level meter. This prevents clipping (distortion) while maintaining a good signal-to-noise ratio.
- Noise Reduction:
- Software Noise Reduction: Use noise reduction plugins or tools in your audio recording software to reduce background noise. Be careful not to overdo it, as excessive noise reduction can degrade the audio quality.
- Pop Filter and Windscreen:
- Pop Filter: Use a pop filter in front of the microphone to reduce plosive sounds (e.g., “p” and “b” sounds).
- Windscreen: If recording outdoors or in a windy environment, use a windscreen to minimize wind noise.
4.4. Monitoring and Testing
- Test Recordings:
- Short Tests: Before recording your final content, make several short test recordings to check the audio quality. Listen back to these recordings to identify and address any issues.
- Headphone Monitoring:
- Real-Time Monitoring: Monitor your audio in real-time using headphones. This allows you to hear any problems (e.g., noise, distortion, or incorrect levels) as they occur and make adjustments accordingly.
- Level Adjustment:
- Dynamic Range: Ensure that your audio has a good dynamic range without clipping. Adjust the microphone gain and your distance from the microphone to achieve the desired sound.
By following these tips, you can significantly improve the sound quality of your computer audio recordings, resulting in professional and polished audio content.
5. What Additional Tools are Available for Recording Audio on Windows?
Besides the built-in Sound Recorder and advanced software like Camtasia and Audacity, several additional tools can enhance your audio recording capabilities on Windows. Each tool offers unique features and benefits, catering to different recording needs.
5.1. Snagit for Quick Captures
Snagit is a versatile screen capture tool that also offers audio recording capabilities. While primarily known for its ability to capture screenshots and screen recordings, Snagit can also record audio, making it a convenient option for quick audio grabs.
5.1.1. Key Features of Snagit
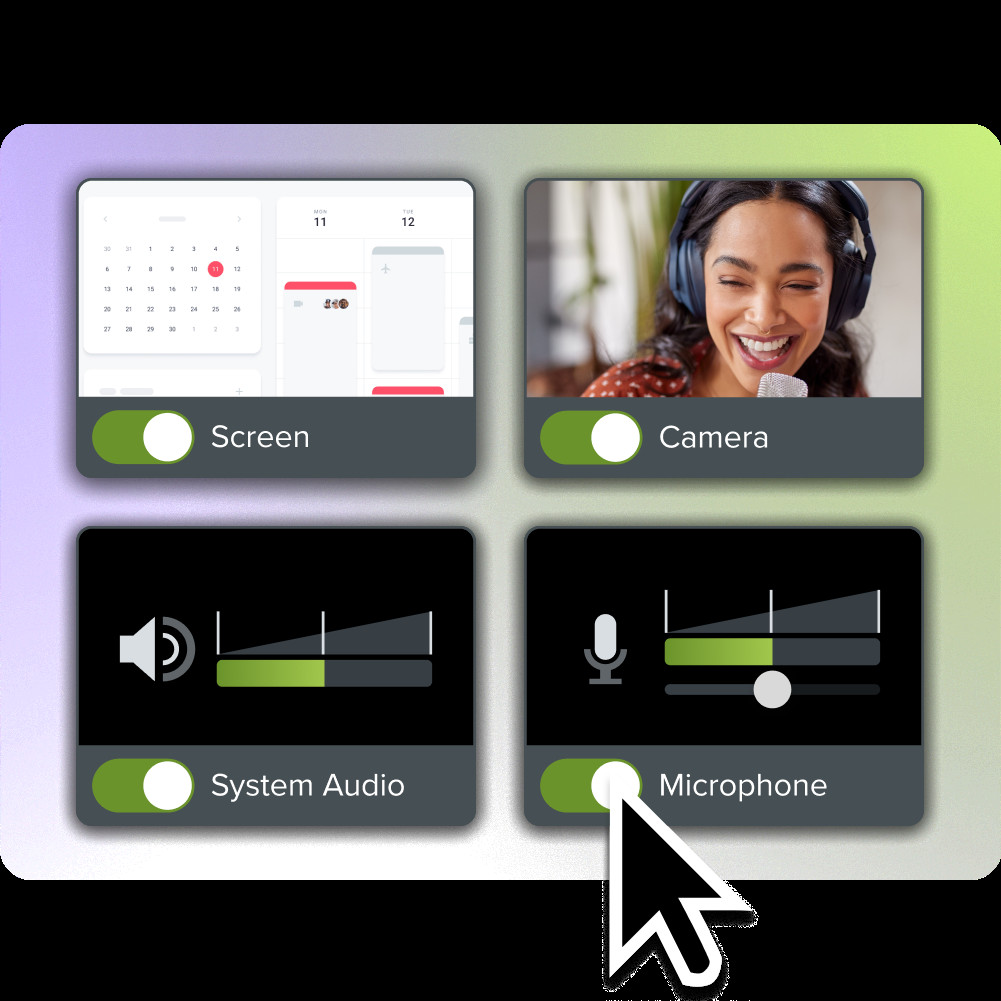
- Screen Recording with Audio: Snagit allows you to record video and audio simultaneously, making it ideal for creating tutorials, presentations, and quick demonstrations.
- System Audio Recording: You can record system audio along with your screen activity, capturing sound from applications, websites, and other sources.
- Microphone Recording: Snagit also supports microphone recording, allowing you to add narration or voiceovers to your screen recordings.
- Easy-to-Use Interface: Snagit features a user-friendly interface, making it simple for beginners to start recording audio and video quickly.
5.1.2. How to Record Audio with Snagit
- Launch Snagit: Open the Snagit application on your computer.
- Select Recording Options:
- In the Snagit capture window, choose the “Video” tab.
- Ensure that the “Record microphone” and/or “Record system audio” options are enabled, depending on your recording needs.
- Start Recording:
- Click the “Capture” button to start recording.
- Select the area of the screen you want to record, or choose to record the entire screen.
- Stop Recording:
- Click the “Stop” button to stop recording.
- Snagit will automatically open the recording in the Snagit Editor.
- Edit and Save:
- In the Snagit Editor, you can trim the recording, add annotations, and make other edits.
- Save the recording to your computer in a variety of formats, such as MP4.
5.2. Dedicated Audio Recording Programs
For more advanced audio editing and features, dedicated audio recording programs like Audacity and Adobe Audition are excellent choices. These tools offer a wide range of capabilities for capturing, editing, and enhancing audio.
5.2.1. Audacity
Audacity is a free, open-source audio editing and recording software that provides a comprehensive set of tools for working with audio.
- Key Features:
- Multi-Track Recording: Audacity allows you to record multiple audio tracks simultaneously, making it ideal for recording music, podcasts, and other complex audio projects.
- Audio Editing Tools: Audacity offers a wide range of editing tools, including trimming, cutting, copying, pasting, and mixing audio.
- Effects and Filters: You can apply various effects and filters to your audio, such as noise reduction, equalization, compression, and reverb.
- Format Support: Audacity supports a wide range of audio formats, including MP3, WAV, FLAC, and Ogg Vorbis.
- Plugins: Audacity supports plugins, allowing you to extend its functionality with additional effects and tools.
5.2.2. Adobe Audition
Adobe Audition is a professional-grade audio editing and production software that offers advanced features and capabilities for working with audio.
- Key Features:
- Multi-Track Recording and Mixing: Adobe Audition provides advanced multi-track recording and mixing capabilities, allowing you to create complex audio projects with ease.
- Audio Restoration: Audition includes powerful audio restoration tools for removing noise, clicks, pops, and other unwanted artifacts from your audio.
- Effects and Processing: Audition offers a wide range of effects and processing tools, including equalization, compression, reverb, and more.
- Integration with Adobe Creative Cloud: Audition integrates seamlessly with other Adobe Creative Cloud applications, such as Premiere Pro and After Effects.
- Advanced Analysis Tools: Audition includes advanced analysis tools for measuring audio levels, frequency content, and other parameters.
5.3. Other Notable Tools
- WavePad: WavePad is a free audio editing software that offers a range of features for recording, editing, and enhancing audio.
- Ocenaudio: Ocenaudio is a cross-platform audio editor that is easy to use and offers a variety of features for recording and editing audio.
- Ardour: Ardour is a digital audio workstation (DAW) that provides advanced features for recording, mixing, and mastering audio.
By exploring these additional tools, you can find the perfect solution for your audio recording needs, whether you require quick captures, advanced editing capabilities, or professional-grade features.
Annotate and edit screenshots with Snagit
Professional mark-up tools and powerful features make it easy to create helpful images.
Try it Free
 Screenshot of a document about puffin migration patterns with a section for changing styles highlighted.
6. What is the Role of Streetsounds.net in Enhancing Audio Recording for Enthusiasts and Professionals?
streetsounds.net plays a pivotal role in enhancing audio recording for both enthusiasts and professionals by providing a comprehensive platform that offers high-quality sound libraries, expert guidance, and a vibrant community.
6.1. Premium Sound Libraries
streetsounds.net offers an extensive collection of high-quality sound effects and audio samples, catering specifically to the needs of audio professionals, filmmakers, musicians, and sound enthusiasts.
- Diverse Range of Sounds: The platform features a diverse range of sounds, including urban ambiences, specific street sounds, vehicle noises, human vocalizations, and more. This allows users to find the perfect sound elements for their projects, whether they’re creating a realistic urban soundscape or adding unique sonic textures to their music.
- High-Quality Recordings: All sounds on streetsounds.net are professionally recorded and curated to ensure the highest quality. The recordings are made using high-end equipment and techniques to capture the nuances and details of each sound.
- Royalty-Free Licensing: streetsounds.net offers royalty-free licensing for its sound libraries, giving users the freedom to use the sounds in their projects without worrying about additional fees or restrictions. This is particularly beneficial for commercial projects and independent creators.
6.2. Expert Guidance and Tutorials
streetsounds.net provides expert guidance and tutorials to help users improve their audio recording skills and techniques.
- Comprehensive Articles: The platform features a wealth of articles covering various aspects of audio recording, from basic microphone techniques to advanced audio editing and mixing. These articles are written by experienced audio professionals and are designed to be informative and accessible to users of all skill levels.
- Step-by-Step Tutorials: streetsounds.net offers step-by-step tutorials that guide users through specific audio recording tasks, such as recording system audio, capturing ambient sounds, and creating sound effects. These tutorials include detailed instructions, screenshots, and video demonstrations to help users master the techniques.
- Tips and Tricks: The platform shares valuable tips and tricks for improving sound quality, reducing noise, and optimizing recording environments. These tips are based on real-world experience and can help users overcome common challenges in audio recording.
6.3. Community Engagement and Collaboration
streetsounds.net fosters a vibrant community of audio enthusiasts and professionals, providing a platform for collaboration, knowledge sharing, and inspiration.
- Forums and Discussions: The platform hosts forums and discussion boards where users can connect with each other, ask questions, share their experiences, and exchange ideas. These forums provide a supportive environment for learning and growth.
- User Showcases: streetsounds.net features user showcases that highlight the creative projects of its community members. This provides an opportunity for users to showcase their work, gain recognition, and inspire others.
- Collaborative Projects: The platform facilitates collaborative projects, allowing users to work together on audio recordings, sound designs, and other creative endeavors. This promotes teamwork, innovation, and the sharing of expertise.
6.4. Resources for Sound Design
streetsounds.net offers a range of resources specifically tailored for sound design, helping users create immersive and compelling audio experiences.
- Sound Effects Libraries: The platform provides curated sound effects libraries that are organized by category and theme, making it easy for users to find the sounds they need for their projects. These libraries include a wide variety of sound effects, from common everyday sounds to unique and specialized sounds.
- Ambient Sound Collections: streetsounds.net offers ambient sound collections that capture the atmosphere and ambience of various environments, such as cities, forests, and interiors. These collections are perfect for creating realistic and immersive soundscapes.
- Tools and Software Recommendations: The platform recommends various tools and software for sound design, helping users choose the right equipment and software for their needs. These recommendations are based on expert reviews and user feedback.
By providing these resources, streetsounds.net empowers audio enthusiasts and professionals to create high-quality audio recordings, sound designs, and multimedia projects. Whether you’re a beginner or an experienced audio professional, streetsounds.net offers the tools, knowledge, and community support you need to succeed.
7. How Do You Choose the Right Recording Device for Capturing Sound on a Computer?
Choosing the right recording device for capturing sound on your computer depends on several factors, including your budget, the type of audio you want to record, and the desired quality. Here’s a guide to help you make the best choice.
7.1. Understanding Your Recording Needs
Before you start looking at specific devices, consider what you’ll be recording:
- Voice Recording: If you primarily need to record your voice for podcasts, voiceovers, or online meetings, a good quality USB microphone or a headset with a microphone might be sufficient.
- Music Recording: For recording instruments or vocals for music production, you’ll need a more sophisticated setup, including a high-quality microphone, an audio interface, and potentially a preamp.
- Ambient Sounds: Capturing environmental sounds requires a microphone with good sensitivity and a low noise floor to pick up subtle details.
- System Audio: Recording audio playing on your computer (e.g., from a game or streaming service) requires a device or software that can capture internal audio streams.
7.2. Types of Recording Devices
7.2.1. Built-in Microphones
- Pros: Convenient, no additional cost, readily available on laptops and some desktops.
- Cons: Generally low quality, prone to picking up background noise, limited frequency response.
- Best For: Casual use, quick voice notes, or situations where convenience is more important than quality.
7.2.2. USB Microphones
- Pros: Easy to set up, good sound quality for the price, direct connection to your computer via USB, often includes headphone output for monitoring.
- Cons: Sound quality may not match dedicated XLR microphones, limited flexibility compared to an audio interface setup.
- Best For: Podcasting, voiceovers, streaming, and recording vocals or instruments directly into your computer.
7.2.3. XLR Microphones with Audio Interfaces
- Pros: Excellent sound quality, wide range of microphone options, flexible setup with preamps and audio processing, professional-grade recording.
- Cons: More expensive than USB microphones, requires an audio interface, can be more complex to set up.
- Best For: Professional music recording, high-quality voiceovers, and any situation where sound quality is paramount.
7.2.4. Headsets with Microphones
- Pros: Convenient for communication, microphone positioned close to the mouth, often includes noise-canceling features.
- Cons: Sound quality may not be as good as dedicated microphones, can be uncomfortable for long recording sessions.
- Best For: Online meetings, gaming, voice chat, and situations where clear communication is essential.
7.3. Key Features to Consider
- Sound Quality: Look for microphones with a wide frequency response, low self-noise, and good sensitivity. Read reviews and listen to sample recordings to assess the sound quality.
- Polar Pattern: The polar pattern of a microphone determines its directionality.
- Cardioid: Picks up sound primarily from the front, rejecting sound from the rear and sides. Best for recording a single sound source in a noisy environment.
- Omnidirectional: Picks up sound equally from all directions. Best for recording ambient sounds or multiple sound sources.
- Bidirectional: Picks up sound from the front and rear, rejecting sound from the sides. Best for recording interviews or duets.
- Connectivity: Ensure the microphone is compatible with your computer and recording setup. USB microphones are plug-and-play, while XLR microphones require an audio interface.
- Software Compatibility: Check that the microphone is compatible with your recording software and operating system. Most USB and XLR microphones are compatible with popular DAWs and recording programs.
- Budget: Set a budget and stick to it. There are good quality microphones available at various price points, so you can find something that meets your needs without breaking the bank.
7.4. Recommendations
- Budget Option (Under $100): Blue Snowball Ice (USB microphone), Samson Go Mic (USB microphone).
- Mid-Range Option ($100 – $300): Rode NT-USB+ (USB microphone), Audio-Technica AT2020 (XLR microphone with a Focusrite Scarlett Solo audio interface).
- High-End Option ($300+): Rode NT1-A (XLR microphone with a Universal Audio Apollo Twin audio interface), Shure SM7B (XLR microphone with a Cloudlifter CL-1 preamp and audio interface).
By carefully considering your recording needs, exploring the different types of recording devices, and evaluating key features, you can choose the right microphone for capturing sound on your computer and achieve professional-quality results.
8. What is the Optimal Recording Environment for Capturing Clean Sound?
Creating an optimal recording environment is crucial for capturing clean and professional-sounding audio. The environment in which you record can significantly impact the quality of your recordings, and by taking steps to minimize noise and reduce reflections, you can achieve much better results.
8.1. Understanding Acoustic Principles
Before setting up your recording environment, it’s important to understand some basic acoustic principles:
- Sound Reflection: Sound waves bounce off hard surfaces, creating reflections that can muddy your recordings. These reflections can result in comb filtering, phase issues, and a general loss of clarity.
- Sound Absorption: Soft, porous materials absorb sound waves, reducing reflections and reverberation.
- Diffusion: Diffusers scatter sound waves in different directions, creating a more even and natural sound field.
- Noise Isolation: Preventing external noise from entering your recording space is essential for capturing clean audio.
8.2. Choosing the Right Room
- Size and Shape: Smaller rooms generally have fewer reflections than larger rooms. Rooms with irregular shapes can help to diffuse sound waves more effectively.
- Location: Choose a room that is away from external noise sources, such as traffic, construction, and noisy appliances.
8.3. Minimizing Noise
- Identify Noise Sources: Identify and eliminate or minimize any sources of noise in your recording environment, such as computers, fans, air conditioners, and fluorescent lights.
- Turn Off Appliances: Turn off any unnecessary appliances or equipment that may generate noise, such as refrigerators, washing machines, and dryers.
- Use Noise Isolation Techniques: Use noise isolation techniques to prevent external noise from entering your recording space. This may include sealing windows and doors, using weather stripping, and adding mass-loaded vinyl to walls.
8.4. Acoustic Treatment
Acoustic treatment involves using materials to absorb, reflect, or diffuse sound waves, thereby improving the acoustic properties of your recording environment.
- Absorption:
- Acoustic Panels: Install acoustic panels on walls and ceilings to absorb sound reflections and reduce reverberation.
- Bass Traps: Place bass traps in corners to absorb low-frequency sound waves, which tend to accumulate in corners.
- DIY Solutions: If you don’t have access to professional acoustic treatment, use everyday items like heavy blankets, curtains, and pillows to absorb sound.
- Diffusion:
- Diffusers: Install diffusers on walls and ceilings to scatter sound waves and create a more even and natural sound field.
- Bookshelves: Bookshelves filled with books can act as effective diffusers, scattering sound waves in different directions.
8.5. Microphone Placement
- Proximity: Position the microphone close to the sound source to capture a strong and direct signal. However, be careful not to get too close, as this can result in proximity effect (an increase in low-frequency response).
- Angle: Experiment with the microphone angle to find the optimal position that captures your voice or instrument clearly without unwanted noise or reflections.
- Pop Filter: Use a pop filter in front of the microphone to reduce plosive sounds (e.g., “p” and “b” sounds).
- Shock Mount: Use a shock mount to isolate the microphone from vibrations and reduce handling noise.
8.6. Testing and Evaluation
- Test Recordings: Make several test recordings in your recording environment to evaluate the sound quality. Listen back to these recordings critically and identify any issues, such as noise, reflections, or comb filtering.
- Adjustments: Make adjustments to your recording environment based on your test recordings. This may include repositioning microphones, adding or removing acoustic treatment, and addressing noise sources.
By following these guidelines, you can create an optimal recording environment for capturing clean and professional-sounding audio. A well-treated recording environment can significantly improve the quality of your recordings and help you achieve your desired sound.
9. How Can You Use Audio Editing Software to Enhance Recorded Sound?
Audio editing software is an invaluable tool for enhancing recorded sound, allowing you to clean up imperfections, refine your audio, and achieve a professional-quality finish. Whether you’re working on a podcast, music track, voiceover, or any other audio project, mastering the basics of audio editing can significantly improve your results.
9.1. Selecting Audio Editing Software
There are many audio editing software options available, ranging from free open-source programs to professional-grade DAWs (Digital Audio Workstations). Here are a few popular choices:
- Audacity (Free): A powerful and versatile open-source audio editor with a wide range of features.
- GarageBand (Free with macOS): A user-friendly DAW that includes a variety of instruments, loops, and effects.
- Adobe Audition (Paid): A professional-grade DAW with advanced features for audio editing, mixing, and mastering.
- Logic Pro X (Paid): A comprehensive DAW with a wide range of instruments, effects, and production tools.
- Pro Tools (Paid): An industry-standard DAW with advanced features for music production, post-production, and audio engineering.
9.2. Basic Editing Techniques
- Importing Audio: Start by importing your recorded audio into the software.
- Trimming: Remove any unwanted sections of audio from the beginning or end of your recording.
- Cutting, Copying, and Pasting: Cut, copy, and paste audio segments to rearrange your recording, remove unwanted sections, or duplicate parts of your audio.
- Fading: Apply fade-in and fade-out effects to the beginning and end of your audio segments to create smooth transitions.
- Adjusting Volume Levels: Adjust the volume levels of different parts of your recording to ensure a consistent and balanced sound.
9.3. Noise Reduction
Noise reduction is a crucial step in enhancing recorded sound, especially if you’ve recorded in a less-than-ideal environment.
- Identifying Noise: Identify any sources of noise in your recording, such as background hum, hiss, or traffic noise.
- Using Noise Reduction Tools: Use the noise reduction tools in your audio editing software to remove or reduce the noise. These tools typically work by analyzing a section of your audio that contains only noise and then subtracting that noise from the rest of your recording.
- Being Cautious: Be cautious when using noise reduction, as excessive noise reduction can degrade the quality of your audio. Use it sparingly and listen carefully to the results.
9.4. Equalization (EQ)
Equalization (EQ) is the process of adjusting the frequency content of your audio to shape its tonal balance.
- Understanding Frequencies: Familiarize yourself with the different frequency ranges and how they affect the sound of your audio.
- Using EQ to Correct Problems: Use EQ to correct problems in your recording, such as a muddy low end, harsh high frequencies, or a nasal midrange.
- Enhancing Your Sound: Use EQ to enhance the sound of your recording, such as adding warmth, clarity, or sparkle.
9.5. Compression
Compression is the process of reducing the dynamic range of your audio, making quiet parts louder and loud parts quieter.
- Understanding Compression: Familiarize yourself with the parameters of a compressor, such as threshold, ratio, attack, and release.
- Using Compression to Control Dynamics: Use compression to control the dynamics of your recording, making it sound more consistent and polished.
- Adding Punch and Energy: Use compression to add punch and energy to your recording, making it sound more lively and engaging.
9.6. Reverb and Delay
Reverb and delay are effects that simulate the sound of an audio signal in a physical space.
- Using Reverb to Add Space: Use reverb to add a sense of space to your recording, making it sound like it was recorded in a room or hall.
- Creating Special Effects: Use delay to create special effects, such as echoes or rhythmic patterns.
- Experimenting with Settings: Experiment with different reverb and delay settings to find the sound that works best for your recording.
By mastering these audio editing techniques, you can enhance your recorded sound and achieve professional-quality results. Whether you’re working on a podcast, music track, voiceover, or any other audio project, audio editing software can help you take your sound to the next level.
10. What Are Some Common Mistakes to Avoid When Recording Sound on a Computer?
Recording sound on a computer can be a rewarding experience, but it’s easy to make mistakes that can compromise the quality of your recordings. By being aware of these common pitfalls, you can avoid them and ensure that your audio recordings are clean, clear, and professional.
10.1. Poor Microphone Placement
One of the most common mistakes is improper microphone placement. The position of your microphone relative to the sound source can significantly impact the quality of your recording.
- Solution:
- Proximity: Position the microphone close enough to the sound source to capture a strong and clear signal, but not so close that it causes distortion or plosive sounds.
- Angle: Experiment with different microphone angles to