
Dive into the details of creating your own Wharf Street Vest with this comprehensive guide. Whether you’re a seasoned knitter or looking to expand your skills, understanding the nuances of this pattern is key to achieving a garment you’ll love. This article will walk you through everything from choosing the right size to mastering essential techniques, ensuring your Wharf Street Vest is a perfect fit and a joy to knit.
Finding Your Ideal Size for the Wharf Street Vest
Selecting the correct size is the first step towards a successful knitting project. The Wharf Street vest pattern offers an inclusive range of 10 sizes, numbered 1 through 10, to accommodate various body types. The crucial measurement to consider is the finished circumference, which ranges from 33 to 69 inches.
To determine your best size, measure your actual bust circumference and then choose a size with a finished circumference that is approximately 4-9 inches larger. This added room, known as ease, is essential for comfortable movement and the intended style of the vest. For a deeper understanding of ease and how it impacts fit, explore this helpful resource on ease in knitting.
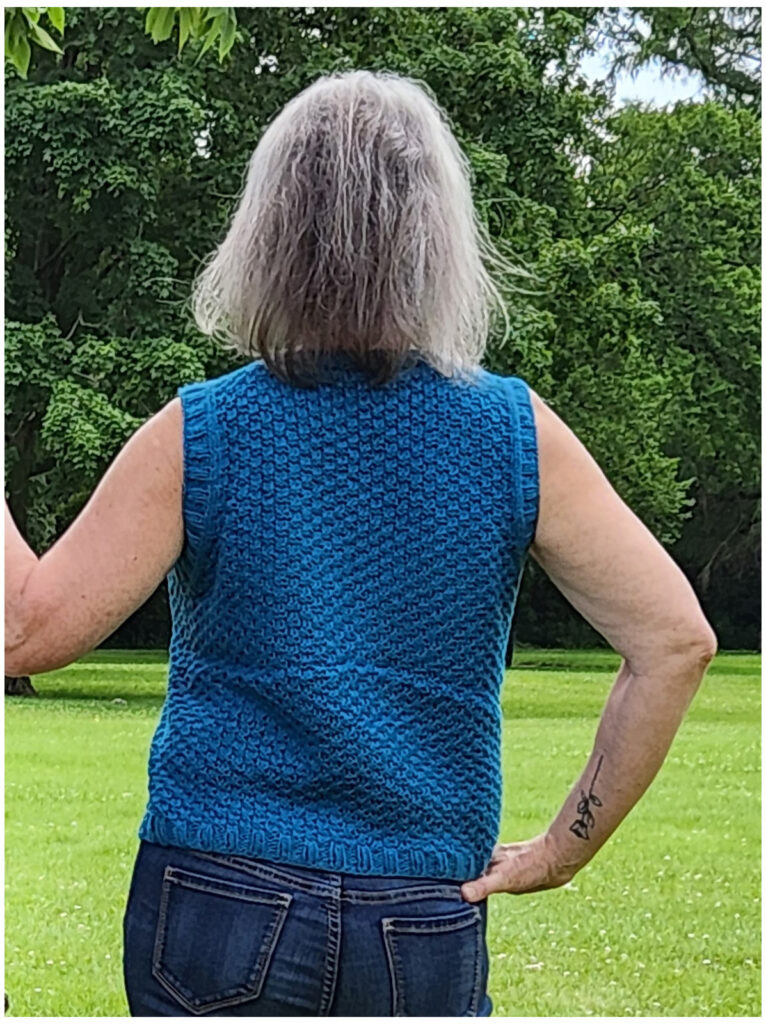
The amount of ease you prefer is a personal choice. To illustrate the difference, two versions of the Wharf Street Vest were knitted for pattern photography. The white vest showcases a 4-inch positive ease, providing a closer fit, while the orange vest demonstrates an 8-inch positive ease, offering a more relaxed and roomy feel.
 Wharf Street Vest with 4 inches of positive ease
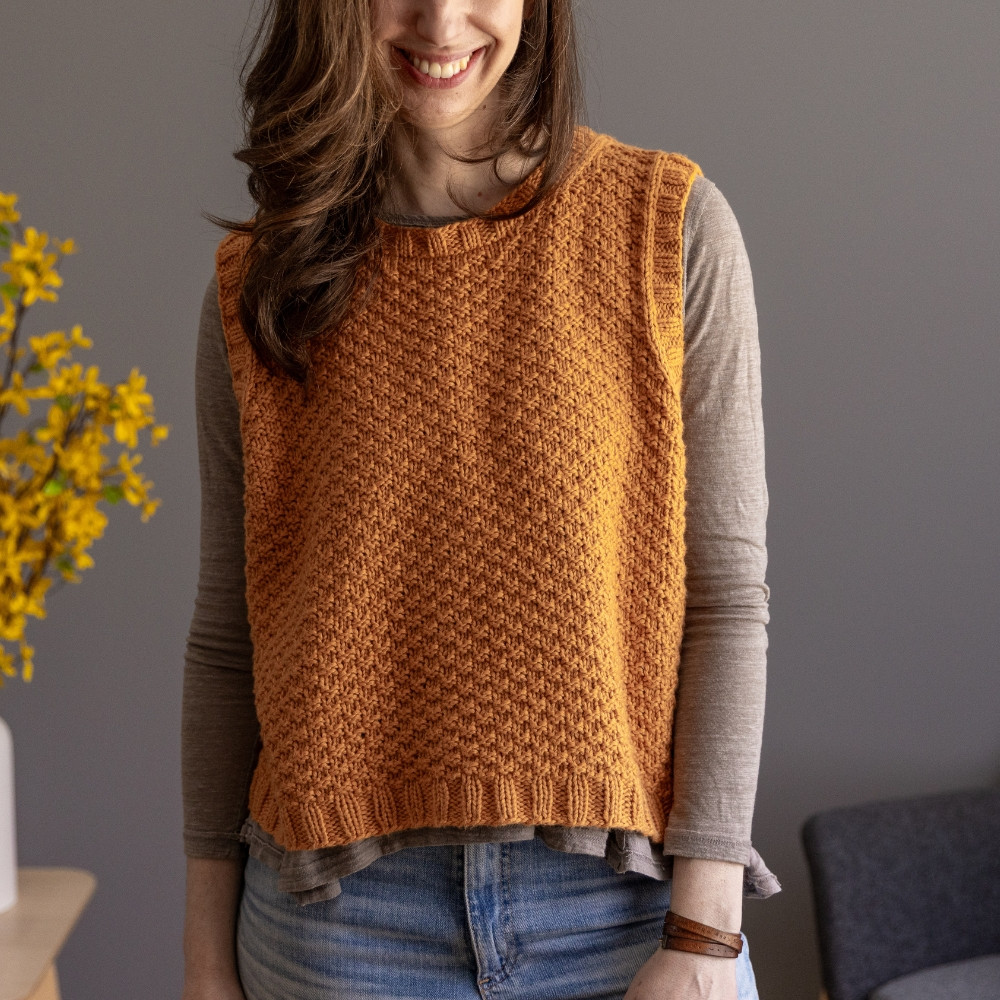 Wharf Street Vest with 8 inches of positive ease
Notice how the vest with 4 inches of positive ease (37″ circumference) fits closer to the body, while the 8-inch ease version (41″ size) is significantly looser. Consider these key fit differences when making your size decision:
- Hip Considerations: If your hips are significantly wider than your bust, like in the example where hip circumference is 39-40 inches, a closer-fitting vest (like the 37″ size) might need to sit higher to avoid tightness around the hips. In this case, the example vest was made 1 inch shorter. Styling a closer-fit vest often works well with fitted tops underneath.
- Length and Styling: A vest with more ease (like the 41″ size, larger than hip circumference) allows for the intended pattern length and can be styled over more flowy tops without looking bunchy.
Ultimately, the ideal ease depends on your styling preferences and body measurements, particularly the relationship between your bust and hip or abdomen circumference. If you’re still unsure, measuring vests or sweaters in your wardrobe that you like the fit of and comparing those measurements to the schematic in the pattern can be incredibly helpful.
For further guidance on sizing and ease, be sure to read the detailed blog post about ease in knitting.
Also, gain inspiration from the diverse fits achieved by test knitters! You can see a range of finished Wharf Street Vests in this blog post showcasing test knitter projects.
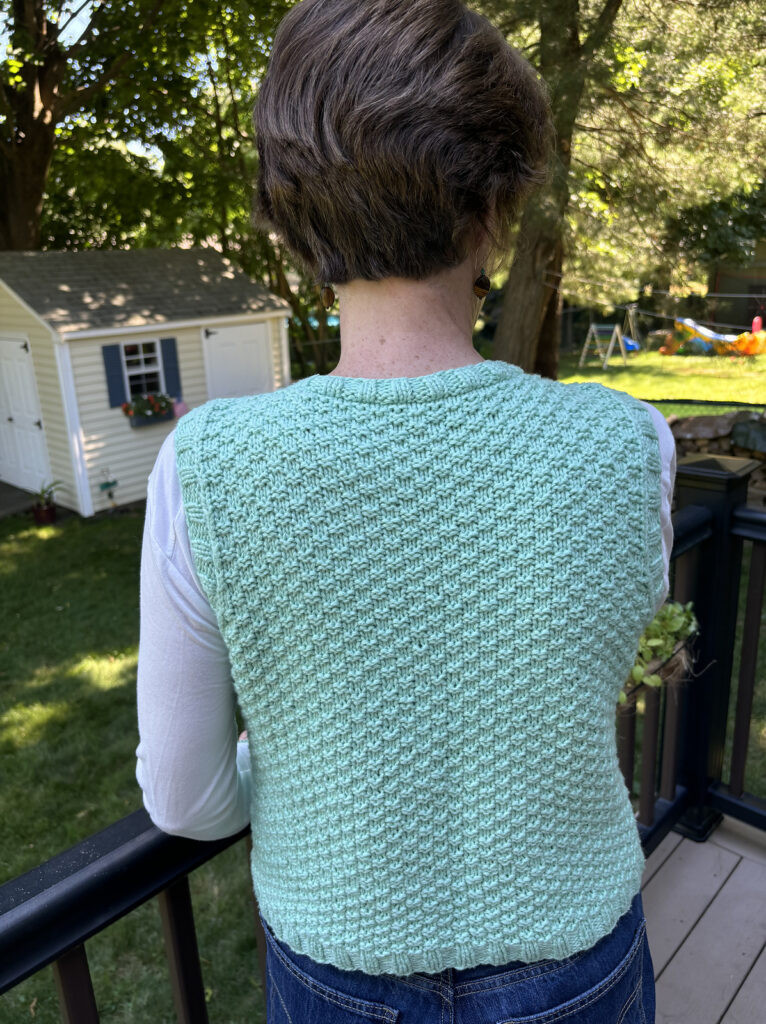
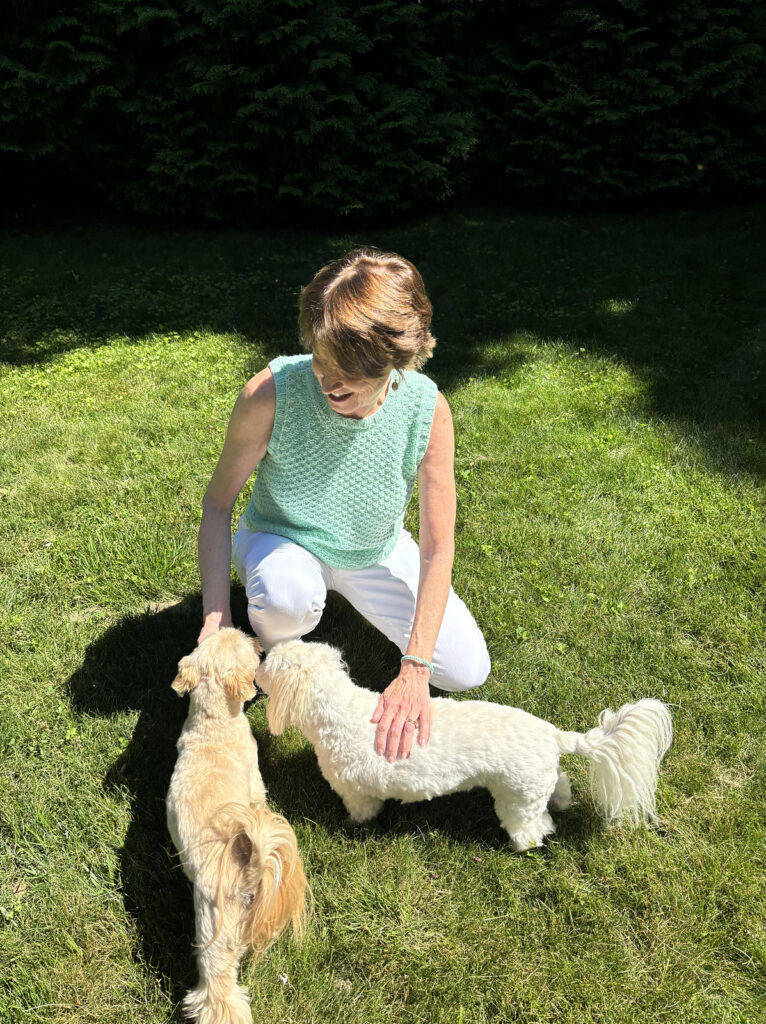
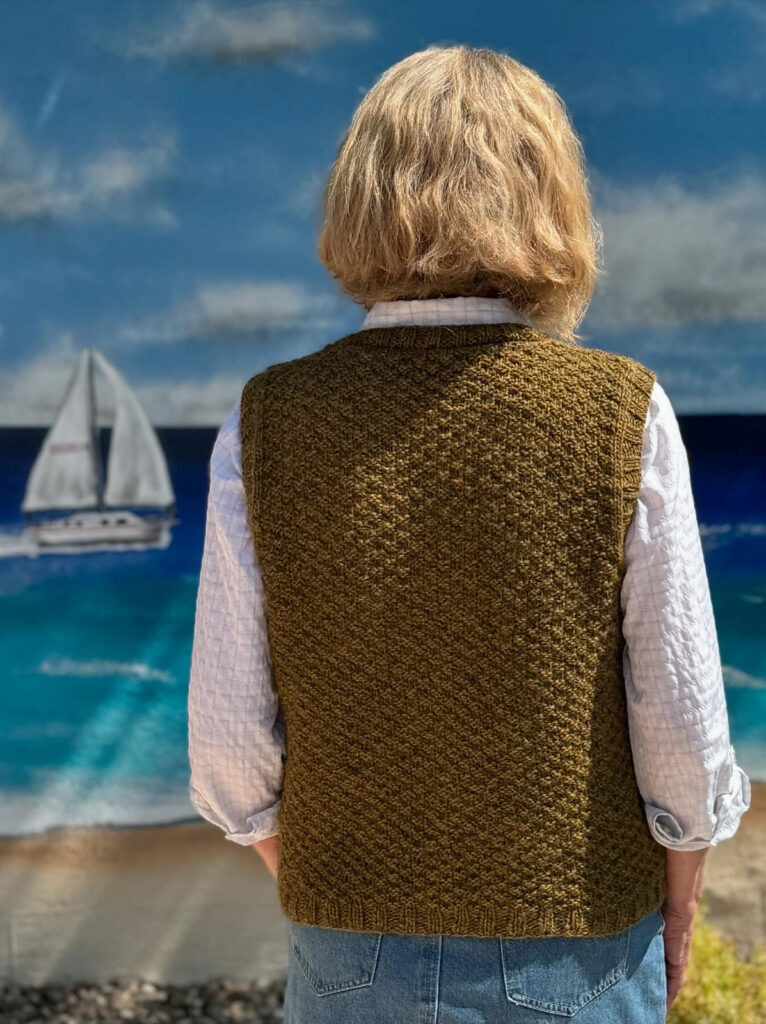
Real Fit Examples: Wharf Street Vest on Different Knitters
See how the Wharf Street Vest looks on different body types and with varying amounts of ease, as demonstrated by test knitters.
Denise: Effortless Style with 3″ Positive Ease
 Denise wearing Wharf Street Vest 1
 Denise wearing Wharf Street Vest 2
 Denise wearing Wharf Street Vest 3
Denise showcases the Wharf Street Vest with approximately 3 inches of positive ease, achieving a comfortable and stylish fit.
Size: Worn with approximately 3 inches of positive ease.
Susan: Relaxed Comfort with 8″ Positive Ease
 Susan wearing Wharf Street Vest 1
 Susan wearing Wharf Street Vest 2
Susan models the Wharf Street Vest with a generous 8 inches of positive ease, highlighting a relaxed and oversized silhouette.
Size: Worn with 8 inches of positive ease.
Denise B.: Classic Fit with 4″ Positive Ease
 Denise B wearing Wharf Street Vest 1
 Denise B wearing Wharf Street Vest 2
 Denise B wearing Wharf Street Vest 3
Denise B presents the Wharf Street Vest with 4 inches of positive ease, offering a balanced and classic fit.
Size: Worn with 4 inches of positive ease.
Choosing the Right Yarn for Your Wharf Street Vest
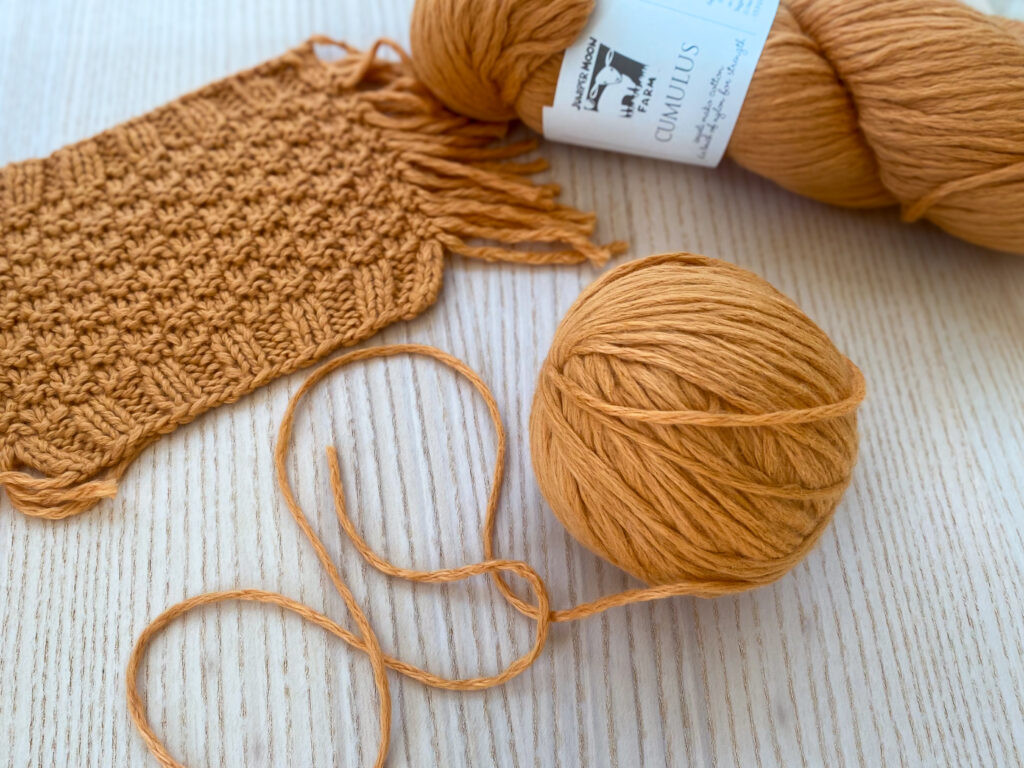
The Wharf Street Vest pattern is designed for worsted-weight yarn, but aran-weight yarns can also be suitable depending on gauge. The sample vest was knit using Cumulus by Juniper Moon Farm, a cotton/nylon blend known for its chainette construction. This unique construction results in a yarn that is exceptionally light, airy, and incredibly soft. Unlike typical worsted or aran-weight cotton yarns that can feel heavy, Cumulus offers a delightful lightness.
 Cumulus Yarn with Swatch
The Cumulus yarn is particularly well-suited for the box stitch pattern (also known as double moss stitch) used in the Wharf Street Vest. Its construction enhances drape and provides excellent stitch definition, showcasing the texture of the pattern beautifully.
If you prefer non-wool alternatives, consider these yarns that were swatched and found to be excellent options:
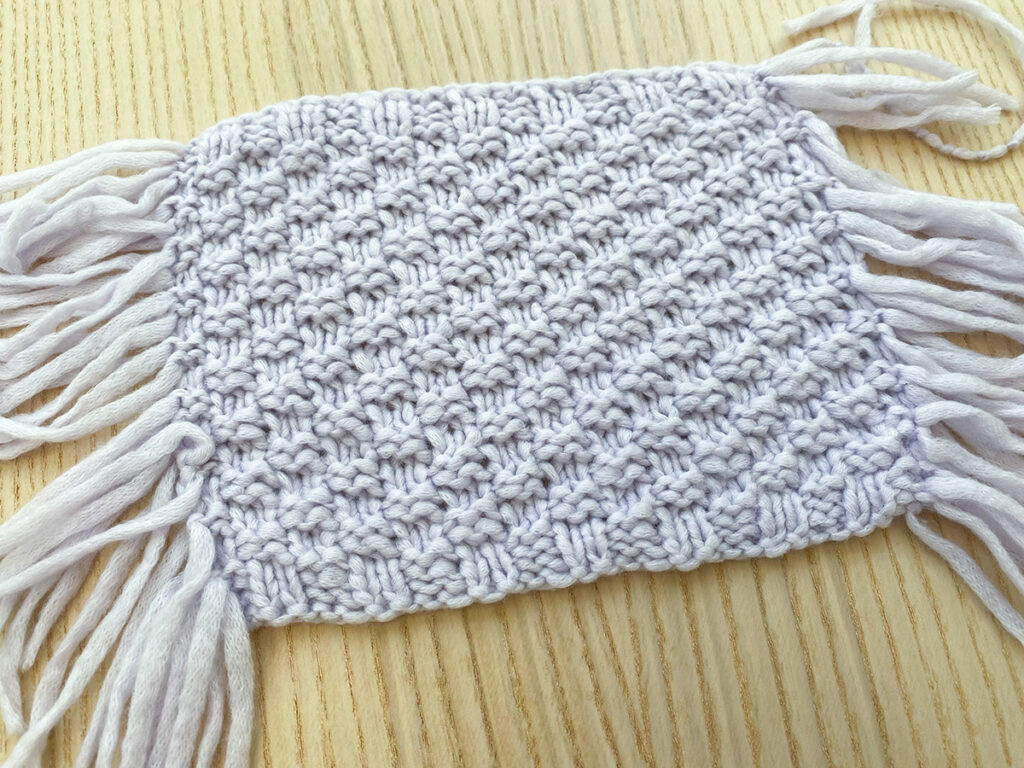 Happiness Yarn by WoolAddicts with Swatch
Happiness by WoolAddicts: Similar to Cumulus, this cotton/nylon blend features a unique, almost felt-like fiber construction. It’s incredibly light, airy, and provides fantastic stitch definition. A US size 8 needle was used to achieve pattern gauge with this yarn.
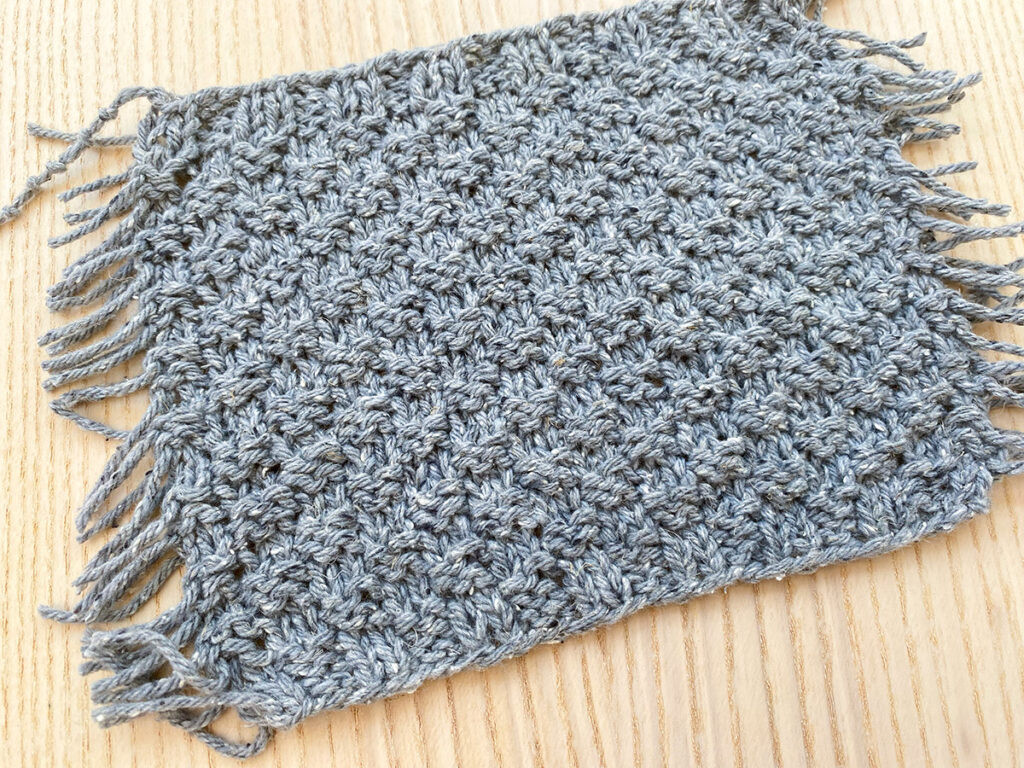 Remix Yarn by Berroco with Swatch
Remix by Berroco: A frequently used yarn, Remix is another excellent choice for the Wharf Street Vest. It offers a more textured, tweedy appearance, resembling wool while maintaining the drape and feel of a non-wool yarn. Pattern gauge was achieved using a US size 8 needle.
While these are recommended non-wool options, various fiber types can work for the Wharf Street Vest. Keep in mind that different fibers will affect the fabric’s drape and the stitch definition. For instance, Berroco Ultra Wool (green swatch below) creates a softer stitch definition compared to Cumulus (orange swatch).
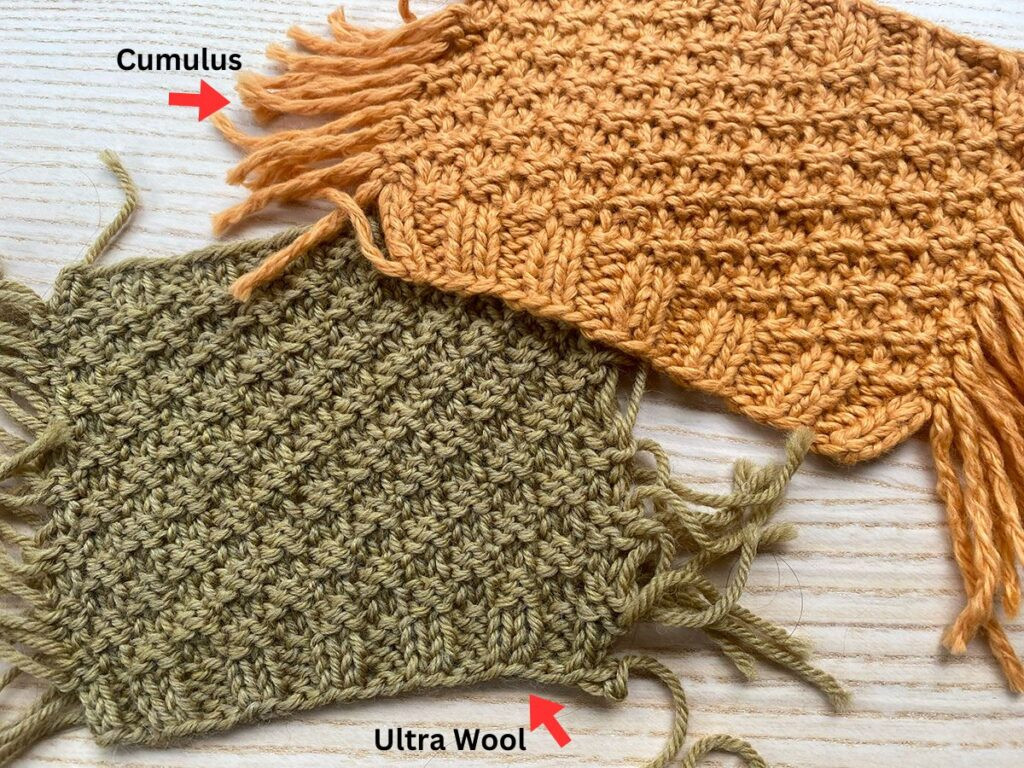 Basketweave Stitch Comparison with Cumulus and Ultra Wool
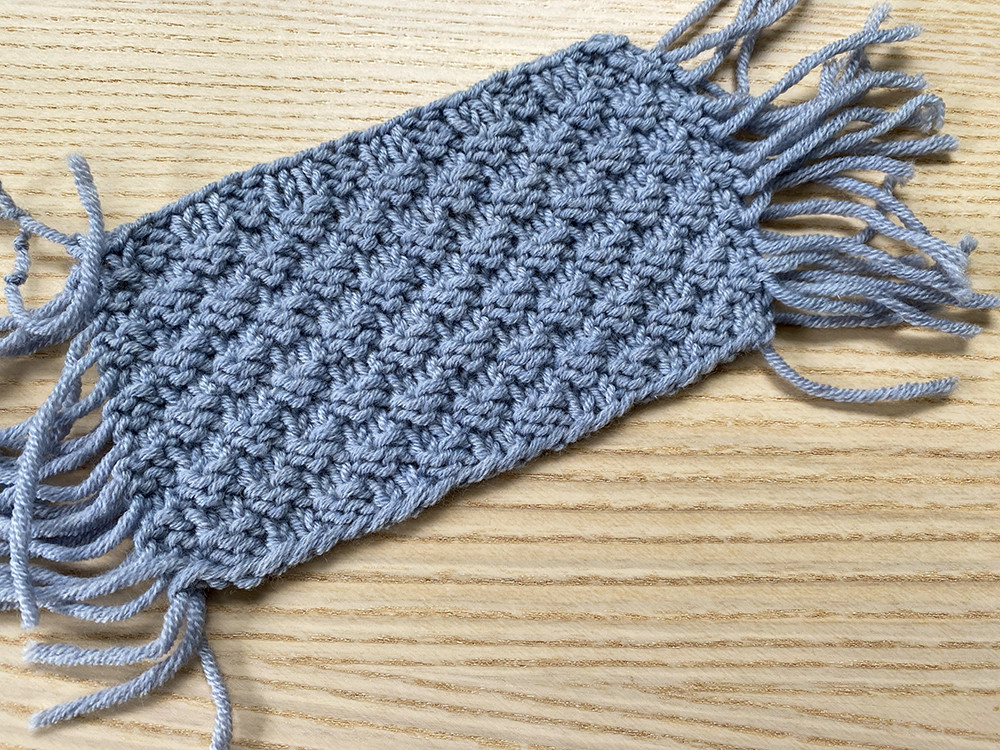
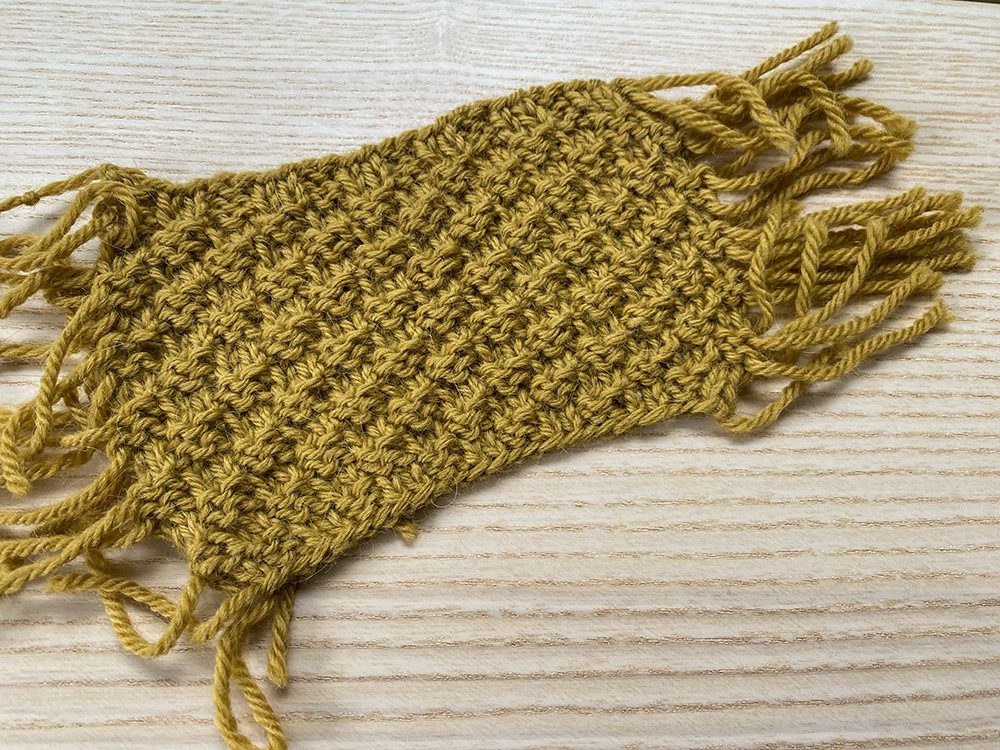
Wool and wool blends are also excellent choices. Here are some swatches using wool and wool blend yarns that achieved gauge and offer great alternatives:
 Millstone Tweed Yarn Swatch
- Yarn: Berroco Millstone Tweed (wool/viscose/polymide blend) – A new yarn for Fall 2024, offering a beautiful tweedy look with a light feel.
- Needle Size for Gauge: US 8
 Merino 401 Yarn Swatch
- Yarn: Berroco Merino 401 (100% extrafine merino) – Another new Fall 2024 yarn, incredibly soft to the touch.
- Needle Size for Gauge: US 9
 Alpakka Ull Yarn Swatch
- Yarn: Sandnes Garn Alpakka Ull (wool/alpaca blend) – Features a wonderful color range to choose from.
- Needle Size for Gauge: US 8
Note that the swatches shown have strands on each side, indicating they were worked in the round, a crucial technique for accurate gauge in this project.
Yarn Yardage for the Wharf Street Vest
The Wharf Street Vest pattern provides estimated yarn requirements for each size, ranging from 550 to 1075 yards of worsted-weight yarn. This amount includes enough yarn for swatching. If you plan to modify the length of your vest, factor in extra yardage. For every additional inch of length, you’ll need approximately 35 to 65 extra yards, depending on the size you are knitting.
Mastering Gauge: Swatching in the Round for Wharf Street
Since the body of the Wharf Street Vest is knit in the round, accurate gauge is paramount. Swatching in the round is essential for achieving the intended fit. If you’re new to this technique, this tutorial on swatching in the round provides detailed guidance. While the tutorial demonstrates stockinette stitch, the round swatching technique remains the same for the box stitch pattern used in the vest.
For your Wharf Street gauge swatch, cast on 30 stitches (or a multiple of 4+2 if you prefer a larger swatch). Work the swatch as follows:
- Ribbing Border: Work a k2, p2 ribbing for a few rounds at the bottom edge.
- Box Stitch Pattern in the Round:
- Round 1: *p2, k2; repeat from * to last 2 stitches, p2.
- Round 2: Repeat round 1.
- Round 3: *k2, p2; repeat from * to last 2 stitches, k2.
- Round 4: Repeat round 3.
- Repeat rounds 1-4 for approximately 5 inches.
- Top Ribbing Border: Work the same k2, p2 ribbing for a few rounds at the top edge.
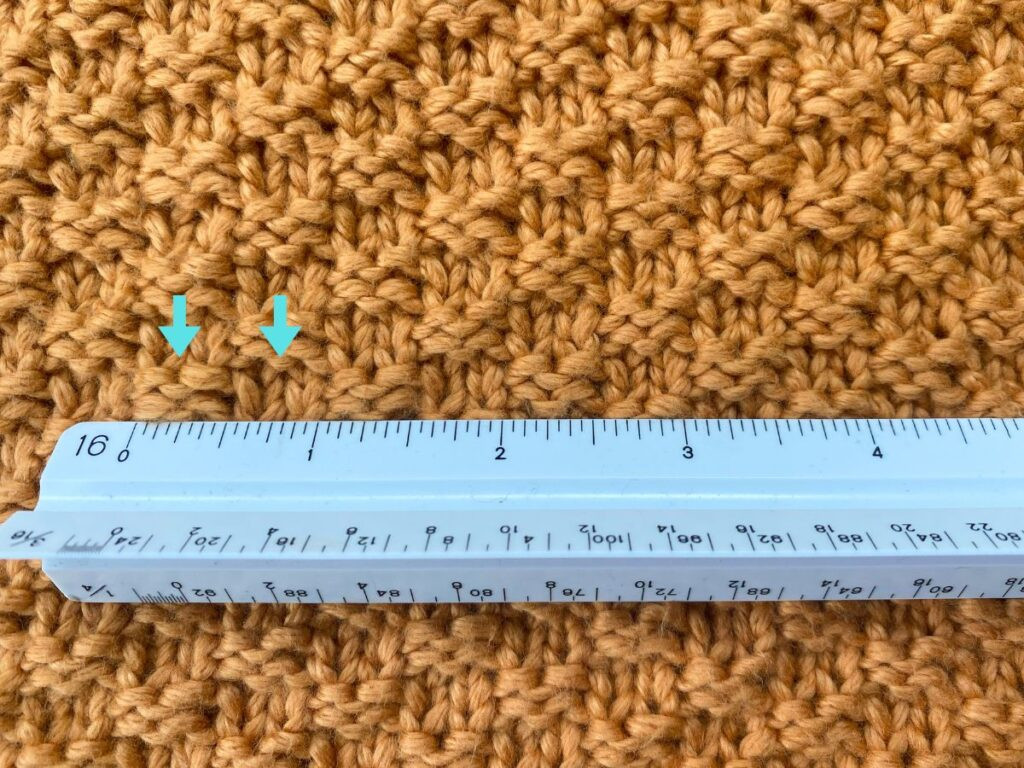
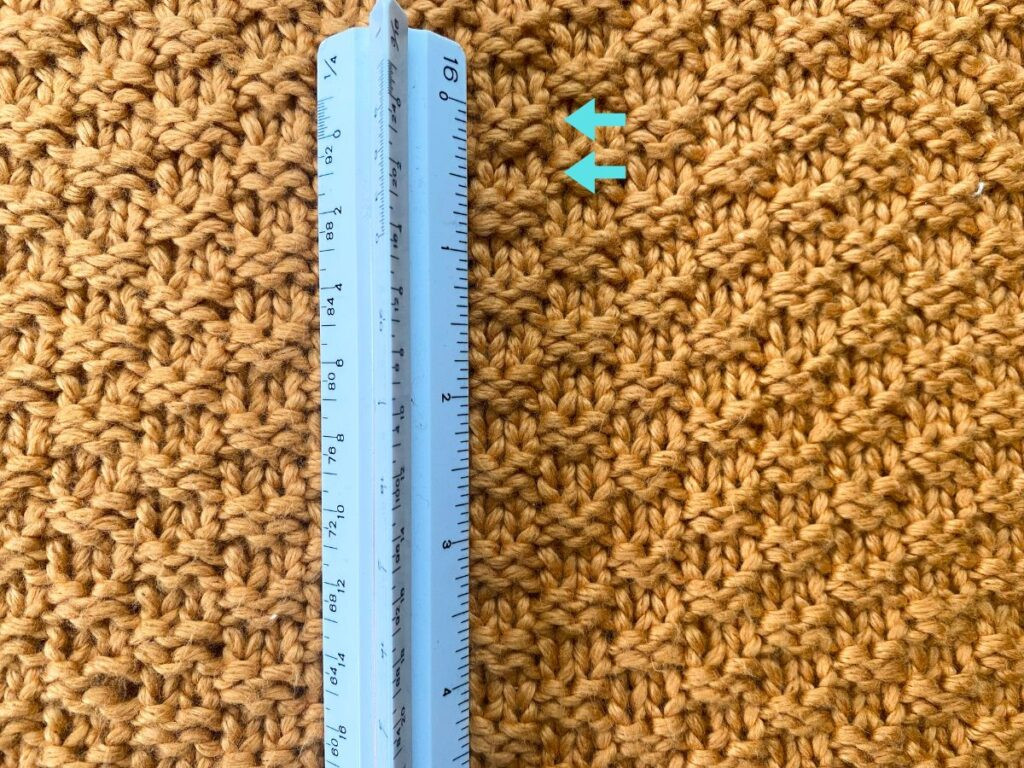
Measuring gauge in the box stitch pattern is simplified by its inherent structure. Each ‘box’ is composed of 2 stitches and 2 rounds. When measuring width, count “2, 4, 6…” stitches per box. For height, each ‘box’ represents 2 rounds.
 Measuring Gauge Swatch 1
 Measuring Gauge Swatch 2
Crucial Gauge Tip: Flat Swatching for Armhole Accuracy
While the pattern gauge is in the round, it’s highly recommended to also create a small flat swatch in the box stitch pattern. This is because the vest body is divided into front and back sections at the underarms, and the stitch pattern is then worked flat. If your gauge differs between working in the round and flat, particularly your row gauge, it can affect the armhole and neck depth.
If you notice a gauge change:
- Looser Row Gauge Flat (fewer rows per inch): Use a needle one size smaller for wrong-side rows when working flat.
- Tighter Row Gauge Flat (more rows per inch): Use a needle one size larger for wrong-side rows when working flat.
While gauge changes weren’t observed in testing with this stitch pattern, some knitters did experience variations, making this flat swatch check a valuable precaution.
Pattern Reading: Understanding Brackets in Wharf Street Instructions
The Wharf Street Vest pattern utilizes brackets to indicate repeating sequences within a row. For example: [k2, p2] to last 2 sts, then k2.
This instruction means: “Repeat the sequence ‘k2, p2’ continuously until you have 2 stitches remaining, then knit the last 2 stitches.”
Another example: p4, k2, [p2, k2] to last 4 sts, p4
This translates to: “Purl 4 stitches, then knit 2 stitches, then repeat the sequence ‘p2, k2’ until you have 4 stitches remaining, then purl the last 4 stitches.” Only the content within the brackets is repeated.
Reading Your Knitting: Identifying Rounds in the Box Stitch
When knitting the Wharf Street Vest body, you’ll repeat the same 4 rounds. Learning to “read” your knitting in the box stitch pattern eliminates the need to constantly mark your round. By observing the stitches on your needles, you can easily determine your current round.
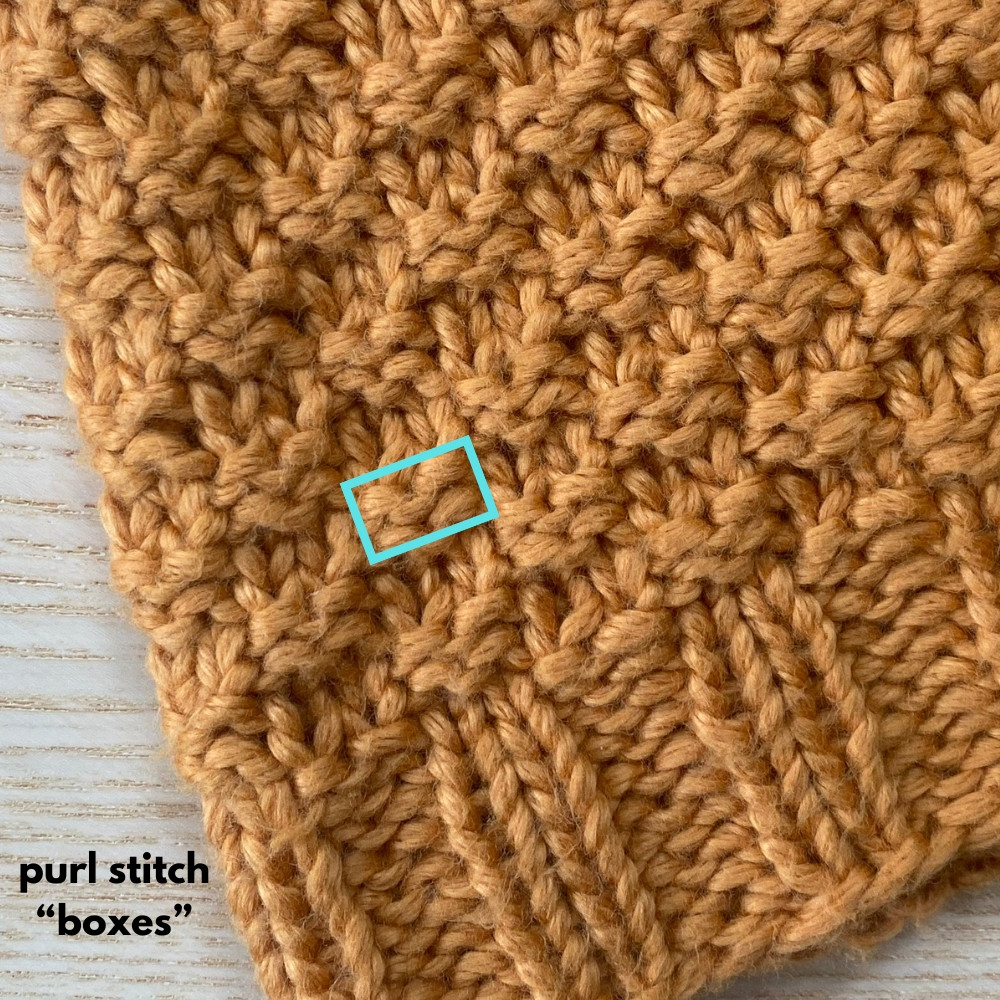
The box stitch pattern consists of “boxes” formed by either 2 rounds of knit stitches (flat boxes) or 2 rounds of purl stitches (bumpy boxes). The alternating arrangement of these boxes creates the basketweave texture.
 Flat Box in Box Stitch
 Bumpy Box in Box Stitch
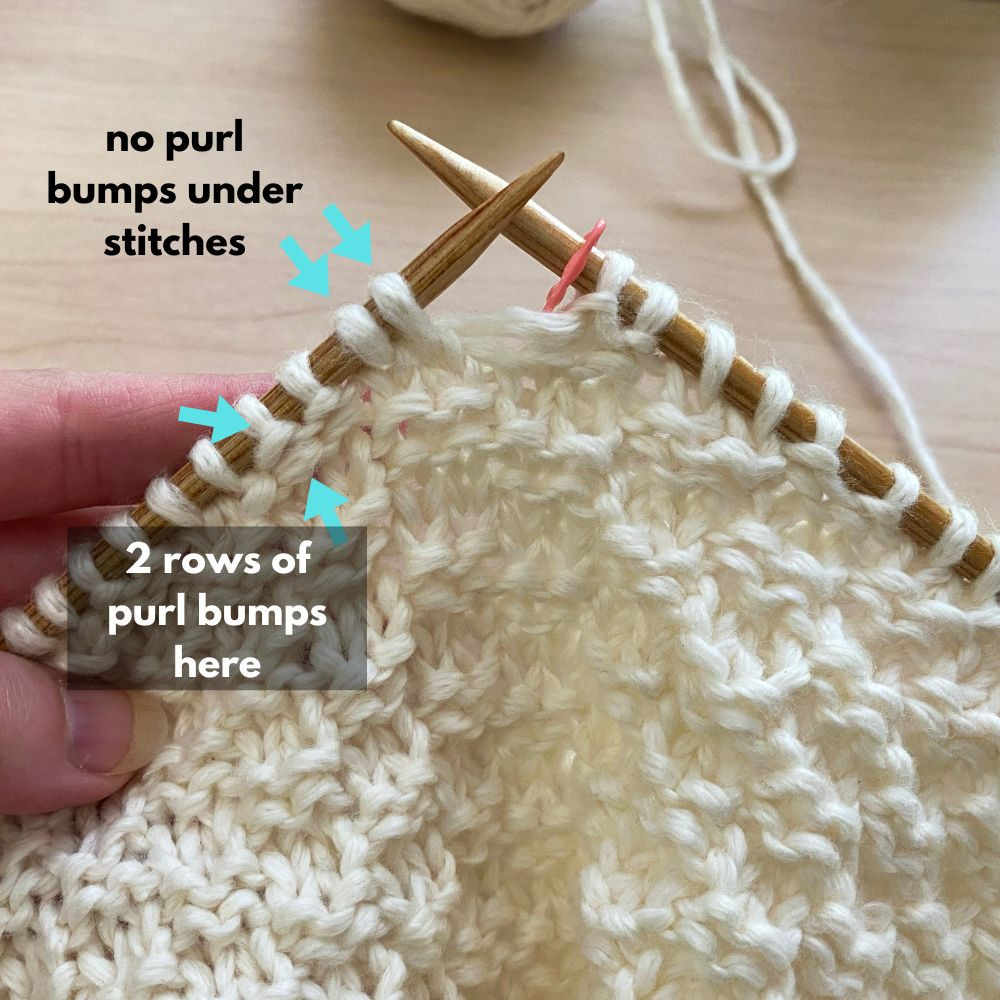
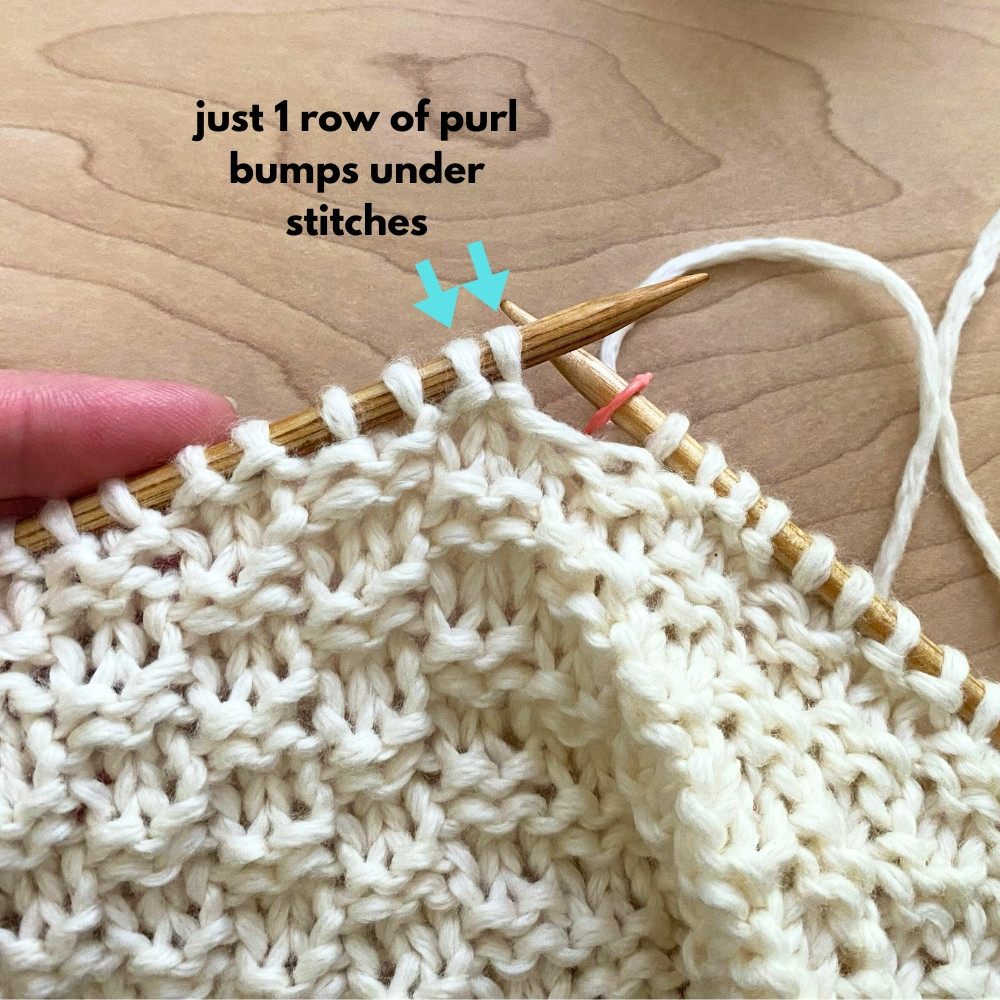
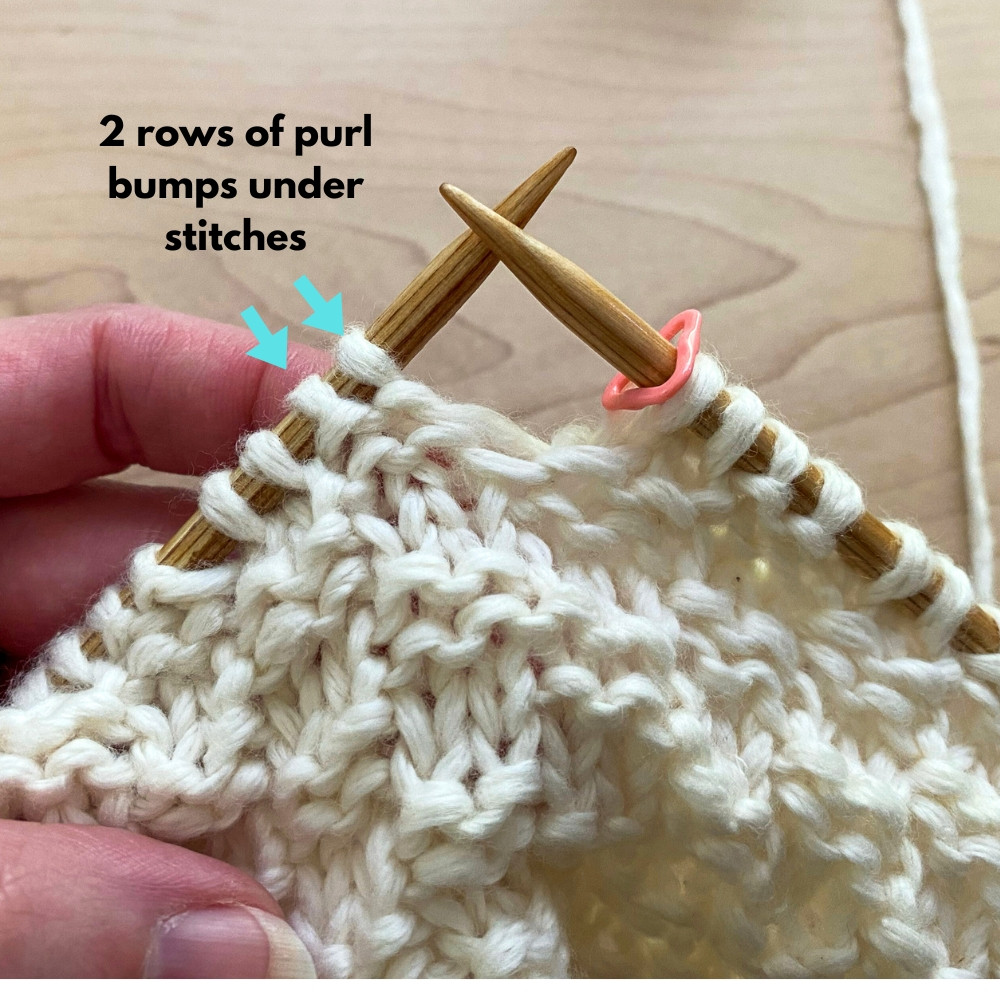
Focus on the purl bump stitches to read your work. Determine if you have one or two rows of purl bumps to guide your next round.
 Reading Knitting in Box Stitch 1
In this image, the next two stitches have no purl bumps underneath, while the stitches to their left have two rows of purl bumps. This indicates the next round should start with “p2, k2” to transition from the knit box to a purl box.
 Reading Knitting in Box Stitch 2
Here, the next two stitches have one row of purl bumps. Since two rows are needed for a complete purl box, continue with “p2, k2” for the current round to build the second row of purl bumps.
 Reading Knitting in Box Stitch 3
In this example, the next two stitches have two rows of purl bumps. This signals a change in sequence is needed. The next round should start with “k2, p2” to begin a knit box after the completed purl box.
Adjusting the Length of Your Wharf Street Vest
Lengthening the body of the Wharf Street Vest is straightforward. Simply work more rounds in the “Body” section of the pattern. Ensure you conclude after completing round 4 of the stitch pattern to maintain the pattern sequence.
To determine your desired length, measure the total garment length (shoulder to hem) of a favorite vest or sweater. Compare this measurement to the “Total Garment Length” in the pattern schematic for your size. Adjust the “underarm-to-hem” length in the pattern to match your preferred overall length. Remember to consider the overall garment length from the shoulder, as the underarm point in this vest may sit lower than a traditional armpit.
Customizing Armhole Depth for a Perfect Fit
To modify the armhole depth of your Wharf Street Vest, whether for personal preference or gauge adjustments, follow these tips:
To Lengthen Armholes: Repeat rows 1-4 in “Front – Section 4” until the armhole is approximately 3 inches shorter than your desired depth. Always finish on row 4 and carefully note the number of extra rows worked. Replicate these extra rows in “Back – Section 4”.
To Shorten Armholes: Reduce rows in “Front – Section 4,” again ending on row 4 and recording the number of rows removed. Apply the same reduction to “Back – Section 4”.
Important Note: If adjusting armhole depth due to a tighter row gauge, you may also need to adjust neck depth (see next section). If both armhole and neck depth are lengthened, the total added rows must be included in “Back – Section 4”.
Modifying Neck Depth for Personal Style
To lower the neckline of your Wharf Street Vest:
- In the “Left Front” section, after row 18, repeat rows 13-16 until your desired neck depth is achieved. End on row 14. Record the number of extra rows.
- Apply the same number of extra rows to the “Right Front”.
- Add the same number of extra rows to “Back – Section 4” to maintain balanced proportions.
Armhole and Neckline Finishing: Pick-up and Knit Technique
The armhole and neckline edges of the Wharf Street Vest are finished using the ‘pick-up and knit’ technique, creating a neat and professional ribbed trim. For the armholes, stitches are picked up and knit around the entire armhole edge, with a specific ratio of 3 stitches for every 4 rows. A video tutorial is available to guide you through the [pick-up and knit armhole process](link-to-armhole-video-if-available – placeholder).
Similarly, the neckline ribbing is created by picking up and knitting stitches around the neckline edge and then working in rib stitch. A video demonstration of the [pick-up and knit neckline technique](link-to-neckline-video-if-available – placeholder) is available for visual learners.
Essential Knitting Techniques for the Wharf Street Vest
The Wharf Street Vest pattern utilizes several fundamental knitting techniques. Click on the links below for detailed tutorials on each technique:
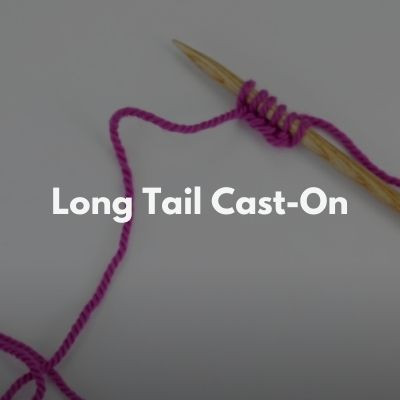 Long tail cast-onLong-tail Cast-on
 Joining to Work in the RoundJoining to work in the round
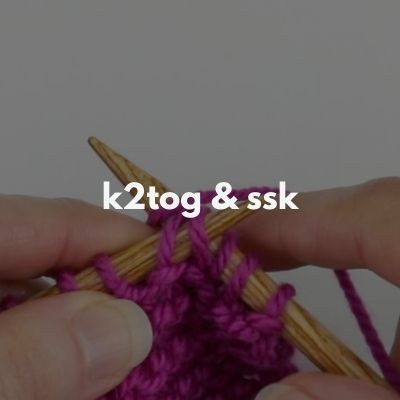 k2tog & ssk decrease
 Three Needle Bind-OffThree Needle Bind-Off
With this comprehensive guide, you’re well-equipped to knit your own beautiful and perfectly fitting Wharf Street Vest. Happy knitting!